

What the module calculates
Rankine, sloping backfill gives the active or passive force of the soil on a wall when the ground behind it slopes, and optionally when the back of the wall leans (Rankine 1857, in the form of Chu 1991 for an inclined back). Rankine’s state needs no wall friction: the direction of the force follows from the stress state of the backfill. The module returns the force per unit length of wall, its inclination, its height above the base and the failure wedge.
For one granular layer the force comes from a closed form:
α is the slope of the ground, θ the lean of the wall back from the vertical and φ′ the friction angle. For a passive wall the signs change and Pp uses Kp(R) . For θ = 0 and α = 0 the coefficient is tan²(45° − φ′/2) for the active state, the familiar Rankine value.
What you can describe
- A frictionless wall of vertical height H, its back inclined at θ from the vertical (+ toward the backfill), active (the wall moves away from the soil) or passive (the wall is pushed into it).
- A backfill with a plane surface at α to the horizontal (+ rising away from the wall).
- Up to six soil layers parallel to the ground surface, each drained (c′, φ′) or undrained (cᵤ, φᵤ = 0), each with its own unit weight.
- A level water table behind the wall with hydrostatic pore pressure, and a uniform surcharge on the backfill surface.
- For an active wall in a cohesive layer, the tension zone either as tension cracks or in the theoretical Rankine form.
Beyond the force, the module draws the section, the pressure along the back, the failure wedge, a chart of the coefficient against the slope and a 3D view, writes out the working step by step and prepares a PDF or Word report.
Which module for which wall
- Level ground, vertical wall: the Rankine module. A wall that does not move: At rest.
- This module: a sloping surface, a leaning back, layers, water and a surcharge, in Rankine’s state with no wall friction.
- A rough wall (wall friction δ) or a wedge solution: Coulomb.
- Earthquake: Mononobe–Okabe for the active force, Passive, earthquake for the passive one. Passive resistance on a curved surface: Passive, log spiral.
- A load on the backfill that is not uniform (a strip, a line, a point) belongs to the Surcharge Loads modules, for example Strip load. The module gives the earth pressure; combine it with those and with the wall’s own checks in your wall calculation.
Before you start: what you need
Have these ready from your design and your ground investigation:
| What | Where it comes from | Notes |
|---|---|---|
| The wall height H and the lean θ of its back | Your design | H is the vertical height. θ is positive when the back leans toward the backfill; θ = 0 is a vertical back. Both can be changed later. |
| The slope α of the ground | The site | Positive when the ground rises away from the wall, negative when it falls. A level surface is α = 0. |
| The soil layers | Ground investigation | For each layer: the unit weight γ, and either φ′ and c′ (drained) or cu (undrained clay in the short term). The layers are parallel to the ground surface; give the vertical thickness of each except the last, which runs on below the heel of the wall. |
| The water table | Ground investigation | The depth zw below the top of the wall and the saturated unit weight γsat of each layer, if water is present. |
| The surcharge q | Your design loading | A uniform load on the backfill surface, per unit area of the sloping surface. Zero for none. |
Quick start in eight steps
- Open the module and choose the units
Open Rankine, sloping backfill from the Lateral Earth Pressure family. Pick SI · kN, SI · tf or US in the header; you can change it at any time, even after Analyze.
- Describe the wall
In Wall, choose Active or Passive, and for an active wall the tension zone. Enter the vertical height H and the lean θ of the back.
- Describe the ground surface
In Backfill, enter the slope α.
- Describe the soil
In Soil layers, change Layer 1 to your soil and, for a layered backfill, fill in the New layer form and press Add layer (up to six).
- Add water and a surcharge if you need them
In Groundwater choose Present and enter the depth zw. In Surcharge enter q.
- Press Analyze
Press Analyze at the foot of the Model tab. The bar reads Analysed — the earth pressure calculated and the inputs lock.
- Read the answer
The Results tab gives the force, its inclination β and, for a layered or loaded model, its height above the base. The Pressure, Chart and 3D views show it.
- Take the working and the report
The Calculations tab shows each step with your numbers. The Report tab saves a PDF or a Word file.
The screen: four views of the wall
The layout is the one every GeoTerva module shares, described in the workspace guide. The drawing on the left has four views, chosen with the buttons above it, and the model and its results are on the right.
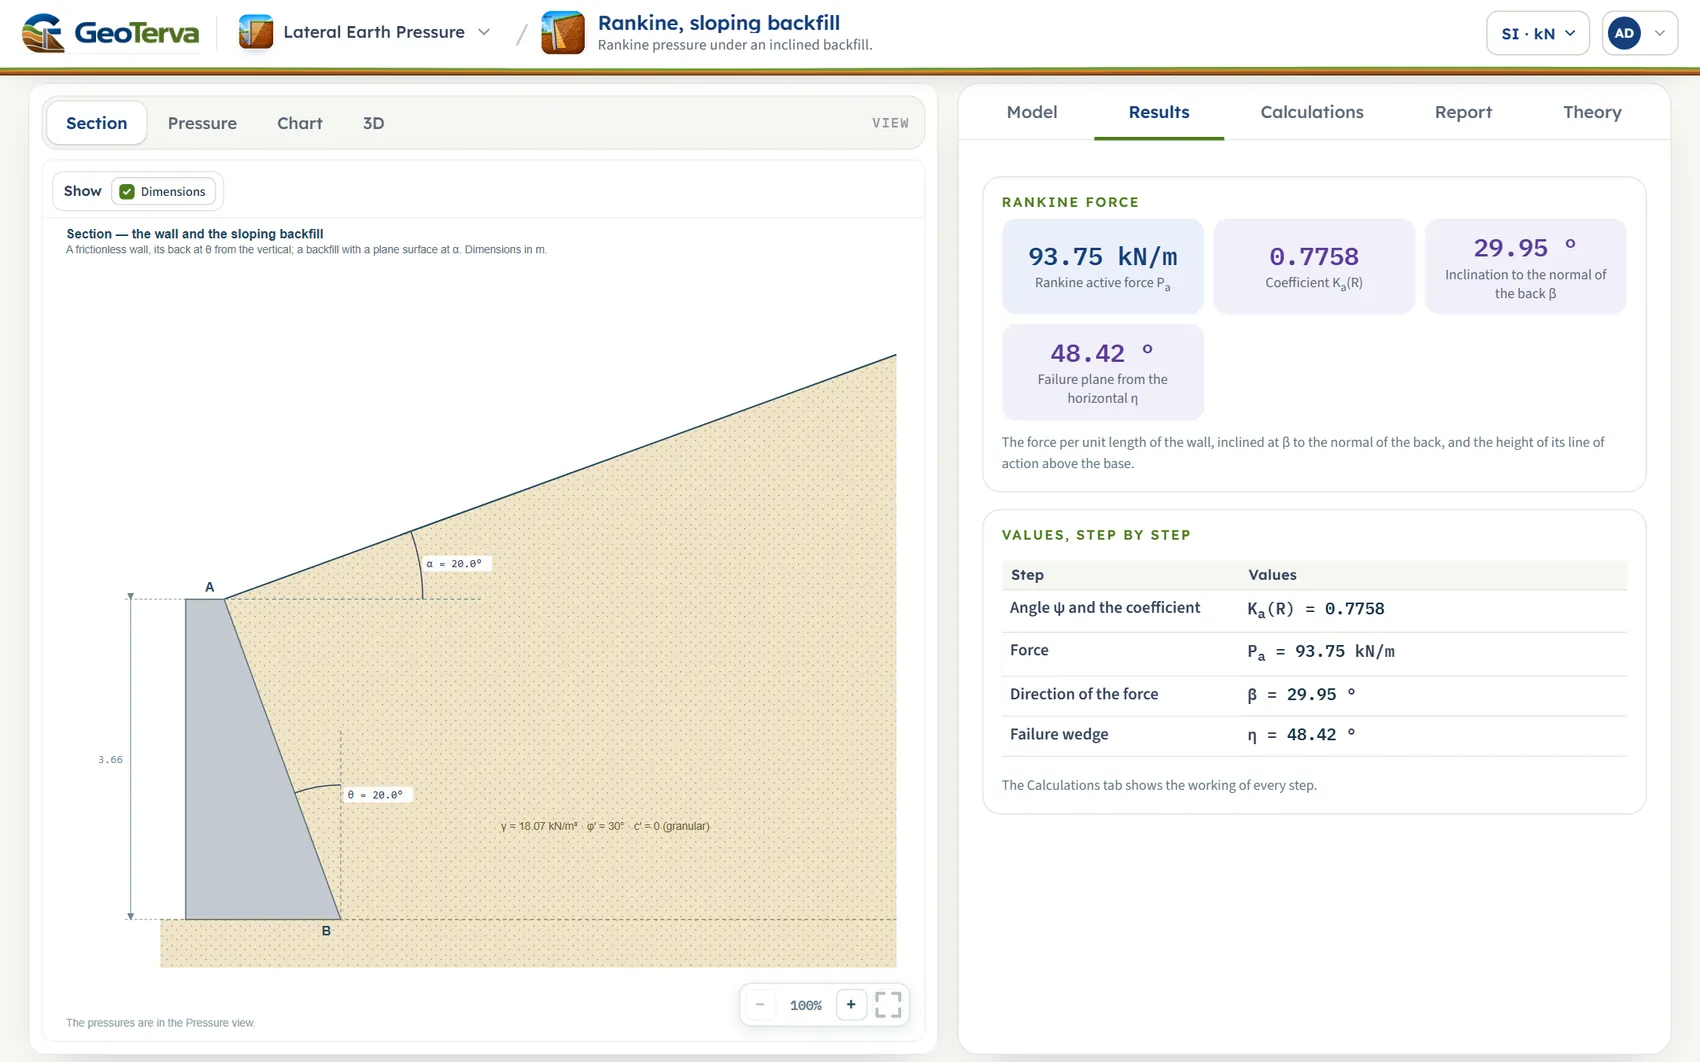
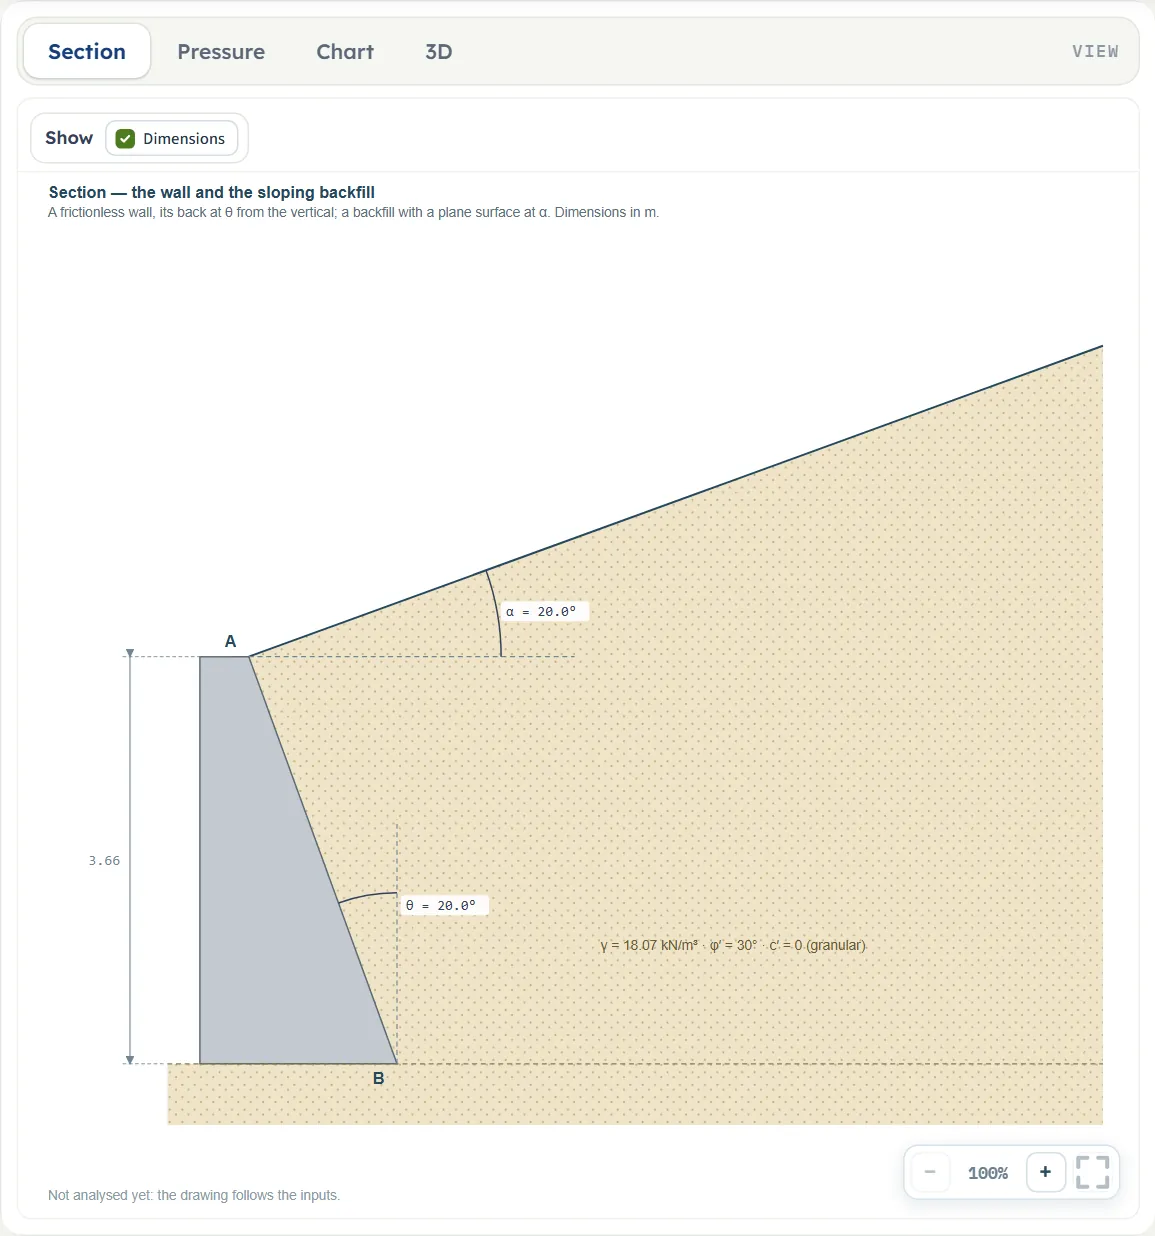
- Section is the geometry only: the wall with its back at θ, the backfill at α, the layers parallel to the surface, the height H and the soil of each layer. It follows your inputs before Analyze.
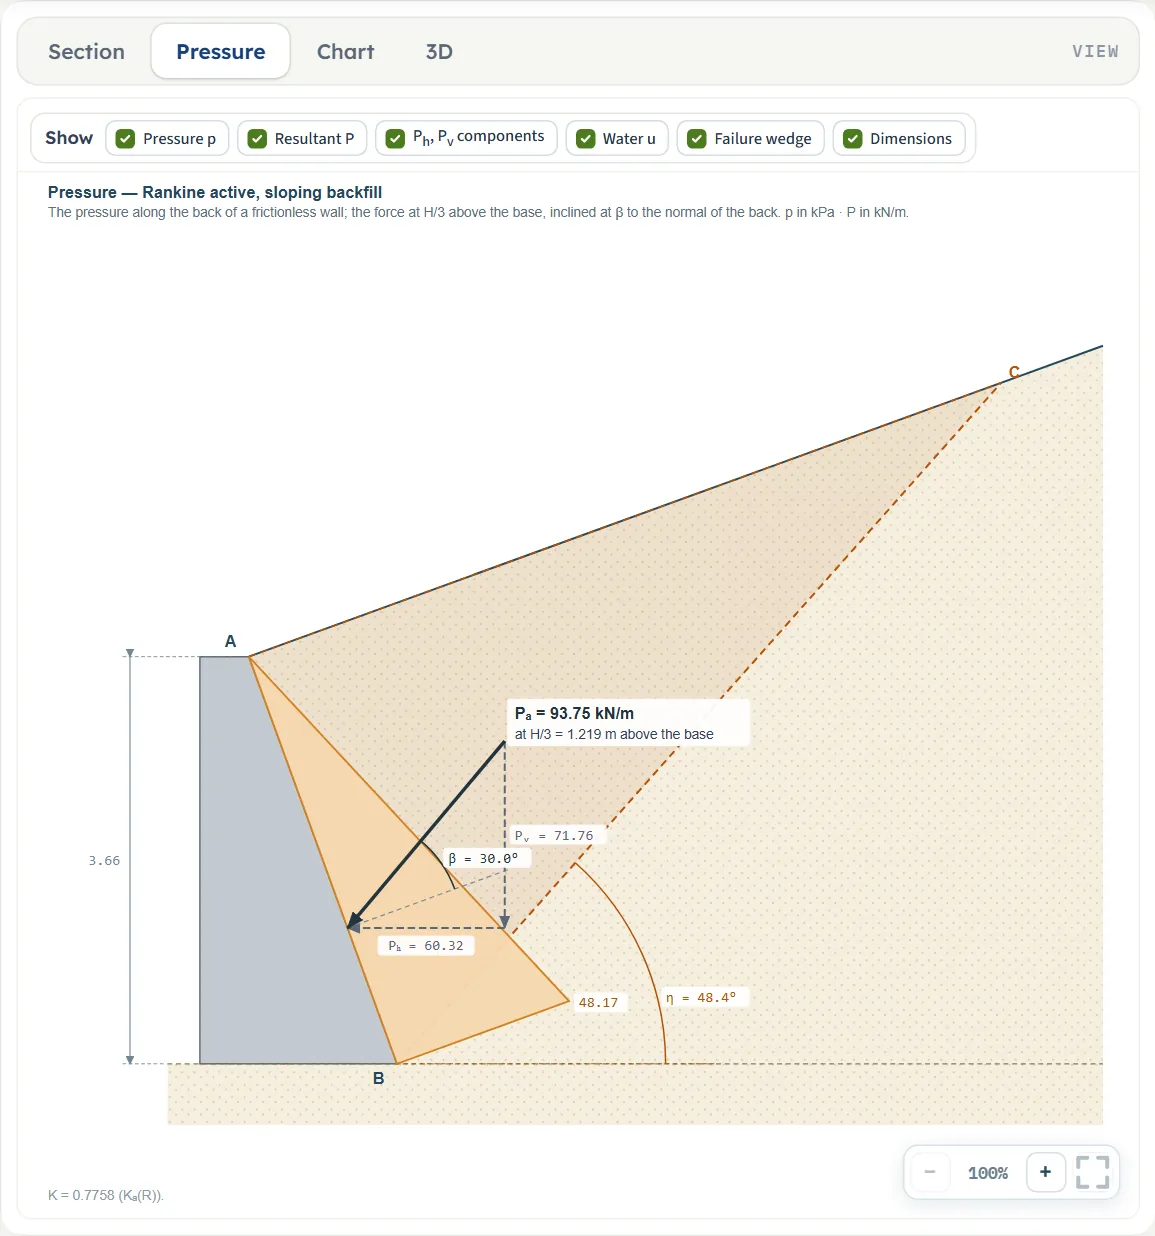
- Pressure is available after Analyze. It draws the pressure along the back of the wall, the force at its line of action inclined at β to the normal of the back, its horizontal and vertical components, the water pressure and the failure wedge from the heel B. Before Analyze it shows the geometry only.
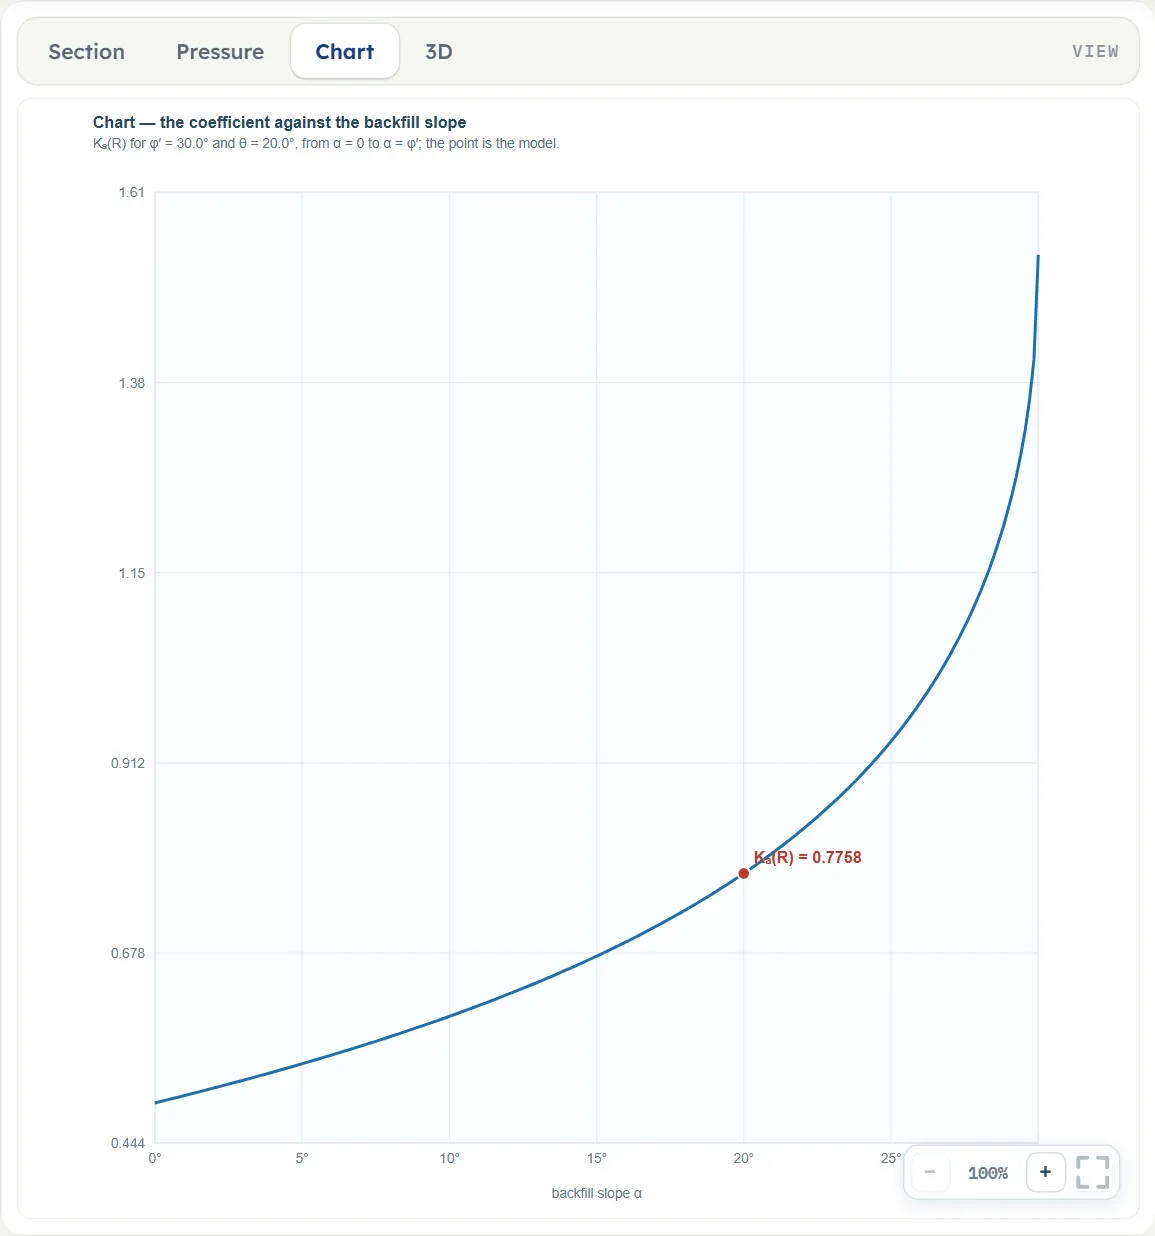
- Chart is available after Analyze: the coefficient against the slope α for the friction angle of each granular layer and the lean θ, from α = 0 to α = φ′, with the model marked. For a cohesive layer the coefficient changes with depth, so there is no single curve.
- 3D shows a length of wall with the sloping backfill, and the force after Analyze.
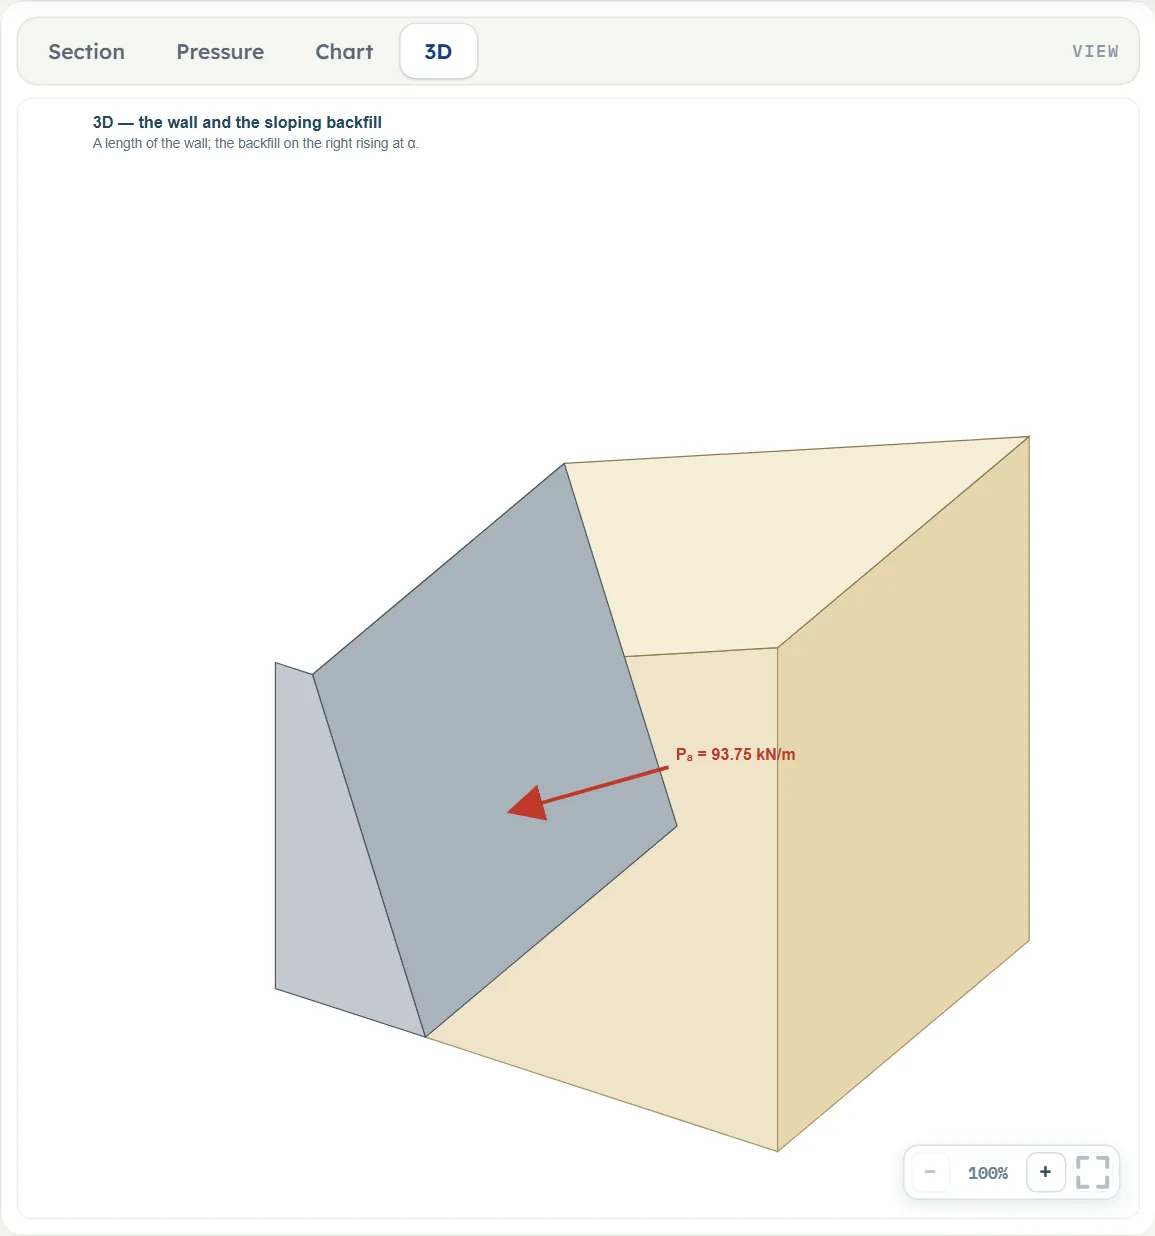
The Show chips
Above the drawing a Show bar has chips. The Section view has one, Dimensions. The Pressure view has six: Pressure p, Resultant P, Ph, Pv components, Water u, Failure wedge and Dimensions. All are on by default; each switches its own element on or off, so you can clear the drawing down to what you want to look at.
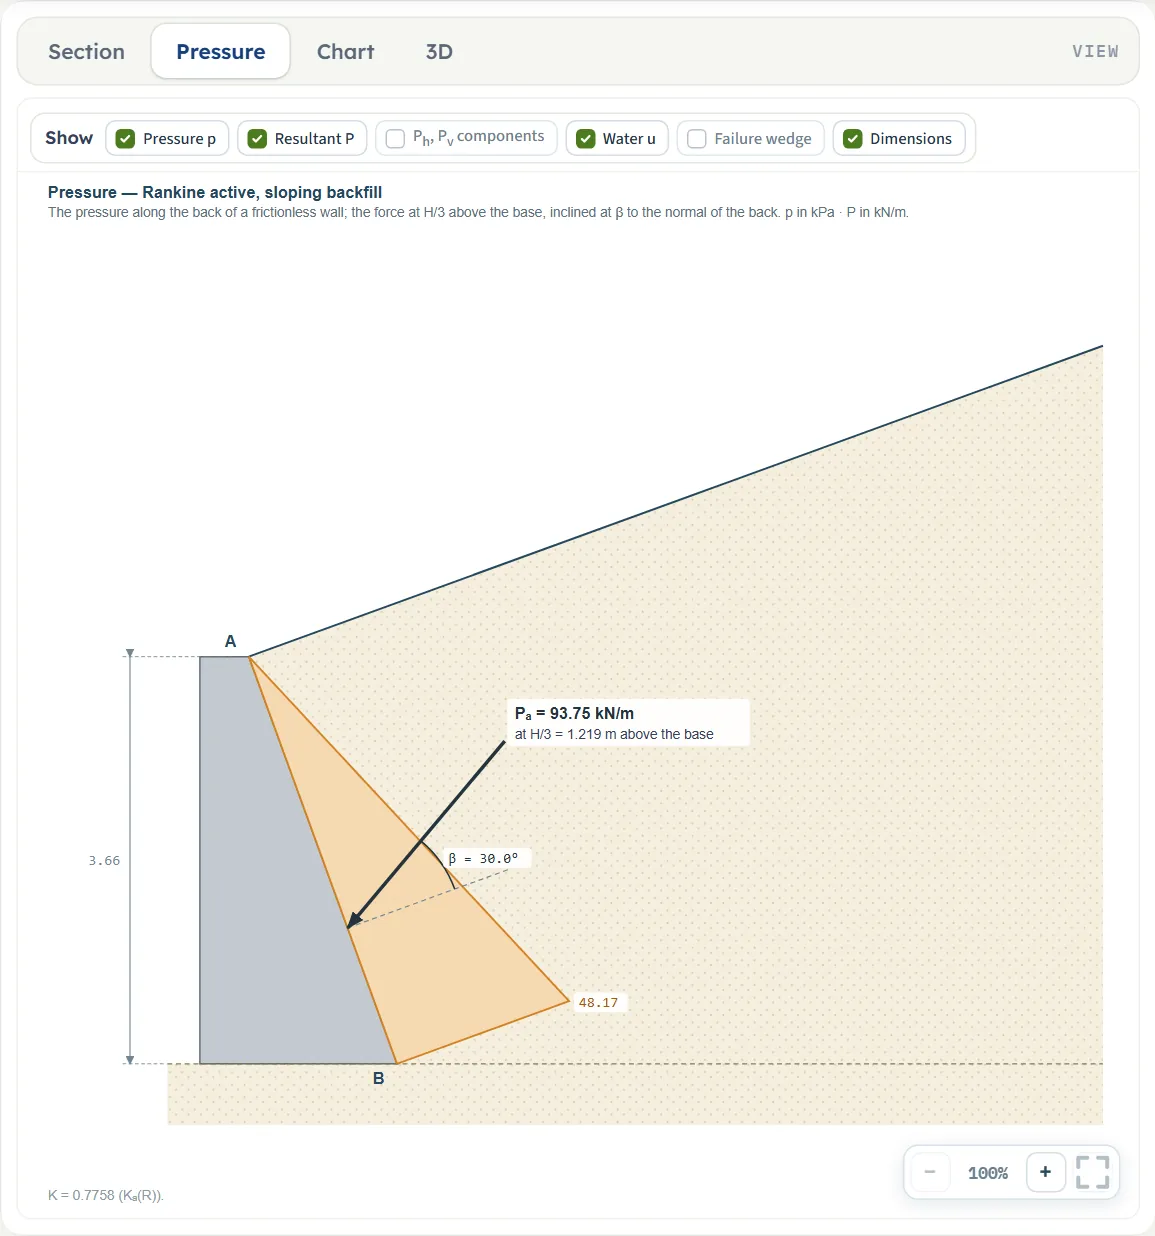
Zoom, and nothing to drag
The [−], [+] and fit buttons at the lower right of the drawing zoom it, and the wheel over the drawing does the same; once zoomed in, dragging the background moves the view. The first press of [+] takes the zoom to 135%. The drawing has no handles: the geometry is changed in the Model tab, not by dragging, and the drawing follows.
Entering the model, section by section
The Model tab has six sections. Each opens when you click its title; Next and Back walk you through them and Analyze waits below the last. The unit of a field is shown beside its box; where a unit is listed twice or three times, such as m · ft, the units are those of SI · kN, SI · tf and US in turn, equal ones merged. The defaults below are in SI; in US the example shows H = 12 ft and γ = 115 pcf.
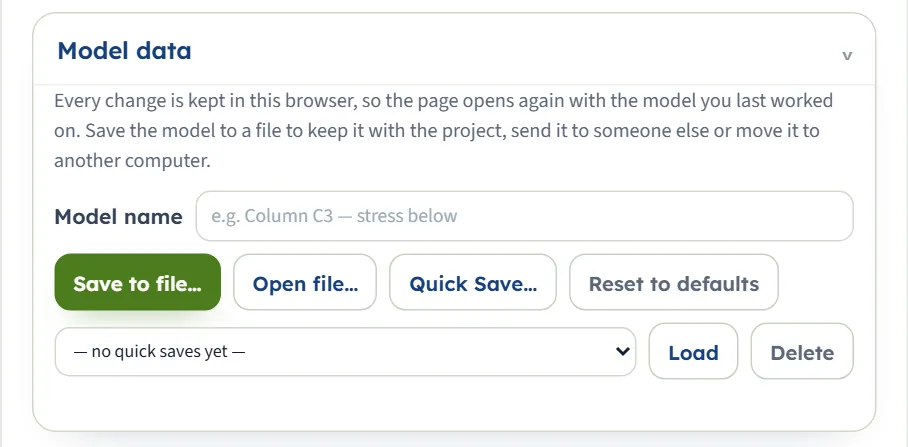
Model data
The first section is about the model itself, not the soil. Every change is kept in this browser: the page opens again with the model you last worked on, analysed or not, with the unit system. You can also give the model a name, Save to file… and Open file… to keep it with the project or move it to another computer, make named Quick Save… copies and Load or Delete them, and Reset to defaults to return to the example. The details typed on the Report tab are kept with the model.
Wall
The state of the wall, the tension zone for an active wall, the vertical height and the lean of the back.
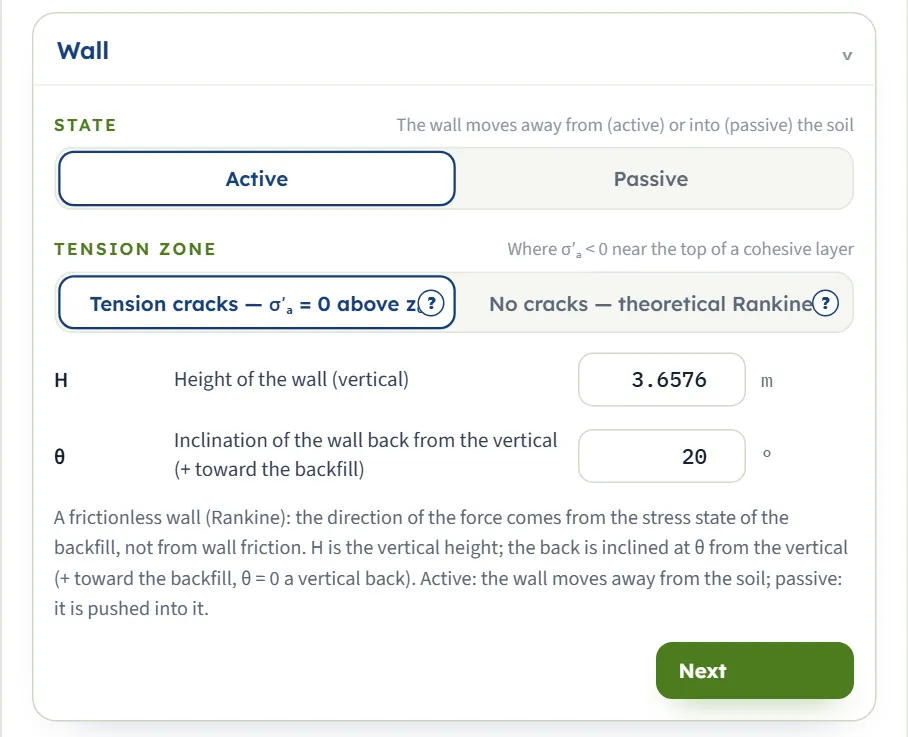
| Field | Unit | Default | What to enter |
|---|---|---|---|
| State | — | Active | The wall moves away from the soil (Active) or is pushed into it (Passive). |
| Tension zone | — | Tension cracks | For a cohesive layer where the active pressure is negative near the top: Tension cracks — σ′ₐ = 0 above z₀ or No cracks — theoretical Rankine. A (?) beside each opens a help window. Shown when the state is Active. |
| Height of the wall (vertical) H | m · ft | 3.6576 | The vertical height. The module needs at least 0.1 m. |
| Inclination of the wall back from the vertical (+ toward the backfill) θ | ° | 20 | From −45° to 45°. Zero is a vertical back. |
Backfill
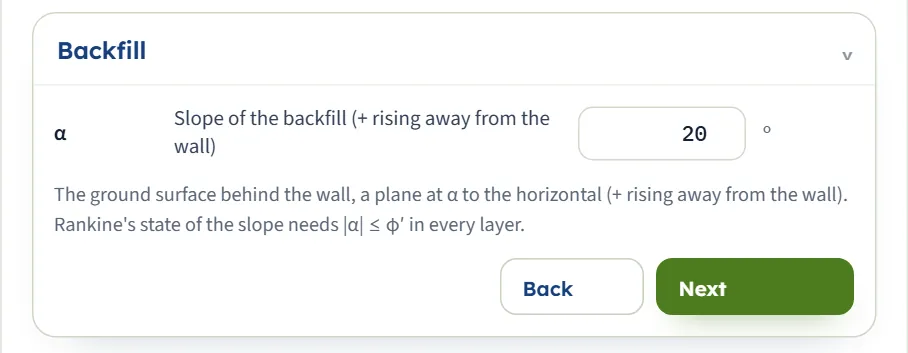
One number: the slope of the ground surface behind the wall. The surface is a plane; the layers of the next section run parallel to it.
| Field | Unit | Default | What to enter |
|---|---|---|---|
| Slope of the backfill (+ rising away from the wall) α | ° | 20 | From −45° to 45°. Rankine’s state of the slope needs |α| ≤ φ′ in every granular layer. |
Soil layers
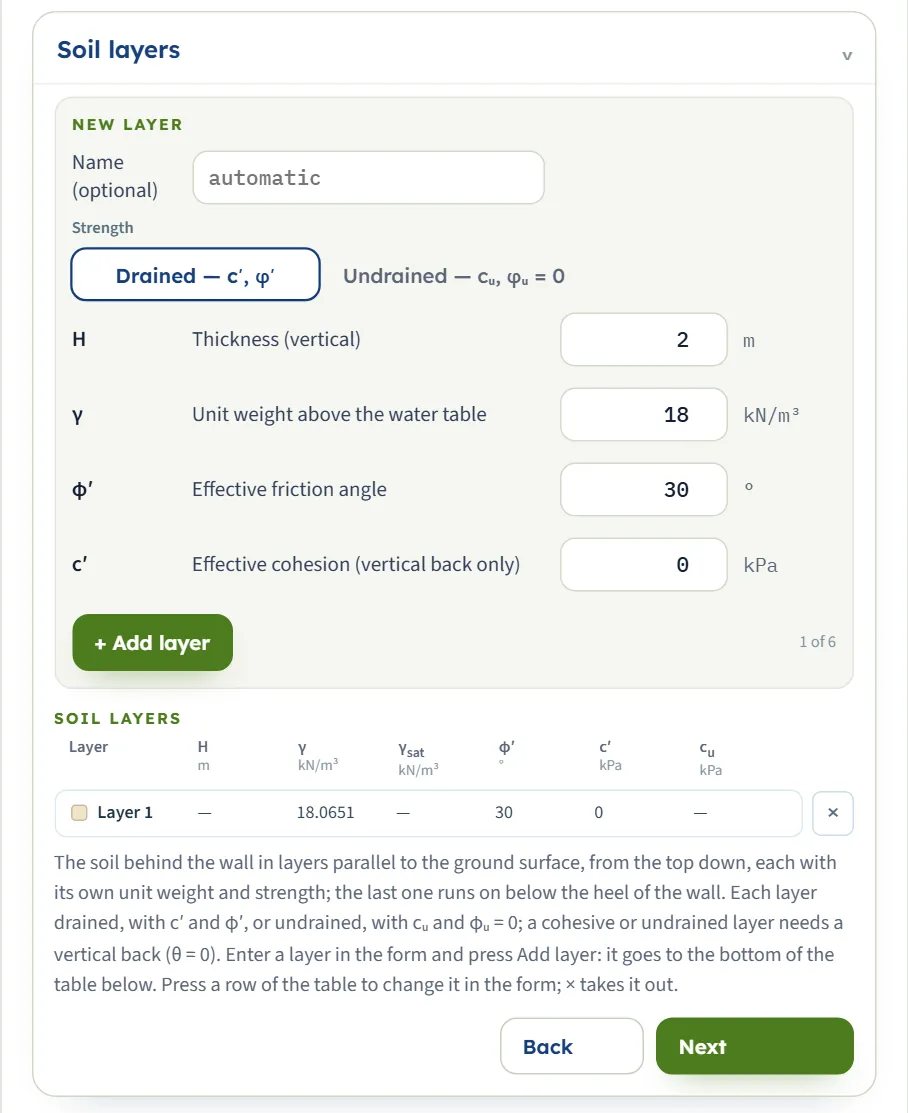
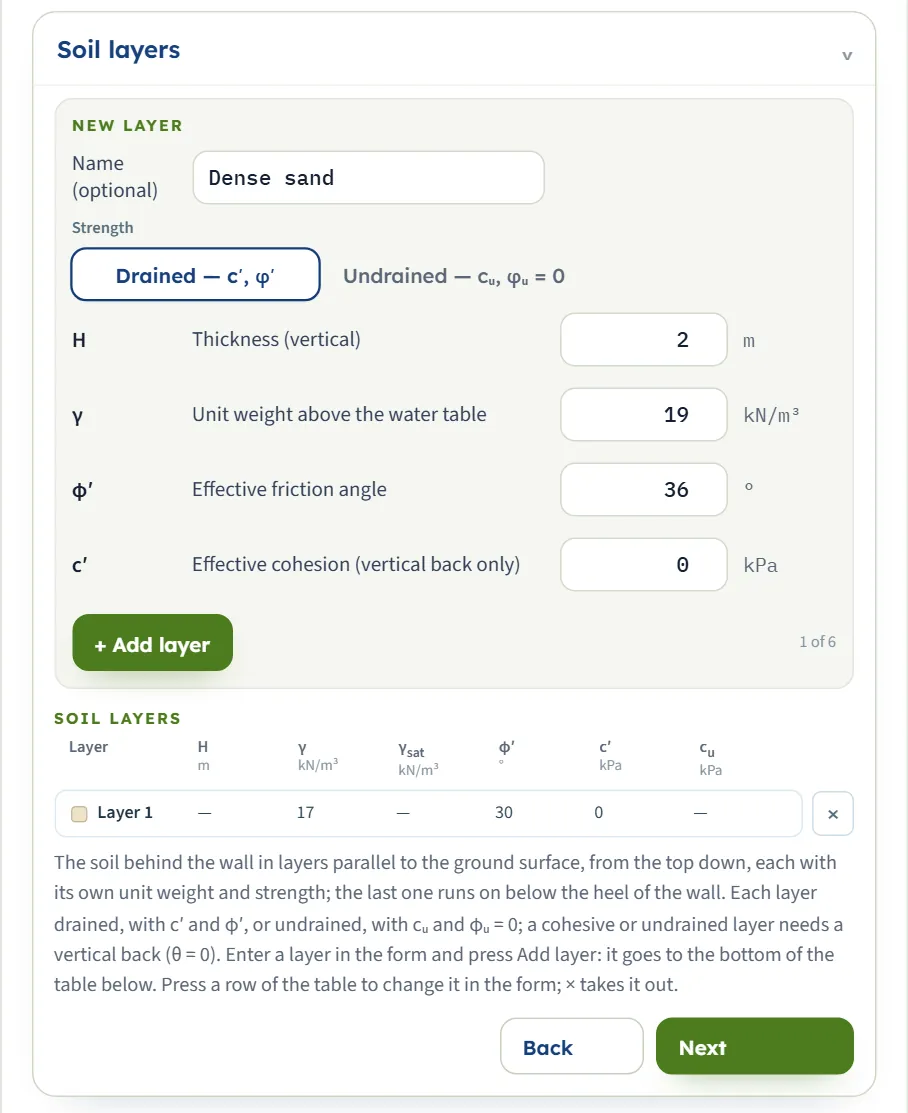
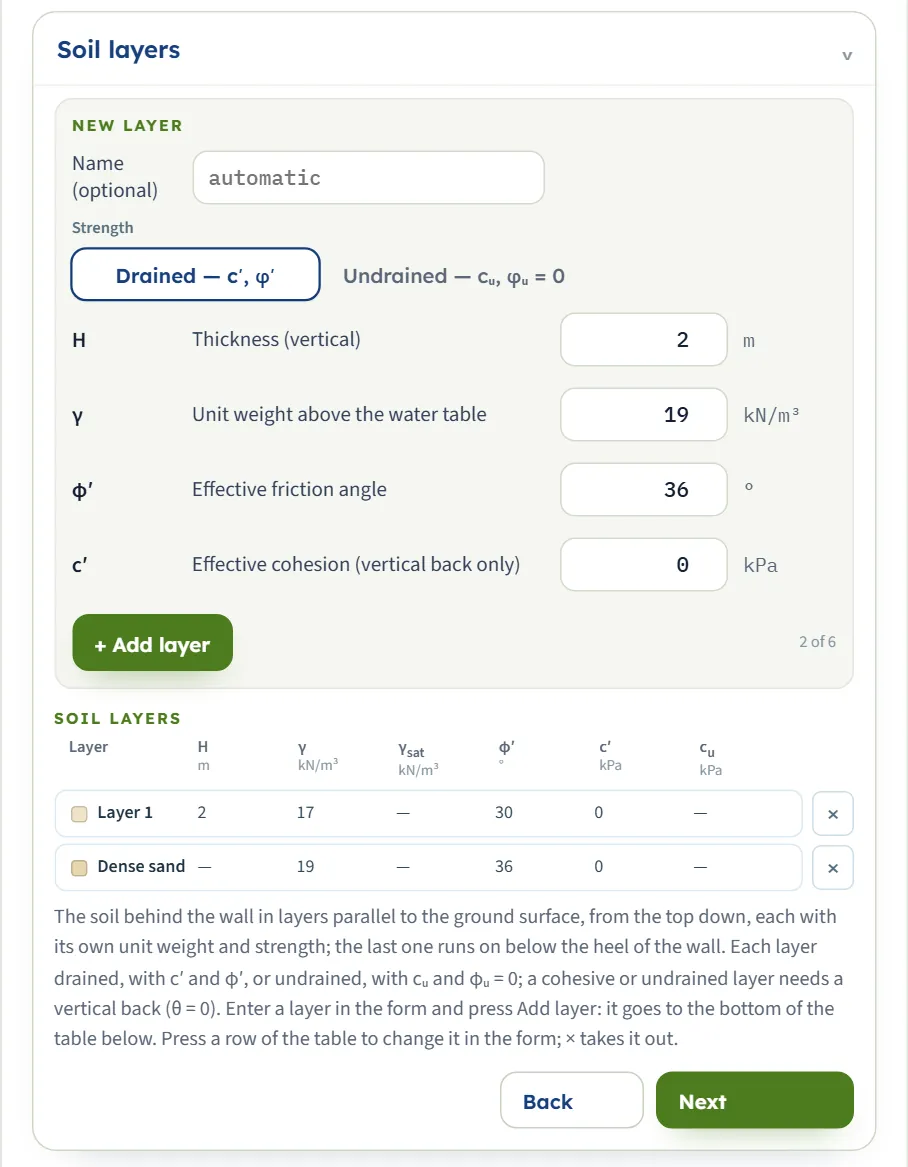
A New layer form over a table of Soil layers. The module opens with one layer, Layer 1, whose row shows its unit weight, friction angle and cohesion; a — means a value that does not apply (no thickness for the last layer, no saturated unit weight without water, no cᵤ for a drained layer). Press a row of the table to change that layer in the form: the form then reads Editing · Layer 1, Done closes it, and the changes apply as you type. Delete layer and × take a layer out. To add a layer fill in the form and press Add layer; it goes to the bottom of the table. The counter (“1 of 6”) shows how many of the six you have used.
| Field | Unit | Default | What to enter |
|---|---|---|---|
| Name | — | automatic | Optional; shown on the drawing and in the tables. Blank gives Layer 1, Layer 2 … |
| Strength | — | Drained | Drained — c′, φ′ or Undrained — cᵤ, φᵤ = 0. |
| Thickness (vertical) Hi | m · ft | 2 | Measured vertically; the layers lie parallel to the ground surface. The last layer has no thickness: it runs on below the heel of the wall. |
| Unit weight above the water table γ | kN/m³ · t/m³ · pcf | 18 (Layer 1: 18.0651) | Moist or dry unit weight. |
| Saturated unit weight γsat | kN/m³ · t/m³ · pcf | 20 | Used below the water table. Shown when a water table is present. |
| Effective friction angle φ′ | ° | 30 | From 0° to 50°. Shown when the layer is drained. |
| Effective cohesion (vertical back only) c′ | kPa · kg/cm² · psf | 0 | Zero or more. A layer with c′ above zero needs θ = 0. Shown when the layer is drained. |
| Undrained shear strength (vertical back only) cu | kPa · kg/cm² · psf | 25 | Total stress, with φᵤ = 0. Needs θ = 0. Shown when the layer is undrained. |
- The last layer runs on below the heel. The heel of the wall lies at the depth H(1 + tan θ tan α) below the ground surface continued over the wall; the layers above the last one must end above it.
- A layer with cohesion or an undrained layer needs a vertical back (θ = 0). With a leaning back the layers are granular.
- Only the last layer has no thickness. When you add a layer below Layer 1, Layer 1 shows its thickness in the table (2 m by default) and the new layer, now the last, shows a dash.
Groundwater
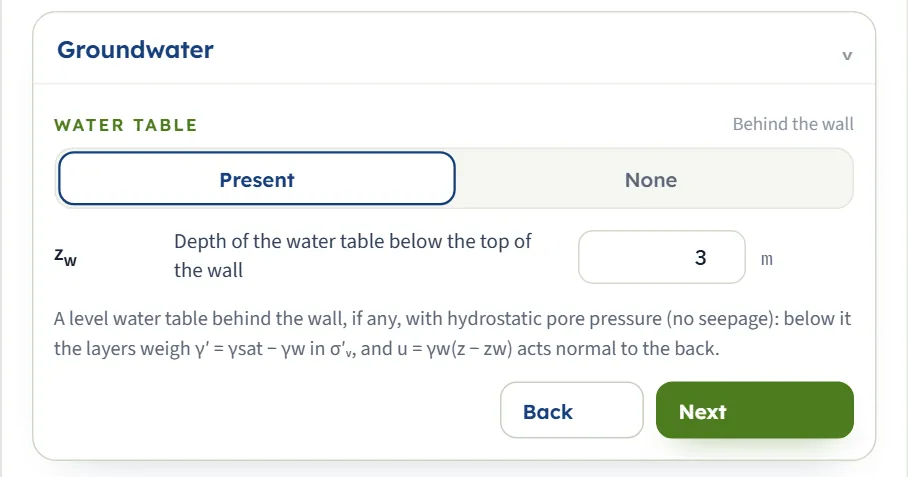
A level water table behind the wall, if any, with hydrostatic pore pressure and no seepage. Below it each layer weighs γsat − γw in the effective vertical stress, and the pore pressure u = γw(z − zw) acts normal to the back. Choosing Present adds the depth box here and the Saturated unit weight to each layer.
| Field | Unit | Default | What to enter |
|---|---|---|---|
| Water table | — | None | Present or None, a level table behind the wall. |
| Depth of the water table below the top of the wall zw | m · ft | 3 | Zero or more. Shown when water is present. |
Surcharge
One number: a uniform load on the backfill surface, vertical and per unit area of the sloping surface. Per unit horizontal area it is q/cos α, added to the vertical stress at every depth as a layer of that weight.

| Field | Unit | Default | What to enter |
|---|---|---|---|
| Uniform surcharge on the backfill surface q | kPa · t/m² · ksf | 0 | Vertical, per unit area of the sloping surface. Zero or more; zero for none. |
Choosing the state, the strength and the tension zone
Four choices decide which solution the module uses.
| Choice | Options | Use it when |
|---|---|---|
| State | Active (default), Passive | Active: the wall can move away from the soil. Passive: the wall is pushed into the soil and the soil resists. For the default example the coefficient is 0.7758 active and 2.901 passive, and the force 93.75 and 350.6 kN/m. |
| Strength of a layer | Drained — c′, φ′ (default), Undrained — cᵤ, φᵤ = 0 | Drained for sand and for long-term clay in effective stress. Undrained for a clay in the short term, in total stress. Both are for a vertical back only when the layer has cohesion. |
| Tension zone (active) | Tension cracks — σ′ₐ = 0 above z₀ (default), No cracks — theoretical Rankine | Matters only for a cohesive or undrained layer, where the active pressure is negative near the top. With cracks the soil is taken to pull nothing on the wall and the negative part is left out; with no cracks the negative area is subtracted from the force. |
| Water table | Present, None (default) | When there is a groundwater level behind the wall. |
Which solution the module applies
- One granular layer, no water, no surcharge: the closed form of Chu 1991 shown above, with the working of each equation.
- A granular layer with a surcharge or water, or several layers: each layer is taken in the Rankine state of the slope under the weight of the soil above it, and the pressure on the back is integrated along the wall. The module states in the Calculations tab that this layered form is an extension made in the program, and that for one layer it reduces to the closed form.
- A layer with cohesion (or undrained) behind a vertical back: Mazindrani and Ganjali 1997. The coefficient depends on the cohesion divided by the vertical stress, so it changes with depth and the pressure is not a straight line.
The water table is level, whatever the slope of the ground. A table that meets the back (zw < H) makes the model layered; one at or below the base of the wall has no effect.
Analyze and read the results
Press Analyze. The bar changes to Analysed — the earth pressure calculated and says “The inputs are locked. Edit inputs clears the results; the unit system can still be changed.” Edit inputs unlocks the model and clears the results. After a reload an analysed model comes back analysed.
The Results tab has a Rankine force block of cards, then a Values, step by step table that repeats the numbers of each step. The cards depend on the model:
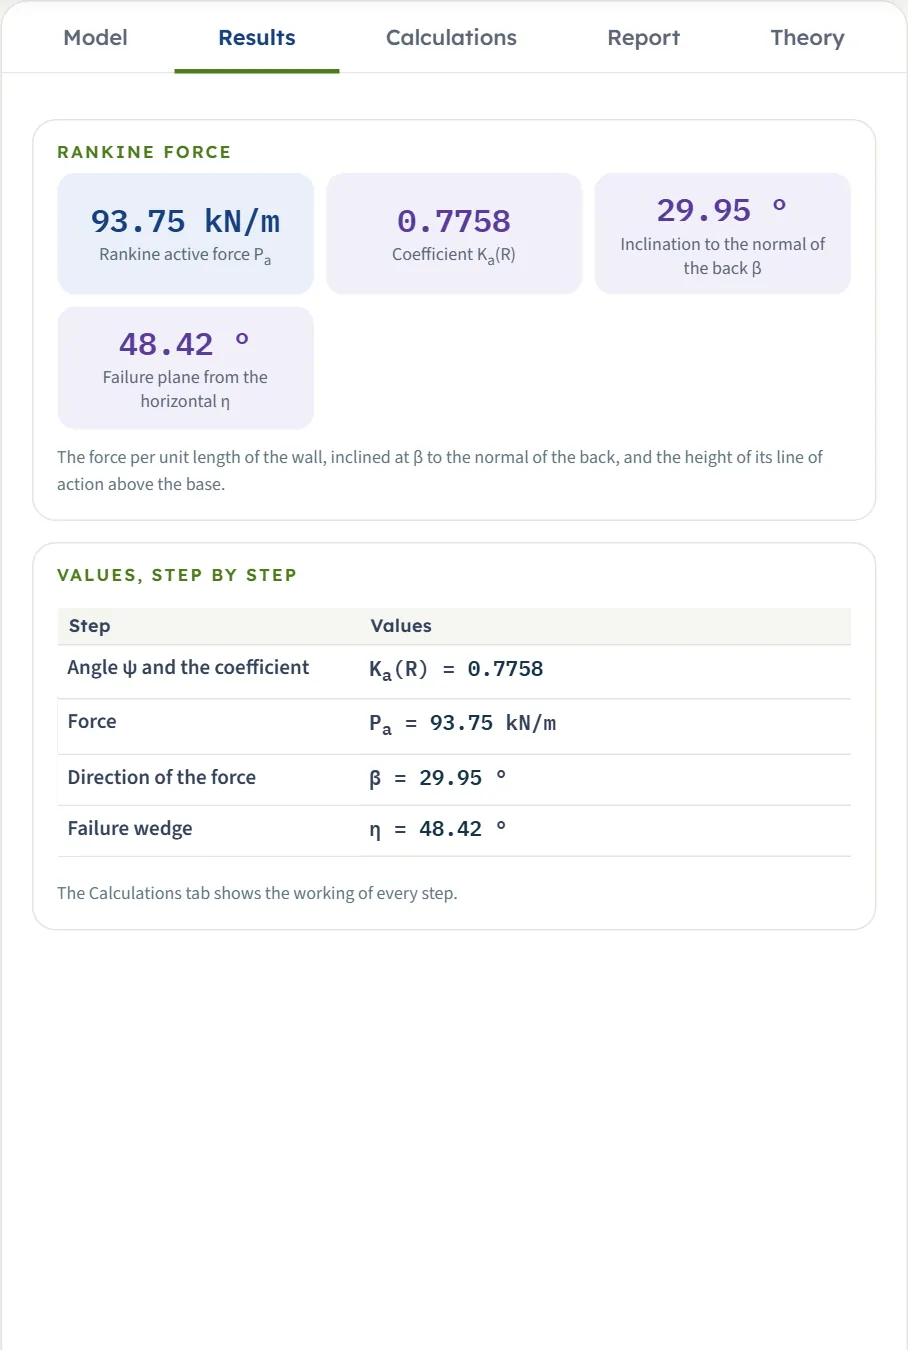
| Card | Symbol | What it is | Default example |
|---|---|---|---|
| Rankine active (or passive) force | Pa (Pp) | The force per unit length of wall, in kN/m (tf/m or kip/ft). | 93.75 kN/m |
| Coefficient | Ka(R) | Shown for one granular layer without surcharge or water. | 0.7758 |
| Inclination to the normal of the back | β | The angle between the force and the normal of the back. | 29.95° |
| Failure plane from the horizontal | η | The side of the failure wedge, from the heel B. | 48.42° |
| Line of action above the base | z̄ | Appears, instead of the coefficient and η, when the model is layered, loaded, wet or cohesive. For one granular layer there is no card: the line of action is H/3. | no card; H/3 = 1.219 m is in the Pressure view and the Calculations tab |
| From the water | Pw | When a water table meets the back: the part of the force from the pore pressure, normal to the back. | — |
| Depth of the tension zone | z₀ | For a cohesive or undrained layer in the active state. | — |
A layered, wet or cohesive model adds tables to the Results tab: the layers and their Rankine state (depth, unit weight, strength, coefficient, β, η), the stresses on the back (the vertical stress, the pressure on the back and the pore pressure at the top, the water table, the base and, for a cohesive layer, where the pressure is zero) and the force of each layer with its normal and tangential parts and arm.
Using the numbers
- P is the earth force per unit length of wall, inclined at β to the normal of the back; when a water table meets the back it includes the water pressure, and the card From the water shows that part. Resolve it into its horizontal and vertical parts (shown in the Pressure view) for the wall checks you make.
- For one granular layer the force acts at H/3 above the base; for any other model read the line of action from the card.
- Changing the unit system after Analyze re-states the cards, the Calculations tab and the text of the report without a new run; the drawings stay in SI (m, kN, kPa).
- Notes and Warnings. When the module has something to say about a result, the bar shows Notes (n) or Warnings (n); press it to read the text. See the messages below.
The Calculations tab, the report and the Theory tab
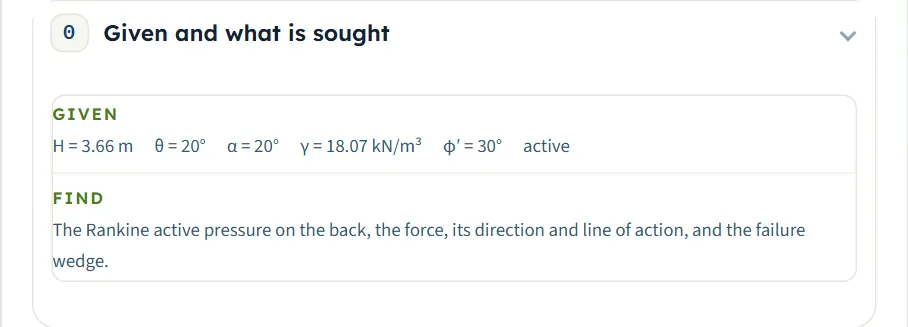
The Calculations tab opens with a Given and what is sought card and then numbered steps, each with its equation, the equation with your numbers and the result. For one granular layer there are four:
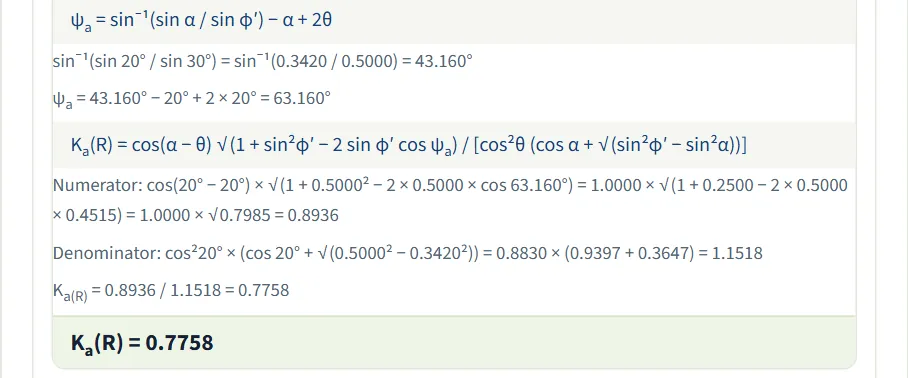
- Angle ψ and the coefficient — ψa and Ka(R) , with the numerator and denominator worked out.
- Force — Pa = ½ γ H² Ka(R) , at H/3 above the base.
- Direction of the force — β.
- Failure wedge — η.
A layered, wet or cohesive model has five steps: the Rankine state of each layer, the stresses on the back, the tension zone (when a cohesive layer has one), the force and its direction and the failure wedge. The tables of the Results tab appear in the steps they belong to. Before Analyze the tab asks you to press Analyze.
The report
In the Report tab fill in the cover (project, location, client, report number, date, prepared by, title / qualification, checked by, and optional notes). The details are kept in this browser and saved with the model file. After Analyze, Save as PDF and Download Word (.docx) produce the summary report; the preview below the buttons is the report itself.
The report has six parts: 1 Introduction and scope, 2 Input data, 3 Calculation (one part for each step), 4 Results, 5 Summary and 6 References. It carries the section, the pressure view, the chart and the 3D drawing, and the warnings and notes of the analysis. It states the units with the conversion constants.

The Theory tab
The Theory tab has six sections, each opening when you click it: Sloping backfill, General case, Cohesive backfill, Layered backfill, Worked example and References. They carry the equations, tables of the coefficient and the figures of the method, computed from the same equations as the module.
Worked example: the module’s own example
The module opens on this example, so you can follow the numbers on your own screen.
| Section | Input | Value |
|---|---|---|
| Wall | State, tension zone | Active, tension cracks |
| Wall | Height and lean | H = 3.6576 m (12 ft), θ = 20° |
| Backfill | Slope | α = 20° |
| Soil layers | One drained layer | γ = 18.0651 kN/m³ (115 pcf), φ′ = 30°, c′ = 0 |
| Groundwater, Surcharge | None, q = 0 |
Step 1: the angle and the coefficient
sin⁻¹(sin 20° / sin 30°) = sin⁻¹(0.3420 / 0.5000) = 43.160°, so ψa = 43.160° − 20° + 2 × 20° = 63.160°. The numerator is cos(0°) √(1 + 0.5000² − 2 × 0.5000 × cos 63.160°) = 1.0000 × √0.7985 = 0.8936 and the denominator cos²20° × (cos 20° + √(0.5000² − 0.3420²)) = 0.8830 × (0.9397 + 0.3647) = 1.1518, so Ka(R) = 0.8936 / 1.1518 = 0.7758.
Step 2: the force
Steps 3 and 4: the direction and the failure plane
β = tan⁻¹[sin 30° sin 63.160° / (1 − sin 30° cos 63.160°)] = tan⁻¹(0.4461 / 0.7743) = 29.95° to the normal of the back, and η = 45° + 30°/2 + 20°/2 − ½ × 43.160° = 48.42°. The Pressure view shows the components of the force: Pv = 71.76 and Ph = 60.32 kN/m, which combine to the same 93.75 kN/m.
These are the numbers on the Results tab, the four steps of the Calculations tab and the figures of the Pressure view.
Two simple cases you can check by hand
- Vertical wall, level ground: H = 6 m, θ = 0, α = 0, φ′ = 30°, the same soil. The module gives Ka(R) = 0.3333 = tan²30° and Pa = 108.4 kN/m = ½ × 18.0651 × 6² × 0.3333, with β = 0° (horizontal) and η = 60.00°.
- Vertical wall, sloping ground: H = 5 m, α = 10°, γ = 18 kN/m³, φ′ = 30°. Ka = cos 10° (cos 10° − √(cos²10° − cos²30°)) / (cos 10° + √(cos²10° − cos²30°)) = 0.3495 and Pa = ½ × 18 × 5² × 0.3495 = 78.64 kN/m, parallel to the ground (β = 10.00°).
- Passive, vertical wall, α = 25°, φ′ = 36° (H = 5 m, γ = 18): Kp = 2.394, Pp = 538.6 kN/m.
The same wall in US units and in SI · tf
Switch to US with the example as it stands (H = 12 ft, γ = 115 pcf). The module gives Pa = 6.424 kip/ft, and by hand ½ × 0.115 × 12² × 0.7758 = 6.424 kip/ft. Enter H = 20 ft and γ = 120 pcf and it gives 18.62 kip/ft: ½ × 0.120 × 20² × 0.7758 = 18.62. In SI · tf the example gives 9.559 tf/m, which is 93.746 / 9.80665, and H = 5 m gives 17.86 tf/m (½ × 18.0651 × 5² × 0.7758 = 175.2 kN/m, divided by 9.80665). The coefficient and the angles do not change with the units.
How each input changes the answer
Each row changes one thing in the default example and runs the module again. The numbers are the ones the module gives, so you can reproduce any row. The first table is one granular layer, where the module returns the coefficient.
| Change | K | P (kN/m) | β (°) | η (°) |
|---|---|---|---|---|
| The default example The reference | 0.7758 | 93.75 | 29.95 | 48.42 |
| Passive instead of active Kp(R) replaces Ka(R) ; the force is several times larger and nearly normal to the back | 2.901 | 350.6 | 7.673 | 61.58 |
| H = 6 m The force follows H²; the coefficient and the angles do not change | 0.7758 | 252.3 | 29.95 | 48.42 |
| H = 2 m The same, downward | 0.7758 | 28.03 | 29.95 | 48.42 |
| θ = 0 (vertical back) A smaller coefficient and force; the force is inclined at β = α | 0.4142 | 50.05 | 20.00 | 48.42 |
| θ = 10° Between the vertical back and the 20° back | 0.5617 | 67.87 | 28.30 | 48.42 |
| θ = −10° (leaning away) The smallest coefficient of the three | 0.3433 | 41.49 | 3.151 | 48.42 |
| α = 0 (level ground) Level ground gives a smaller force; η rises to 60° | 0.4935 | 59.64 | 27.52 | 60.00 |
| α = 10° Between level and 20° | 0.6000 | 72.50 | 29.48 | 54.84 |
| α = −10° (ground falling away) A falling surface lowers the force | 0.4165 | 50.33 | 23.64 | 65.16 |
| φ′ = 25° A smaller friction angle: a larger coefficient and force | 0.9272 | 112.0 | 24.69 | 40.49 |
| φ′ = 35° A larger friction angle: a smaller coefficient and force | 0.6755 | 81.63 | 34.98 | 54.20 |
| γ = 20 kN/m³ The force is proportional to γ; the coefficient does not change | 0.7758 | 103.8 | 29.95 | 48.42 |
Where the back is vertical (θ = 0) the force is inclined at β = α, parallel to the ground. The pattern follows the formulas: P = ½ γ H² K is proportional to γ and to H², and K depends on φ′, α and θ only.
| Case | P (kN/m) | β (°) | z̄ (m) |
|---|---|---|---|
| Surcharge q = 15 kPa Adds q H K cos θ / cos(θ − α) = 40.0 kN/m to the 93.75, acting higher | 133.7 | 29.95 | 1.402 |
| Water table 1.5 m below the top (γsat = 20) The force includes a water part, normal to the back, shown on its own card | 103.0 | 23.18 | 1.148 |
| Two layers, vertical back, α = 15°, H = 6 m (γ 17 and 19, φ′ 30° and 36°) Each layer in its own Rankine state; β equals α | 94.29 | 15.00 | 2.054 |
| The same two layers, θ = 15°, α = 10°, H = 5 m An inclined back with granular layers | 100.2 | 32.77 | 1.706 |
| One layer, γ = 18, φ′ = 20°, c′ = 13.5 kPa, α = 10°, H = 7.5 m, tension cracks The pressure is negative above z₀ | 133.4 | 10.00 | 1.780 |
| The same, no cracks The negative area is subtracted: a smaller force, acting lower | 113.0 | 10.00 | 0.8786 |
| Undrained, γ = 18, cu = 30 kPa, level, H = 6 m z₀ = 2cu/γ; Pa = ½ × 48 × (6 − 3.333) = 64.0 | 64.00 | 0 | 0.8889 |
| The default example, passive, water table 1.5 m below the top The force with its water part and the line of action | 327.7 | 7.105 | 1.253 |
In these cases z̄ is the height of the line of action above the base. The water part of the force, on its own card, is 24.30 kN/m in the water-table row (½ × 9.81 × 2.1576² / cos 20° by hand) and 24.30 kN/m in the passive one. The tension depth in the cohesive row is z₀ = 2.142 m, and in the undrained row 3.333 m.
Messages: when the module stops, notes and warnings
The module checks the model before it calculates. When a condition of the solution is not met it stops and nothing is calculated.
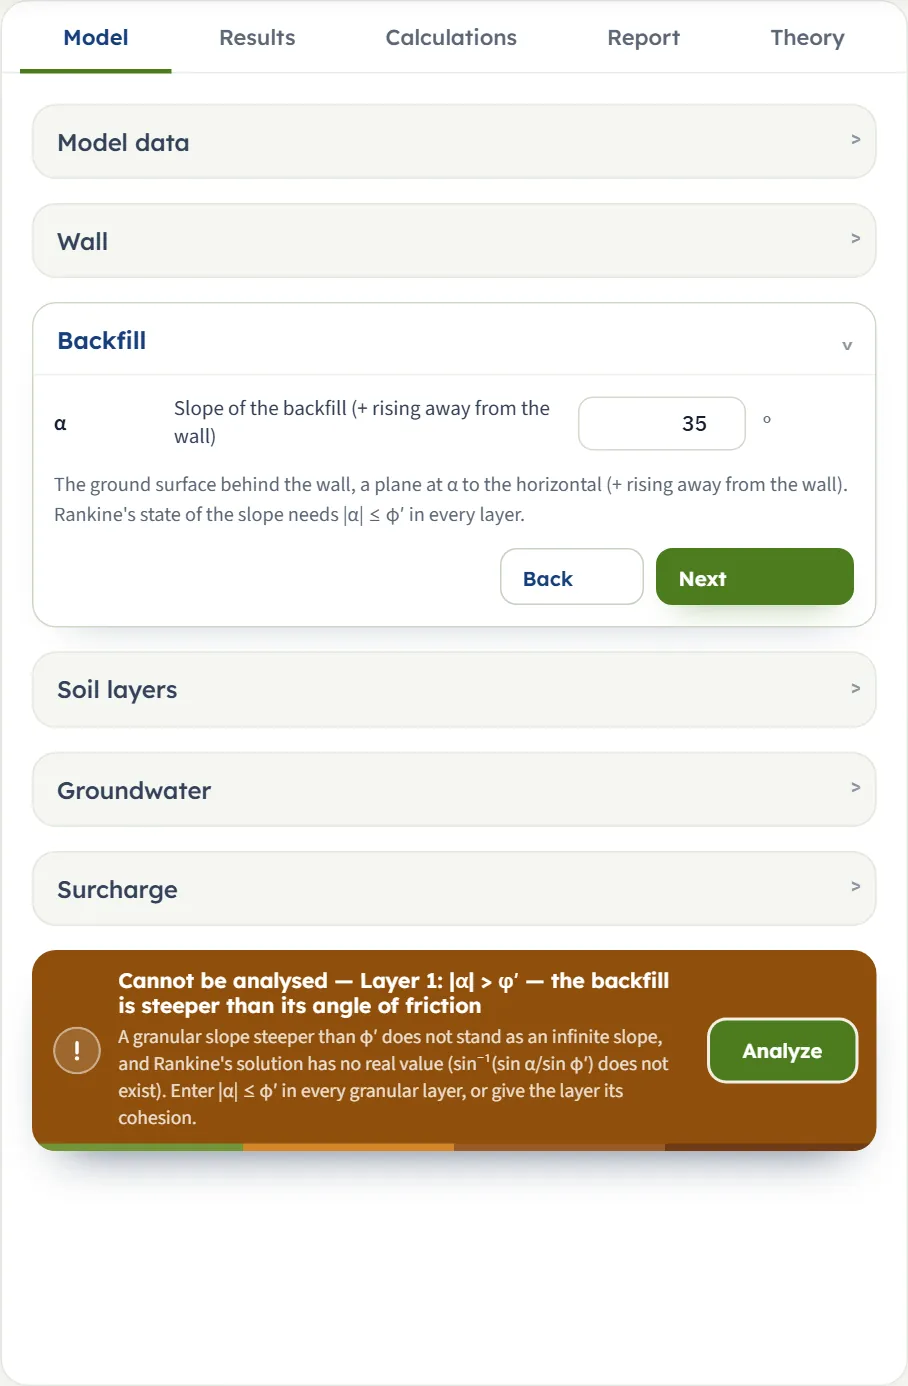
- On the Model tab the Analyze bar turns brown and reads Cannot be analysed, followed by the message and a line of explanation.
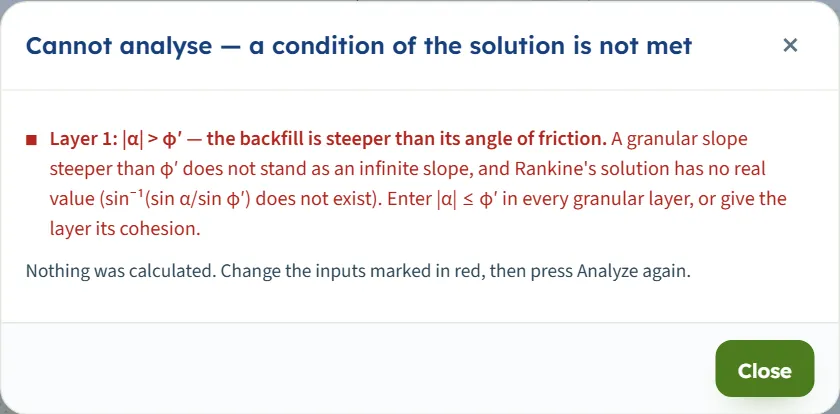
- If you press Analyze, a window titled Cannot analyse — a condition of the solution is not met gives the message and says “Nothing was calculated. Change the inputs marked in red, then press Analyze again.”
- A value outside the limit of its box, such as a wall height under 0.1 m, opens Cannot analyse — 1 input error with the name of the field and the limit.
| Kind | When | Message and what to do |
|---|---|---|
| Stop | H is below 0.1 m | “Height of the wall (vertical) (H) must be at least 0.1 m.” Enter a height of at least 0.1 m. |
| Stop | H is empty | “Height of the wall (vertical) (H) is missing.” Enter a height. |
| Stop | |α| is above φ′ in a granular layer | “Layer 1: |α| > φ′ — the backfill is steeper than its angle of friction.” Enter |α| ≤ φ′, or give the layer its cohesion. |
| Stop | A drained layer with φ′ = 0 and c′ = 0 | “Layer 1: a granular layer without strength (c′ = 0, φ′ = 0).” Enter φ′ above zero, a cohesion, or choose Undrained for a clay. |
| Stop | A cohesive or undrained layer with θ not zero | “A cohesive or undrained layer with an inclined back.” Enter θ = 0, or drained granular layers. |
| Stop | 1 + tan θ tan α is close to zero | “The back of the wall is nearly parallel to the ground surface.” Enter a smaller θ or α. |
| Stop | The layers above the last already reach below the heel | “The layers above the last one already reach below the heel.” Reduce the thicknesses or the number of layers. |
| Stop | Water is present and a layer’s γsat is not above 9.81 kN/m³ | “Layer 1: the saturated unit weight 9 kN/m³ is not above that of water.” Enter the saturated unit weight of the soil. |
| Stop | A cohesive layer on a slope steeper than its strength allows | “Layer 1: the slope does not stand down to the heel” (“the undrained slope” for an undrained layer), with the stress and the depth at which it fails. Enter a smaller α or a stronger layer. |
Notes and warnings after a run
- Warning — with No cracks — theoretical Rankine, if the tension of a cohesive layer outweighs the pressure: “The net active force is not a push”, with the value (for example H = 2 m, φ′ = 20°, c′ = 20 kPa, γ = 18 gives Pa = −38.37 kN/m). Choose tension cracks to get the pressure on a wall that the soil cannot pull.
- Note — with tension cracks, if the pressure is negative over the whole height: “σ′a is negative over the whole height of the wall”. The force is zero.
- Note — when the failure plane from the heel is steeper than the back (for example θ = −35° with level ground): “η = 60.00° is steeper than the wall back (90° + θ = 55°)”. The plane runs behind the back; the coefficient and the force are the Rankine stress state of the backfill acting on the plane of the back.
Good practice and common mistakes
- Enter H as the vertical height and θ with its sign: positive when the back leans toward the backfill, negative when it leans away.
- Keep |α| ≤ φ′. A granular slope steeper than its friction angle does not stand, and Rankine’s state of the slope has no value for it. Give the layer cohesion, or reduce the slope.
- Use a vertical back for cohesive and undrained layers (θ = 0); with a leaning back the layers are granular.
- Choose the tension zone deliberately. Tension cracks give the larger active force and are the usual choice for a wall that the soil cannot pull; the no-crack choice is the theoretical Rankine pressure. The Calculations tab states the force with the other choice too.
- Enter the surcharge per unit area of the sloping surface, vertical, not per unit horizontal area; the module converts it with 1/cos α.
- Do not add the water twice. When a water table meets the back, P already includes the water pressure; the card From the water is the part of it that acts normal to the back.
- Read the force as per metre of wall and resolve it into its horizontal and vertical parts for the wall checks; the Pressure view shows both.
- The module keeps your model in this browser. Save it to a file to keep it with the project or move it to another computer.
- Check the units after switching the system: type values in the units shown beside the boxes.
Frequently asked questions
How is the Rankine force calculated with a sloping backfill and a leaning wall?
For one granular layer the module finds the angle ψa = sin⁻¹(sin α / sin φ′) − α + 2θ, then Ka(R) (Chu 1991) and Pa = ½ γ H² Ka(R) at H/3 above the base. For the module’s example Ka(R) = 0.7758 and Pa = 93.75 kN/m, inclined at β = 29.95° to the normal of the back.
Why is the force not horizontal?
Rankine’s state has no wall friction. The pressure on a vertical back acts parallel to the ground surface, at α; on a leaning back it acts at β to the normal of the back, which the module reports. The Pressure view shows its horizontal and vertical components.
What happens when the slope is steeper than the friction angle?
A granular layer cannot stand on a slope steeper than its friction angle and the solution has no real value, so the module stops with “|α| > φ′ — the backfill is steeper than its angle of friction”. Enter |α| ≤ φ′, or give the layer a cohesion.
Can I use a cohesive soil with a leaning wall back?
No. A layer with cohesion, or an undrained layer, needs a vertical back (θ = 0), because the cohesive solution (Mazindrani and Ganjali 1997) is for a vertical back. With a leaning back the layers are drained and granular.
What do the tension-zone choices do?
In an active cohesive layer the pressure is negative near the top, down to a depth z₀. With tension cracks the module takes the soil to pull nothing on the wall and leaves the negative part out, which gives the larger force. With no cracks it subtracts the negative area, which can even make the net force not a push; the module then warns you.
How does the module deal with layers?
The layers are parallel to the ground surface. Each is taken in the Rankine state of the slope with its own unit weight and strength under the weight of the soil above it, and the pressure on the back is integrated along the wall. For one layer this reduces to the closed form. You can have up to six layers; the last runs on below the heel of the wall.
How are water and a surcharge included?
A level water table adds the pore pressure u = γw(z − zw) normal to the back and uses the effective unit weight below it; the water part of the force has its own card. A surcharge is vertical per unit area of the sloping surface and is added to the vertical stress at every depth, as a layer of weight q/cos α.
Active or passive: what is the difference in the results?
For the same soil and wall the passive coefficient is far larger. In the default example Kp(R) = 2.901 against Ka(R) = 0.7758, and the passive force is 350.6 kN/m against 93.75 kN/m. The passive force is nearly normal to the back (β = 7.673°).
What values does the module accept?
The wall height at least 0.1 m, the lean and the slope from −45° to 45°, the friction angle from 0° to 50°, and at most six layers. A condition of the solution that is not met, such as |α| > φ′, stops the analysis with a message that names the layer.
Does the module remember my model?
Yes. Every change is kept in this browser, so the page opens with your last model, analysed or not, and the unit system. Use Save to file to keep a model with the project, Quick Save for named copies and Reset to defaults to return to the example.
Which units does it use, and what are the units of the answer?
SI · kN, SI · tf or US, switchable in the header at any time, even after Analyze. The force per unit length is in kN/m, tf/m or kip/ft, the unit weight in kN/m³, t/m³ or pcf, the cohesion in kPa, kg/cm² or psf and the pressure in kPa, t/m² or ksf.
What does the report contain?
A cover with your project details and a summary, then six parts: introduction and scope, input data, the calculation step by step, results, summary and references, with the section, pressure, chart and 3D drawings and the notes and warnings of the analysis. It is saved as a PDF or a Word file after Analyze.