

What the module calculates
Passive, log spiral gives the passive force that the soil in front of a wall can put up when the wall is pushed into it: the force per metre of wall, its direction, and the height at which it acts. The failure surface is not a plane but a logarithmic spiral that leaves the heel of the wall and runs up to a straight line to the ground surface (Terzaghi and Peck). A rough wall pushes the soil up its back, and a curved surface follows that movement; a plane (Coulomb) overstates the resistance as wall friction grows.
Kp is the passive coefficient the module finds from the smallest trial wedge, H is the height of the wall and γ the unit weight of the soil. For an inclined back, a sloping surface, several layers, water or a surcharge the module works on the pressure along the back instead and adds the parts, as described under Choosing what to enter.
What you can describe
- A wall of height H whose back is vertical or inclined at θ (from −30° to 30°).
- A ground surface in front of the wall, level or sloping at α (from −30° to 30°).
- One to six layers of granular soil (no cohesion), each with its own unit weights, friction angle φ′ and wall friction δ′.
- A level water table at a depth you give, and a uniform surcharge on the surface.
The module gives the passive force, its inclination to the normal of the back and its height above the base, draws the pressure on the back and the critical failure surface, shows the force of the trial wedges, writes out the working and prepares a PDF or Word report.
Which module for which job
- This module: passive resistance on a rough wall, a curved failure surface, soils in layers.
- Passive, earthquake gives the passive force in an earthquake.
- Rankine and Rankine, sloping backfill give active and passive pressure on a smooth back; Coulomb uses a plane failure surface with wall friction and a battered wall; Mononobe–Okabe gives the active pressure in an earthquake; At rest gives the pressure behind a wall that does not move.
- A load on the ground behind a wall is the subject of the Surcharge loads modules.
Before you start: what you need
Have these ready from your design:
| What | Where it comes from | Notes |
|---|---|---|
| The wall height H | Your design | The vertical height of the wall over which the passive pressure acts. At least 0.1 m. |
| The inclination θ of the back | Your design | Measured from the vertical, positive toward the backfill (the soil). 0° is a vertical back; the limits are −30° and 30°. |
| The slope α of the ground surface | Survey | Positive when the ground rises away from the wall; from −30° to 30°. The size of α is limited by φ′: see Messages. |
| The soil layers | Tests or correlations | For each layer: the unit weight γ, the saturated unit weight γsat when there is water, the effective friction angle φ′ (10° to 45°; granular, c′ = 0) and the thickness, measured vertically at the back. |
| The wall friction δ′ | Judgement or tests | The friction angle between the wall and each layer, from 0° up to φ′ of that layer. The Theory tab gives δ′ ≈ φ′ for loose granular soil and φ′/2 to 2φ′/3 for dense soil. |
| The water table | Ground investigation | If there is one: its depth below the top of the wall. The module takes it level, with hydrostatic pressure and no seepage. |
| The surcharge q | Your design loading | A uniform load on the ground surface in front of the wall. Zero for none. |
Quick start in eight steps
- Open the module and choose the units
Open Passive, log spiral from the Lateral Earth Pressure family. Pick SI · kN, SI · tf or US in the header; you can change it at any time.
- Describe the wall
In Wall, enter the height H and the inclination θ of the back.
- Describe the surface
In Backfill, enter the slope α of the ground surface (0 for level ground).
- Enter the soil
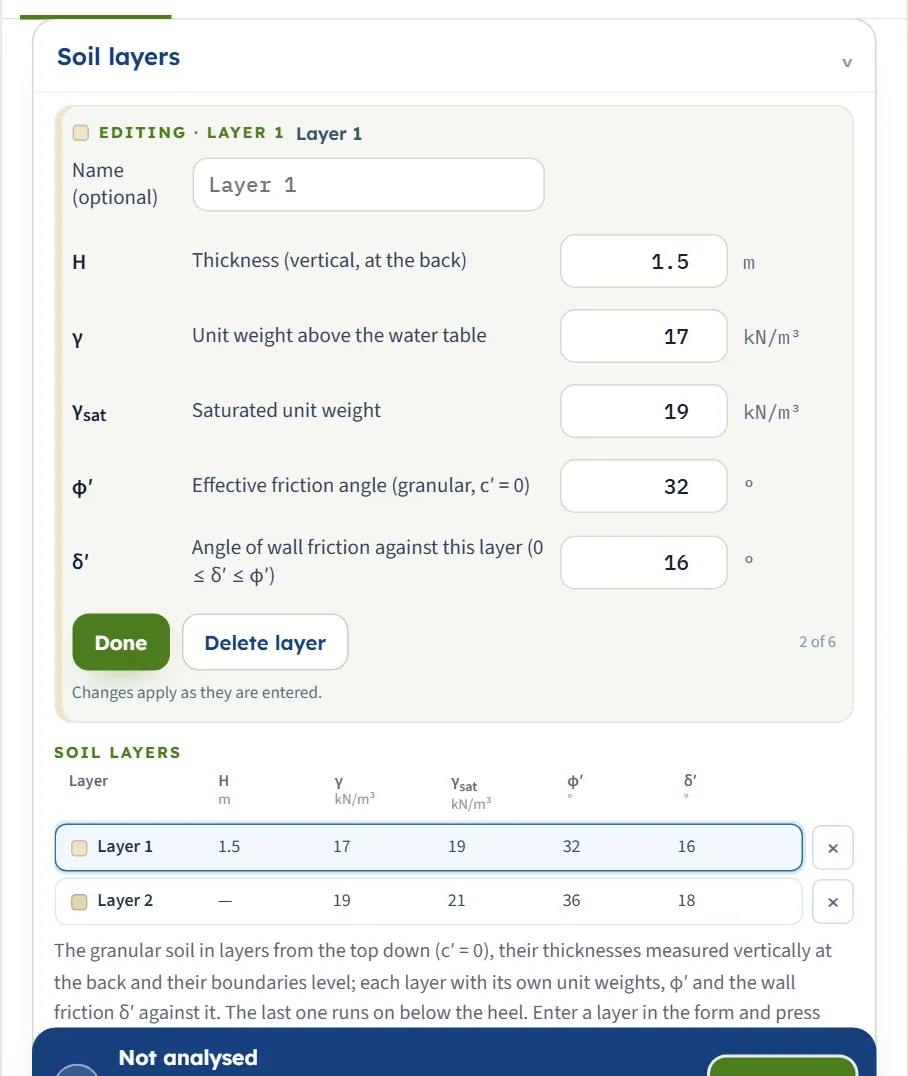
In Soil layers, press the first layer in the table to change it (the form turns to EDITING · LAYER 1), or fill the New layer form and press + Add layer for each further layer. Each layer has its unit weights, φ′ and δ′.
- Add water and a surcharge if you have them
In Groundwater choose Present and enter the depth zw. In Surcharge enter q.
- Press Analyze
Press Analyze at the foot of the Model tab. The bar reads Analysed — the earth pressure calculated and the inputs lock.
- Read the answer
The Results tab gives the passive force, its direction and its height above the base. The Pressure view draws the pressure on the back and the critical failure surface.
- Take the working and the report
The Calculations tab shows every step with your numbers. The Report tab saves a PDF or a Word file.
The screen: four views of the wall
The layout is the one every GeoTerva module shares, described in the workspace guide. The drawing on the left has four views, chosen with the buttons above it; the tabs on the right hold the model and the answers.
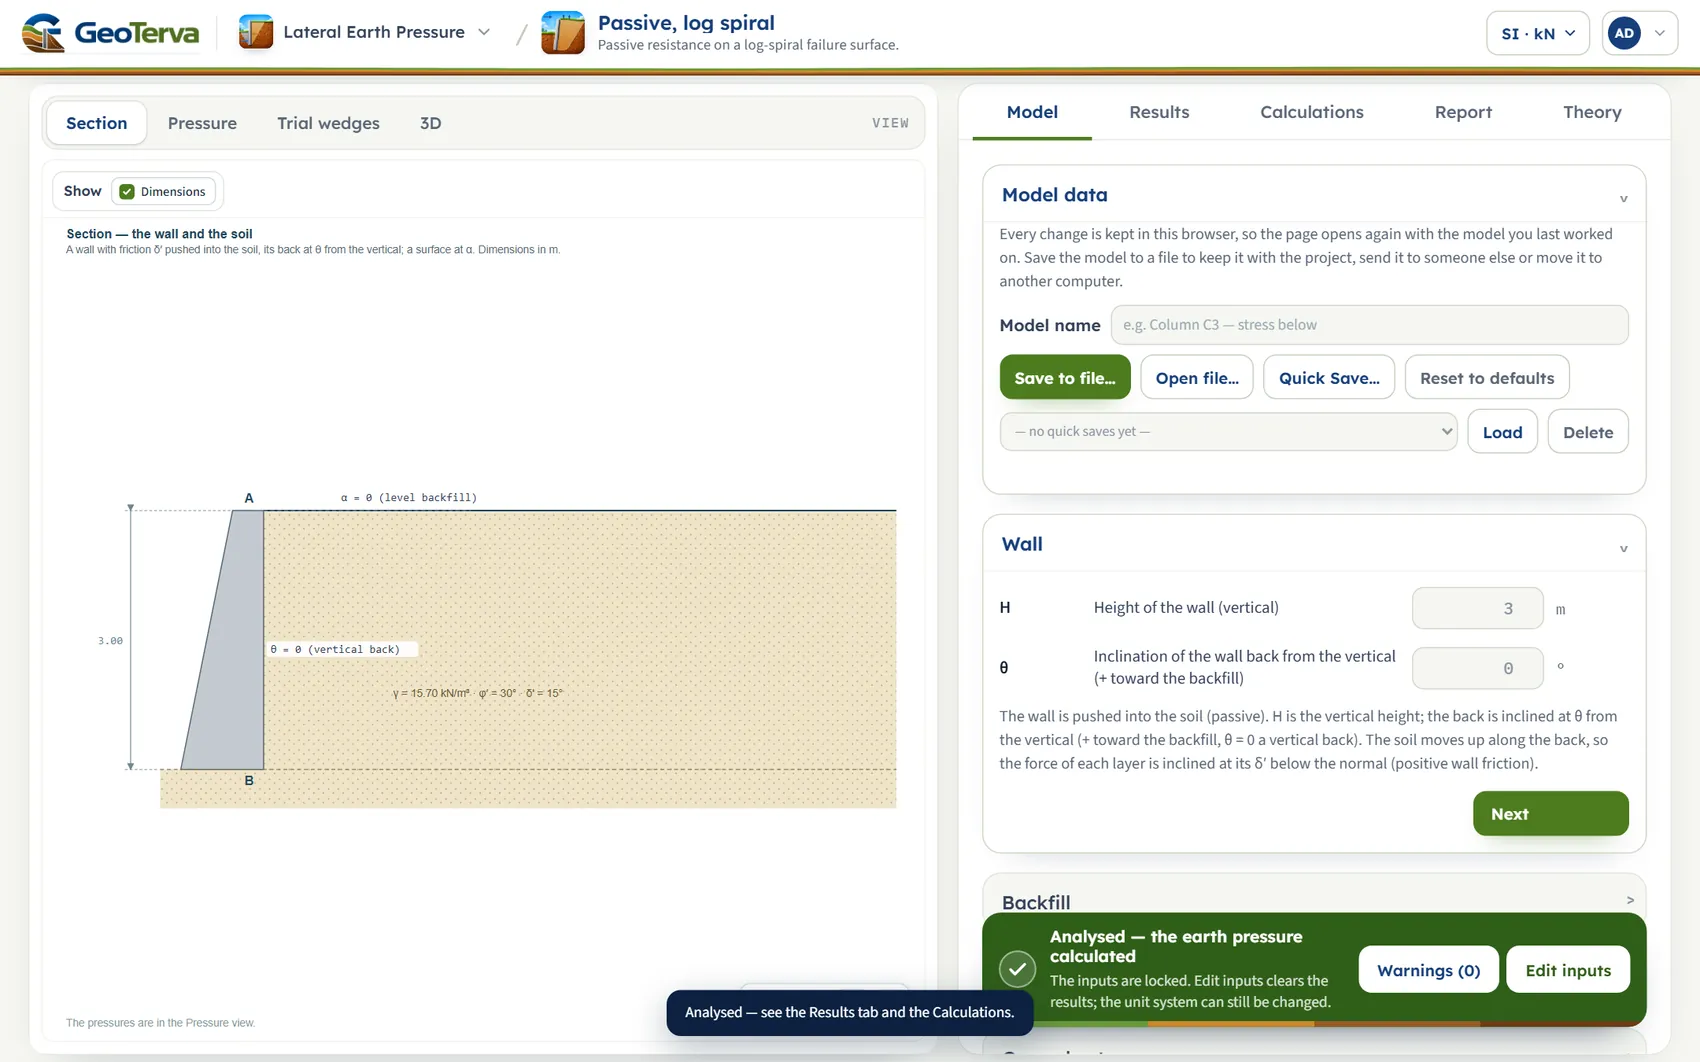
- Section is a section through the wall and the soil: the wall with its back at θ, the ground surface at α, the layers, the water table and the surcharge, and the height H. It shows the geometry only and follows the inputs as you type.
- Pressure shows, after Analyze, the passive pressure along the back, the water pressure on it, the resultant force with its inclination, its horizontal and vertical components, and the critical failure surface.
- Trial wedges plots the force of the log-spiral trial wedges against the depth of point C; the smallest is the passive force and is marked. It is drawn for one soil, a vertical back and a level surface without water or surcharge.
- 3D shows a length of the wall with the soil and, after Analyze, the force as an arrow.
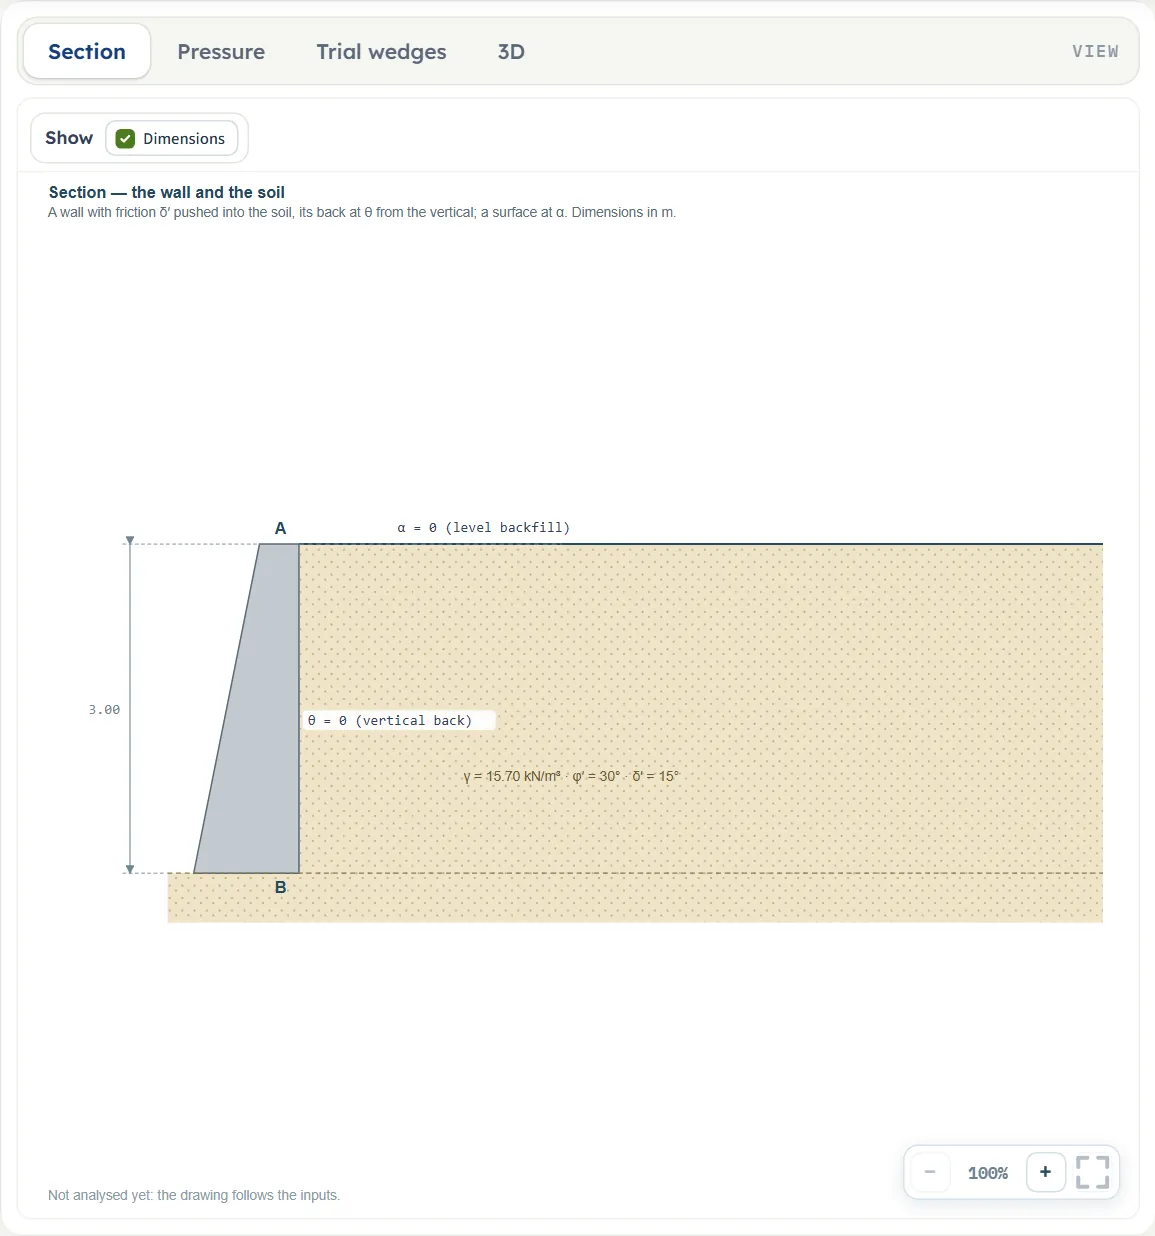
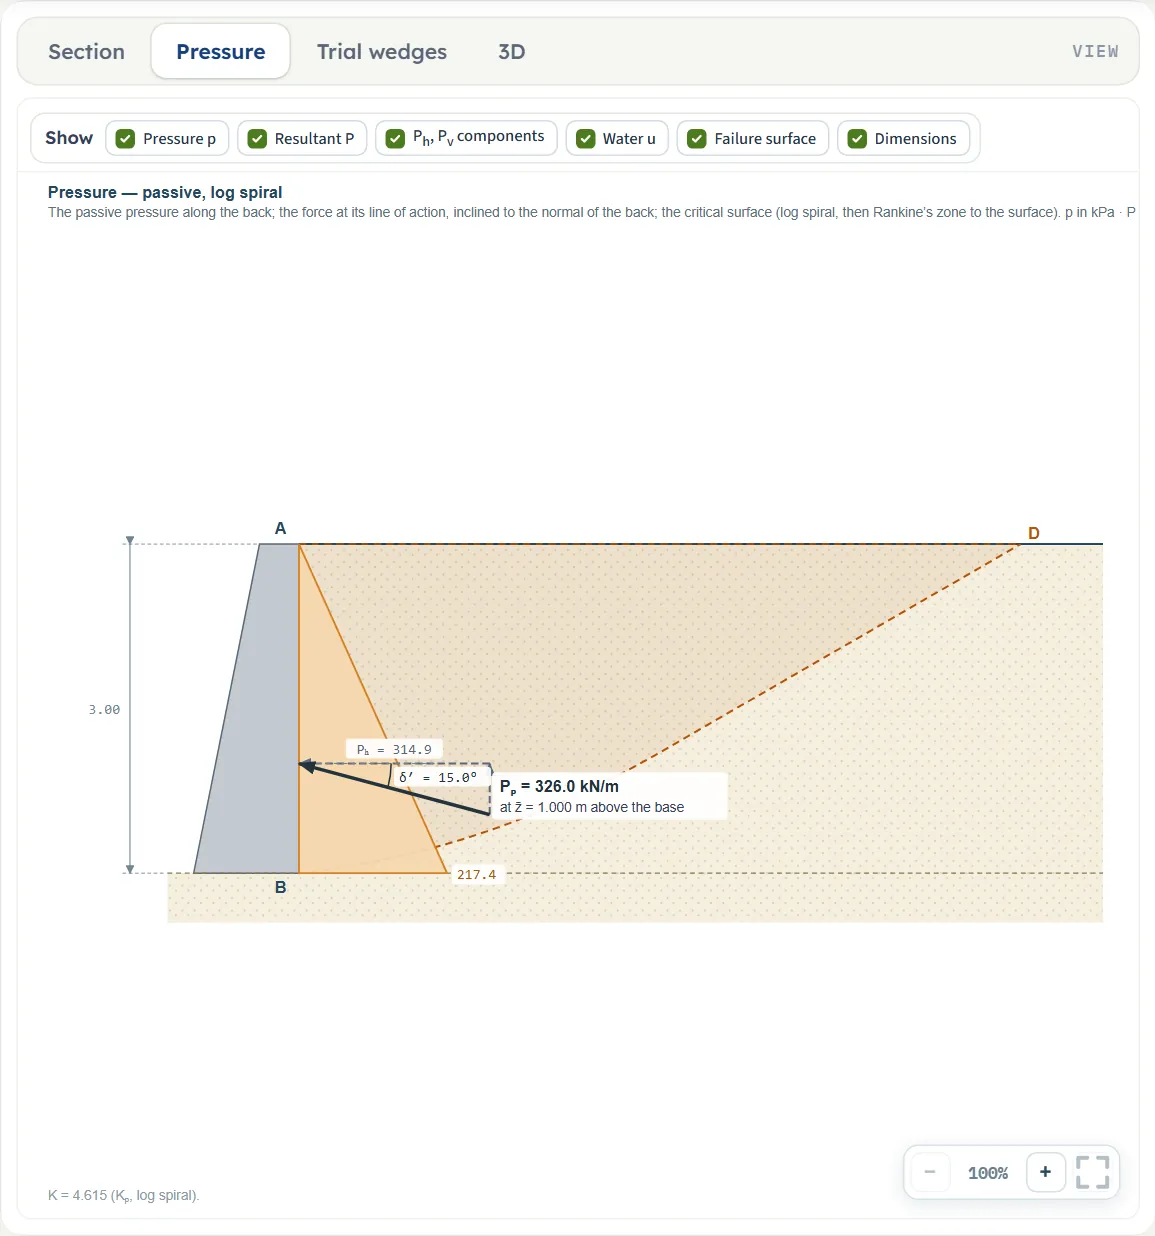
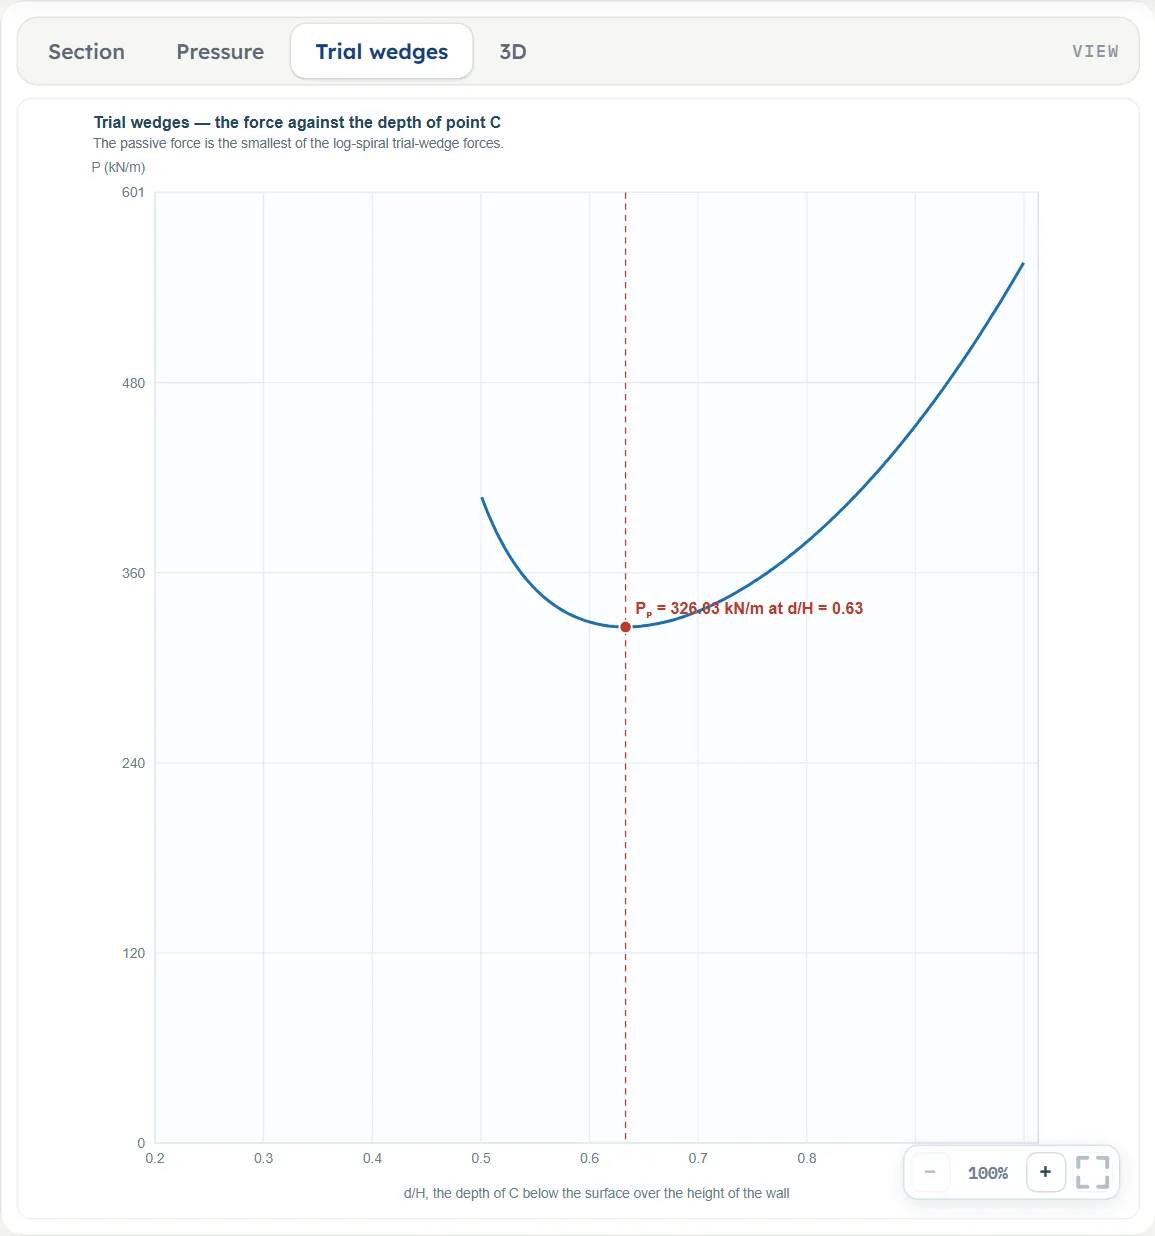
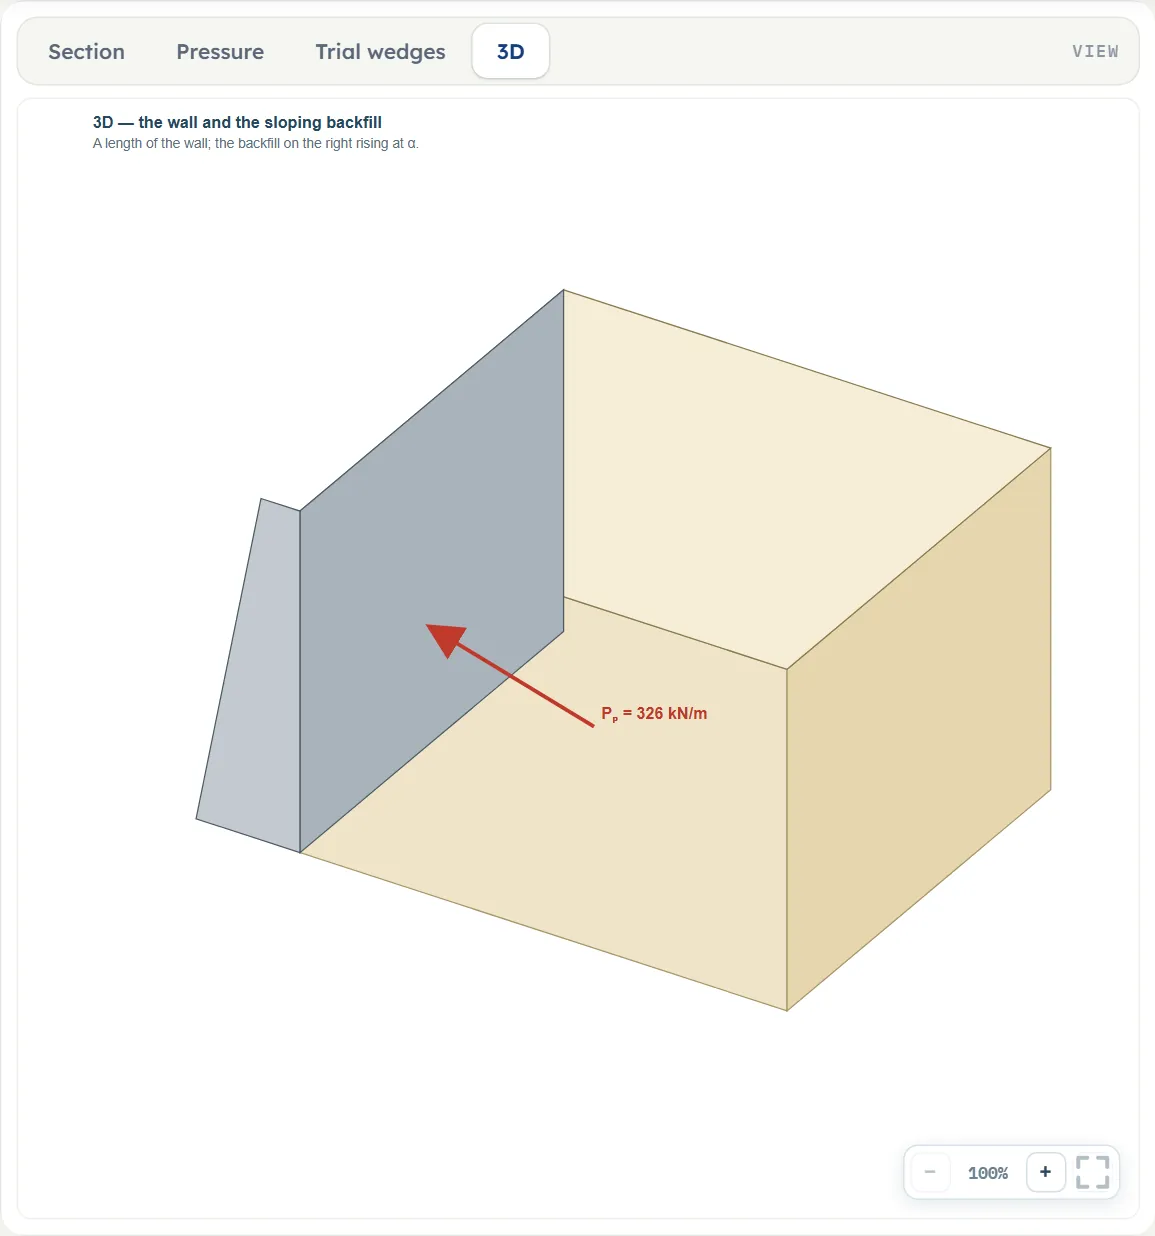
Until you press Analyze the Pressure view says “The pressures and the resultant appear after Analyze”, the Trial wedges view says “The chart appears after Analyze” and the 3D view says “The force appears after Analyze”.
The Show chips
Above the drawing a Show bar switches parts of the picture on and off. The Section view has Dimensions. The Pressure view has six: Pressure p, Resultant P, Ph, Pv components, Water u, Failure surface and Dimensions. The Trial wedges and 3D views have no chips.
Zoom
At the lower right of the drawing, + enlarges it (100%, 135%, 182%, 246%, 332%), − reduces it (it stops at 100%), and the third button fits the whole drawing to the pane again. The reading in the middle shows the zoom; the mouse wheel zooms too, and dragging pans a zoomed drawing.
Entering the model, section by section
The Model tab has a Model data section and five input sections: Wall, Backfill, Soil layers, Groundwater and Surcharge. Click a title to open or close a section; Next and Back at the foot of a section walk you through them, and Analyze waits at the foot of the tab. Where a unit is shown twice or three times, such as m · ft, the units are those of SI · kN, SI · tf and US in turn, and equal ones are merged. Defaults are given in SI; in SI · tf the unit weight of the example reads 1.60095 t/m³, and in US the wall reads 9.84252 ft and the unit weight 99.9443 pcf for the same wall and soil.
Model data
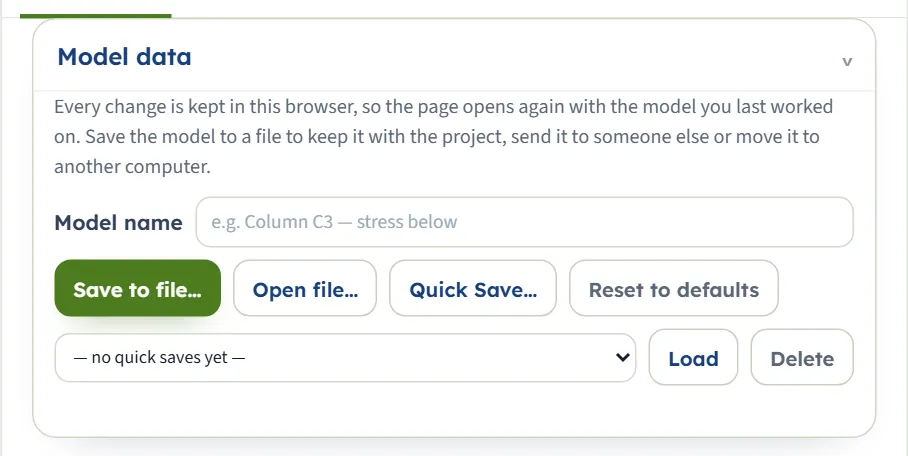
At the top of the tab you can name the model and keep it. Save to file… and Open file… keep the model in a file with the project. Quick Save… asks for a name and lists the version in the box below; choose it there and press Load to come back to it, or Delete to remove it. Reset to defaults puts the example back. Every change is also kept in this browser, so the page opens again with the model you last worked on, analysed or not.
Wall
Two numbers: the height and the inclination of the back.
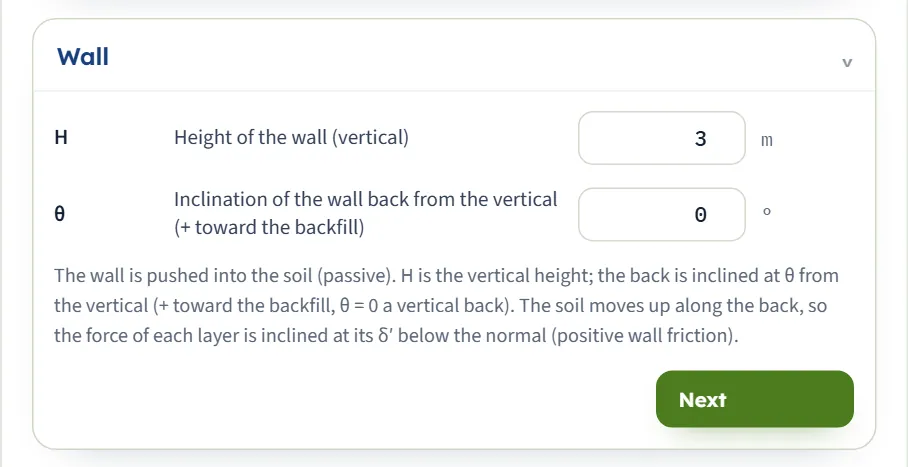
| Field | Symbol | Unit | Default |
|---|---|---|---|
| Height of the wall (vertical) The vertical height of the wall. At least 0.1 m; a blank or smaller box stops the analysis. | H | m · ft | 3 |
| Inclination of the wall back from the vertical (+ toward the backfill) Positive toward the backfill (the soil), negative when the back leans away from it. From −30° to 30°; 0° is a vertical back. | θ | ° | 0 |
Backfill
One number: the slope of the ground surface in front of the wall.
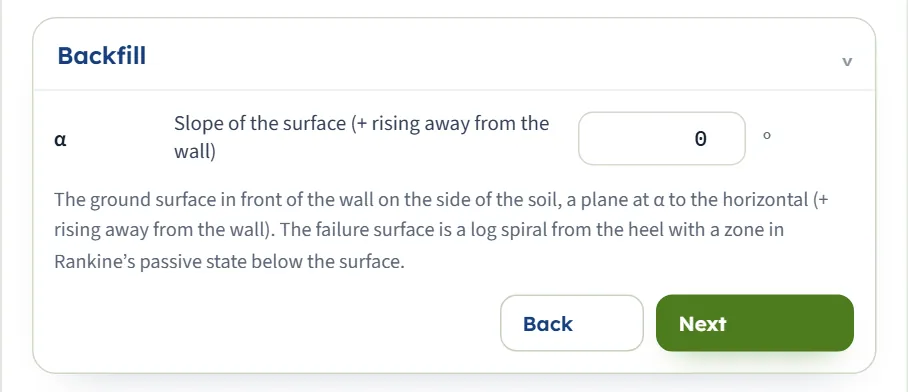
| Field | Symbol | Unit | Default |
|---|---|---|---|
| Slope of the surface (+ rising away from the wall) Positive when the surface rises away from the wall. From −30° to 30°. It must be smaller than φ′ in size, and a falling surface also needs φ′ + |α| ≤ 50°: see Messages. | α | ° | 0 |
Soil layers
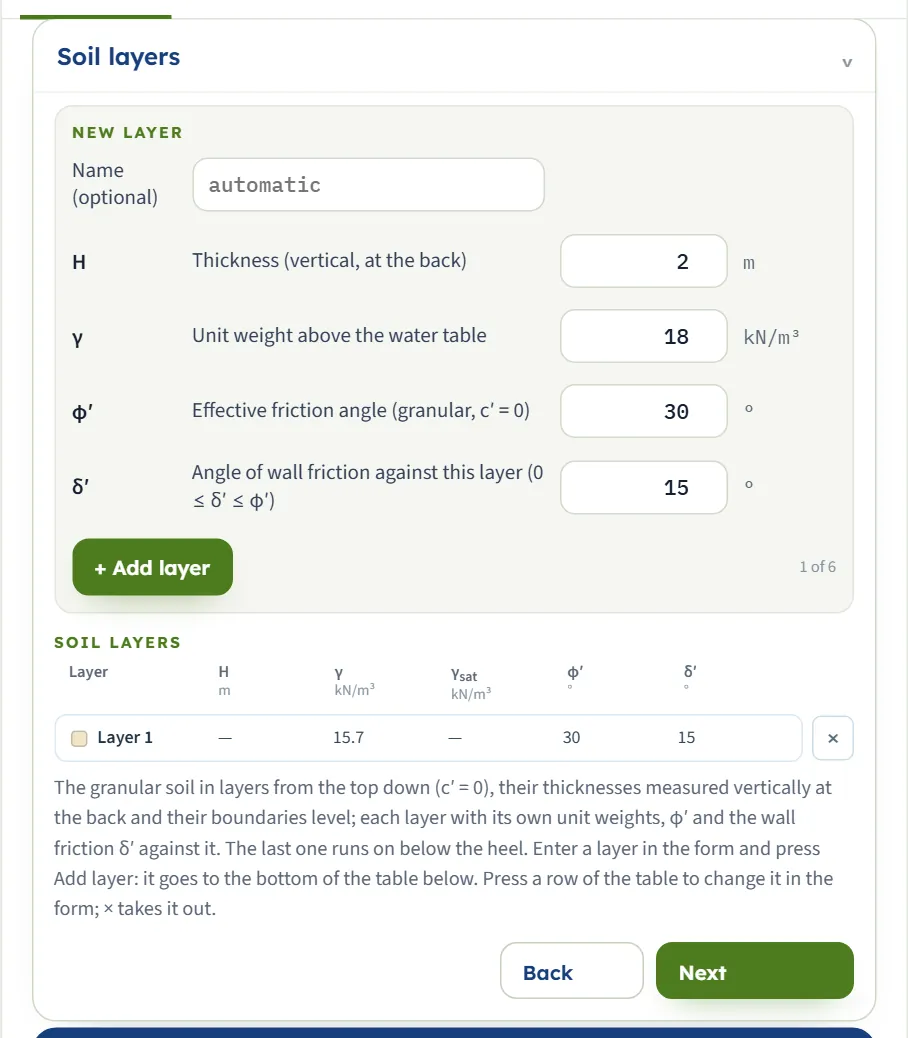
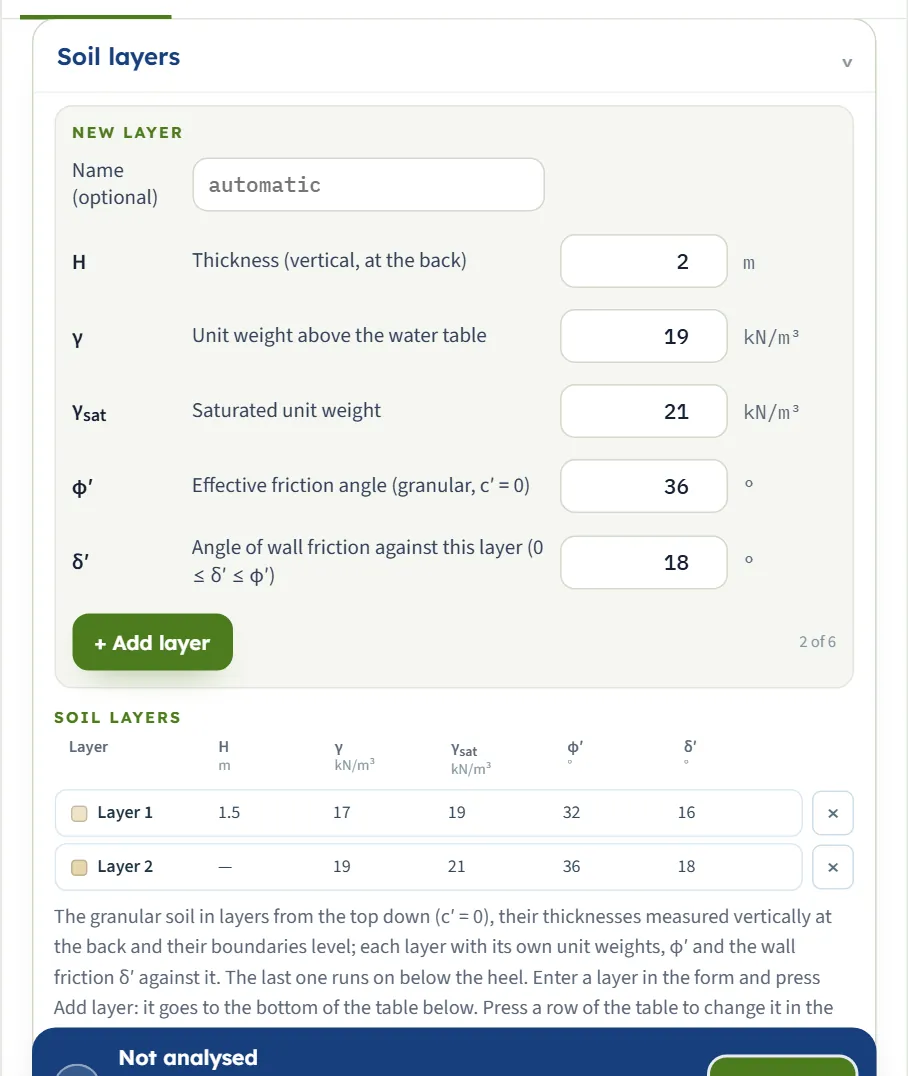
A New layer form on top, a table of the layers below it. The first layer is already in the table. To add a layer, fill the form and press + Add layer: it goes to the bottom of the table. To change a layer, press its row: the form turns to EDITING · LAYER n, changes apply as you type, and Done closes it; Delete layer and the × at the end of a row remove a layer (a single layer cannot be removed). Up to six layers are allowed. The layers run from the top of the wall down; every layer has the fields below, and the table lists them with their units.
| Field | Symbol | Unit | Default |
|---|---|---|---|
| Name (optional) Shown on the drawing and in the tables; leave it blank for “Layer 1”, “Layer 2” and so on. | — | — | automatic |
| Thickness (vertical, at the back) Measured vertically at the back of the wall from its top; the layer boundaries are taken level. At least 0.01 m. The last layer has no thickness: it runs on below the heel, and its thickness shows as — in the table. | H | m · ft | 2 |
| Unit weight above the water table The unit weight of the layer. At least 1. | γ | kN/m³ · t/m³ · pcf | 15.7 |
| Saturated unit weight The weight of the layer below the water table. At least 1, and above that of water (9.81 kN/m³) when the water table is present. Shown when the water table is present. | γsat | kN/m³ · t/m³ · pcf | 19 |
| Effective friction angle (granular, c′ = 0) From 10° to 45°. | φ′ | ° | 30 |
| Angle of wall friction against this layer (0 ≤ δ′ ≤ φ′) From 0° up to φ′ of the same layer. The force of the soil on the wall is inclined at δ′ to the normal, turned upward. | δ′ | ° | 15 |
Groundwater
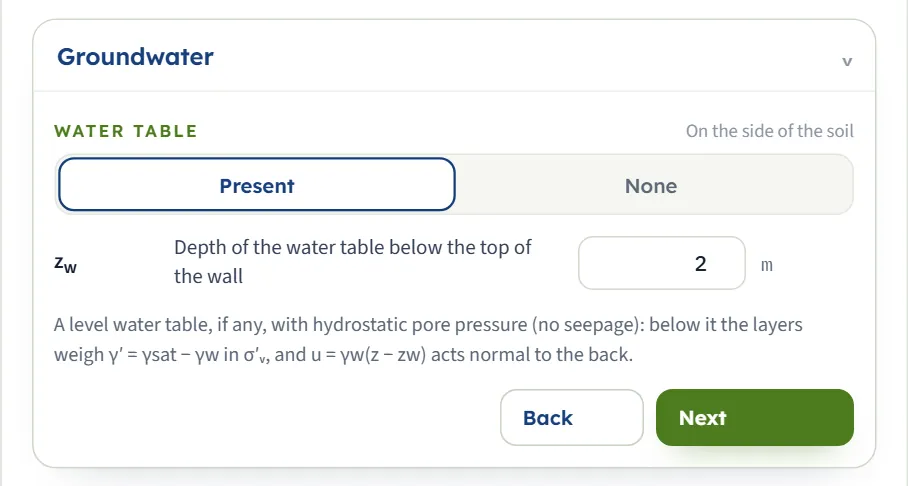
Two buttons choose Present or None. With water present the depth zw appears, and each layer asks for its saturated unit weight. Below the table the layers weigh γsat − γw in the effective vertical stress, and the water pressure u = γw (z − zw) acts normal to the back and is added to the force; γw is 9.81 kN/m³.
| Field | Symbol | Unit | Default |
|---|---|---|---|
| Water table Choose Present or None. It is on the side of the soil. | — | — | None |
| Depth of the water table below the top of the wall At least 0. A table deeper than the wall has no effect on the pressure on it. Shown when the water table is present. | zw | m · ft | 2 |
Surcharge
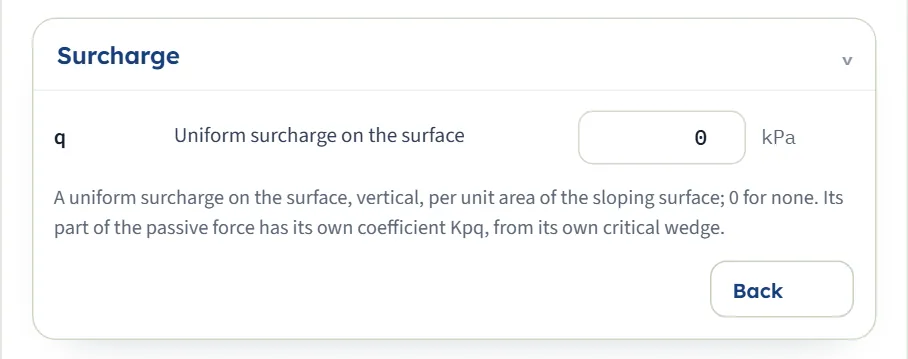
One number: a uniform load on the surface. It is taken as vertical, per unit area of the sloping surface, and its part of the passive force has its own coefficient Kpq from its own critical wedge.
| Field | Symbol | Unit | Default |
|---|---|---|---|
| Uniform surcharge on the surface Vertical, per unit area of the sloping surface. Zero or more; zero for none. | q | kPa · t/m² · ksf | 0 |
How the passive force is found
There is nothing to choose between methods: the module always uses the critical log-spiral surface. What differs is how much of your model it can use in the simple form, and what it shows for comparison.
One soil, a vertical back, a level surface
With one soil, θ = 0, α = 0, no water and no surcharge, the module runs the trial wedges of Terzaghi and Peck. A trial wedge is bounded by the spiral BC from the heel B and the zone ACD in Rankine’s passive state; moments about the centre of the spiral give the force of the trial wedge, and the passive force is the smallest of them. Then Pp = ½ γ H² Kp, acting H/3 above the base and inclined at δ′ to the normal of the wall. With δ′ = 0 the spiral flattens to a plane and the result is Rankine’s, Kp = tan²(45° + φ′/2).
In this form the module also lists Kp by other solutions for the same wall: Lancellotta (a lower bound), Shields and Tolunay (the method of slices), Zhu and Qian (for φ′ from 30° to 45°), Coulomb (plane surface) and Rankine (δ′ = 0). They are for comparison; the passive force of the module is the log spiral.
Anything more: the general form
When there is an inclined back, a sloping surface, more than one layer, water or a surcharge, the module generalises the wedge. It finds two coefficients for each layer, Kpγ for the weight of the soil and Kpq for what lies above the layer, each from its own critical wedge, and takes the smaller of the log spiral and Coulomb’s plane for each. Then it builds the pressure along the back layer by layer from the effective vertical stress, adds the water pressure, and sums the force:
The force of each layer is the area of its pressure diagram along the back, Pi; its normal part is Ni = Pi cos δ′ and its part along the back Ti = Pi sin δ′, up the back. The total is Pp = √(N² + T²) at an angle tan⁻¹(T/N) to the normal, and the line of action comes from the moment of N about the base. The Calculations tab writes out each of these steps with your numbers. The wedge shown in the Pressure view is that of the layer at the heel.
What the module says about the generalised form
- The layers are taken with level boundaries, their thicknesses measured vertically at the back, and the water table is level with hydrostatic pressure and no seepage.
- For one soil it reduces to the classic wedge; where the wall friction equals the inclination of Rankine’s stress on the back it gives Rankine’s passive force of the slope.
- A back inclined within ±30° and a rising or falling surface are covered. For a falling surface the limit is φ′ + |α| ≤ 50°.
How to choose δ′
- δ′ is a property of the wall face and the soil, not a calculation result. The module accepts any value from 0° to φ′ of the layer.
- The Theory tab gives δ′ ≈ φ′ for loose granular soil and φ′/2 to 2φ′/3 for dense soil; the curvature of the failure surface matters when δ′ is above φ′/2, and the results table shows how much the answer changes: see How each input changes the answer.
- δ′ = 0 gives Rankine’s value, the lowest passive force for the same soil.
Analyze and read the results
Press Analyze. The bar changes to Analysed — the earth pressure calculated and says “The inputs are locked. Edit inputs clears the results; the unit system can still be changed.” It also carries a Warnings (0) or Notes (n) button and Edit inputs. The Results tab shows the cards; the Pressure view now carries the pressure, the force and the failure surface.
One soil, vertical back, level surface
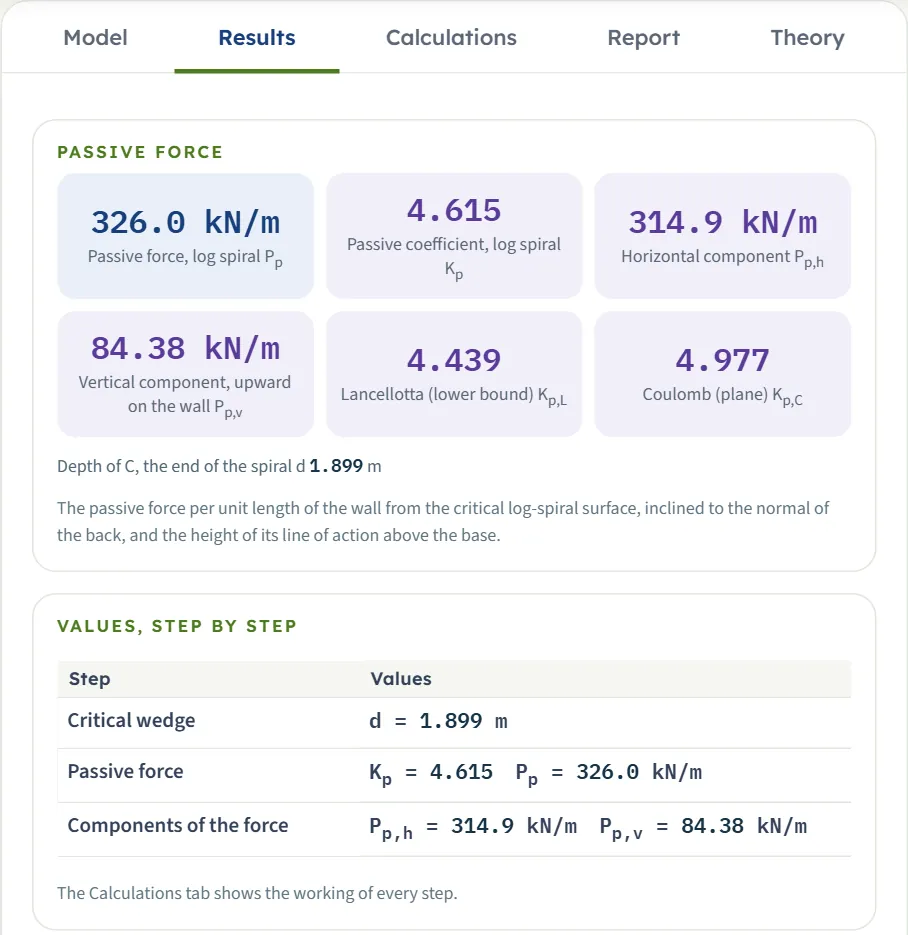
| Card | Symbol | What it is | The example |
|---|---|---|---|
| Passive force, log spiral | Pp | The resultant per unit length of wall, in kN/m (tf/m or kip/ft in the other systems). | 326.0 kN/m |
| Passive coefficient, log spiral | Kp | The coefficient of the critical wedge. | 4.615 |
| Horizontal component | Pp,h | Pp cos δ′, horizontal, into the wall. | 314.9 kN/m |
| Vertical component | Pp,v | Pp sin δ′, upward on the wall. | 84.38 kN/m |
| Lancellotta (lower bound) | Kp,L | The coefficient by Lancellotta, for comparison. | 4.439 |
| Coulomb (plane) | Kp,C | The coefficient for a plane surface, for comparison; shown when it has a finite value. | 4.977 |
Under the cards a line gives the depth of point C, the end of the spiral, then a table of Values, step by step, and a table of Kp by each solution with the passive force each would give.
Anything more
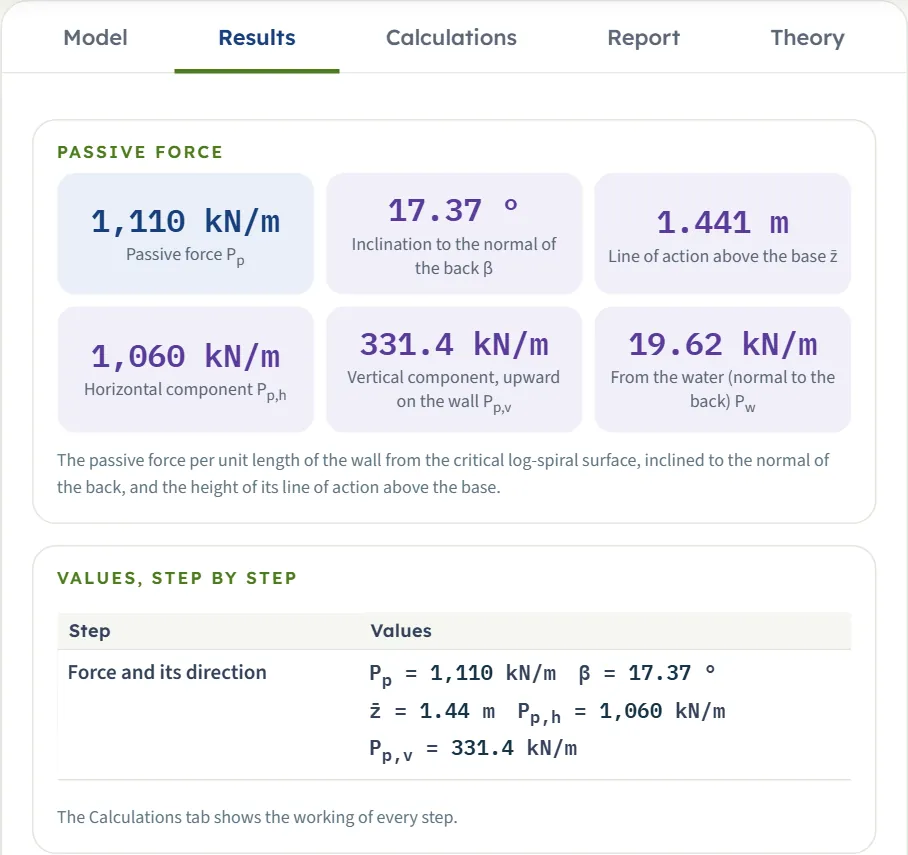
For an inclined back, a sloping surface, layers, water or a surcharge the cards change: Passive force Pp, Inclination to the normal of the back β, Line of action above the base z̄, the Horizontal component and the Vertical component; with a single layer also the coefficients Passive coefficient of the soil weight Kpγ and Passive coefficient of a surcharge Kpq; with water, From the water (normal to the back) Pw. Below them are tables of the passive coefficients of the layers, the stresses on the back and the force of each layer.
Using the numbers
- Pp is the force of the soil on the wall per unit length of wall. Its direction is inclined at δ′ (or β in the general form) to the normal of the back, turned upward: the wall pushes the soil up and its friction holds it down, so the force of the soil on the wall is inclined at δ′ to the normal, turned upward.
- The force acts at the height shown above the base: H/3 for one soil with a vertical back and a level surface without water or surcharge.
- In the general form the water pressure Pw is part of the total.
- Changing the unit system after Analyze re-states the cards, the drawing and the report without a new run. Edit inputs unlocks the model and clears the results.
The Calculations tab, the report and the Theory tab
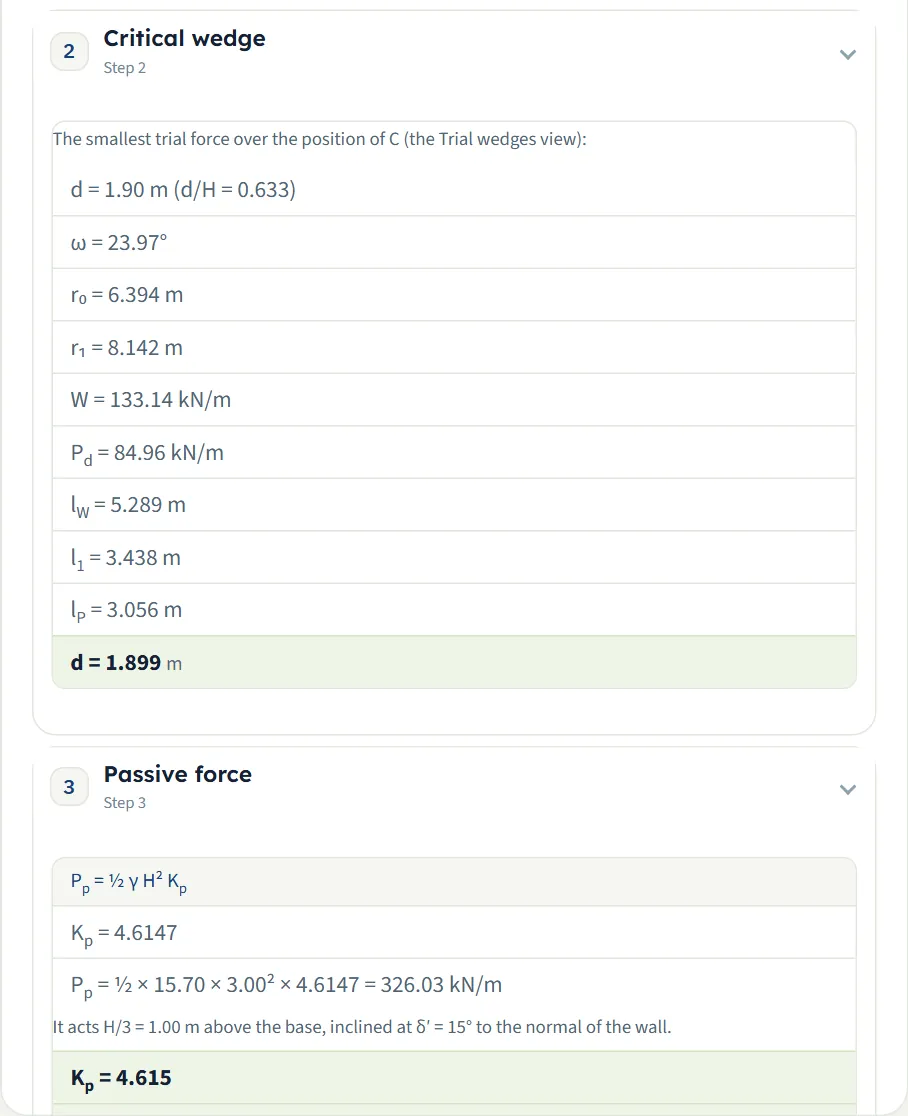
The Calculations tab opens with Given and what is sought, then numbers the steps. For one soil with a vertical back and a level surface they are Trial wedge, Critical wedge (the position of point C and the spiral’s dimensions: d, ω, r0, r1, W, Pd and the lever arms), Passive force, Components of the force, and Other solutions with the table of coefficients; the Answer closes the tab. For the general form the steps are Log-spiral wedge, Passive coefficients of each layer, Stresses on the back, Force and its direction and Critical surface. Before Analyze the tab asks you to press Analyze.
The report
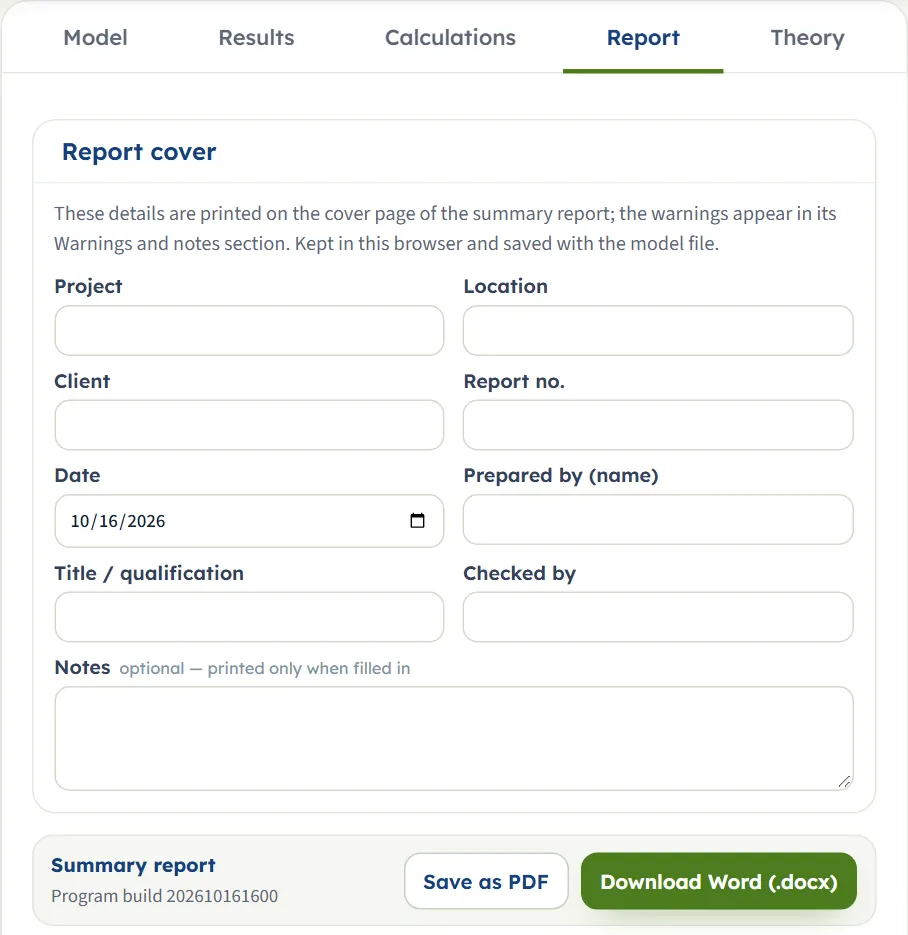
In the Report tab fill in the cover: project, location, client, report number, date, prepared by, title or qualification, checked by, and optional notes. The details are kept in this browser and saved with the model file. Save as PDF and Download Word (.docx) make the report; the preview below the buttons is the report itself.
The report has a summary cover and six parts: 1 Introduction and scope, 2 Input data, 3 Calculation (the steps of the Calculations tab), 4 Results, 5 Summary and 6 References. It carries the Section, Pressure, Trial wedges and 3D drawings, states the units with their conversion constants, and lists the notes of the analysis.
The Theory tab
The Theory tab has eight sections: Wall friction and the failure surface; The logarithmic spiral; The log-spiral trial wedge; Coefficient of passive pressure; Caquot and Kerisel; Inclined back, sloping surface, layers; Worked example; and References.
Worked examples
The module’s own example
The module opens on this example, so you can follow the numbers on your own screen.
| Section | Input | Value |
|---|---|---|
| Wall | Height, inclination | H = 3 m, θ = 0° |
| Backfill | Slope | α = 0° |
| Soil layers | One layer | γ = 15.7 kN/m³, φ′ = 30°, δ′ = 15° |
| Groundwater, Surcharge | — | None, q = 0 |
The Calculations tab gives the critical wedge at d = 1.899 m below the surface (d/H = 0.633, ω = 23.97°), and then
A hand check: ½ × 15.70 × 9 = 70.65 kN/m, and 70.65 × 4.6147 = 326.0. The force acts H/3 = 1.00 m above the base, inclined at 15° to the normal, so
| Solution | Kp | Pp (kN/m) |
|---|---|---|
| Log spiral | 4.615 | 326.0 |
| Lancellotta (lower bound) | 4.439 | 313.6 |
| Shields and Tolunay | 4.280 | 302.4 |
| Zhu and Qian | 4.575 | 323.2 |
| Coulomb (plane) | 4.977 | 351.6 |
| Rankine (δ′ = 0) | 3.000 | 212.0 |
The plane overstates the resistance by about 8 % here, and Rankine’s smooth wall understates it by about a third. Setting δ′ = 0 in the module gives Kp = 3.000 = tan²60° and Pp = 212.0 kN/m, the last row.
The same example in other units
Switch to SI · tf: the module gives Pp = 33.25 tf/m, with the same Kp = 4.615. Switch to US: Pp = 22.34 kip/ft with Kp = 4.615. They are the same wall and soil in other units (326.03 kN/m ÷ 9.80665 = 33.25 tf/m).
A layered example with water and a surcharge
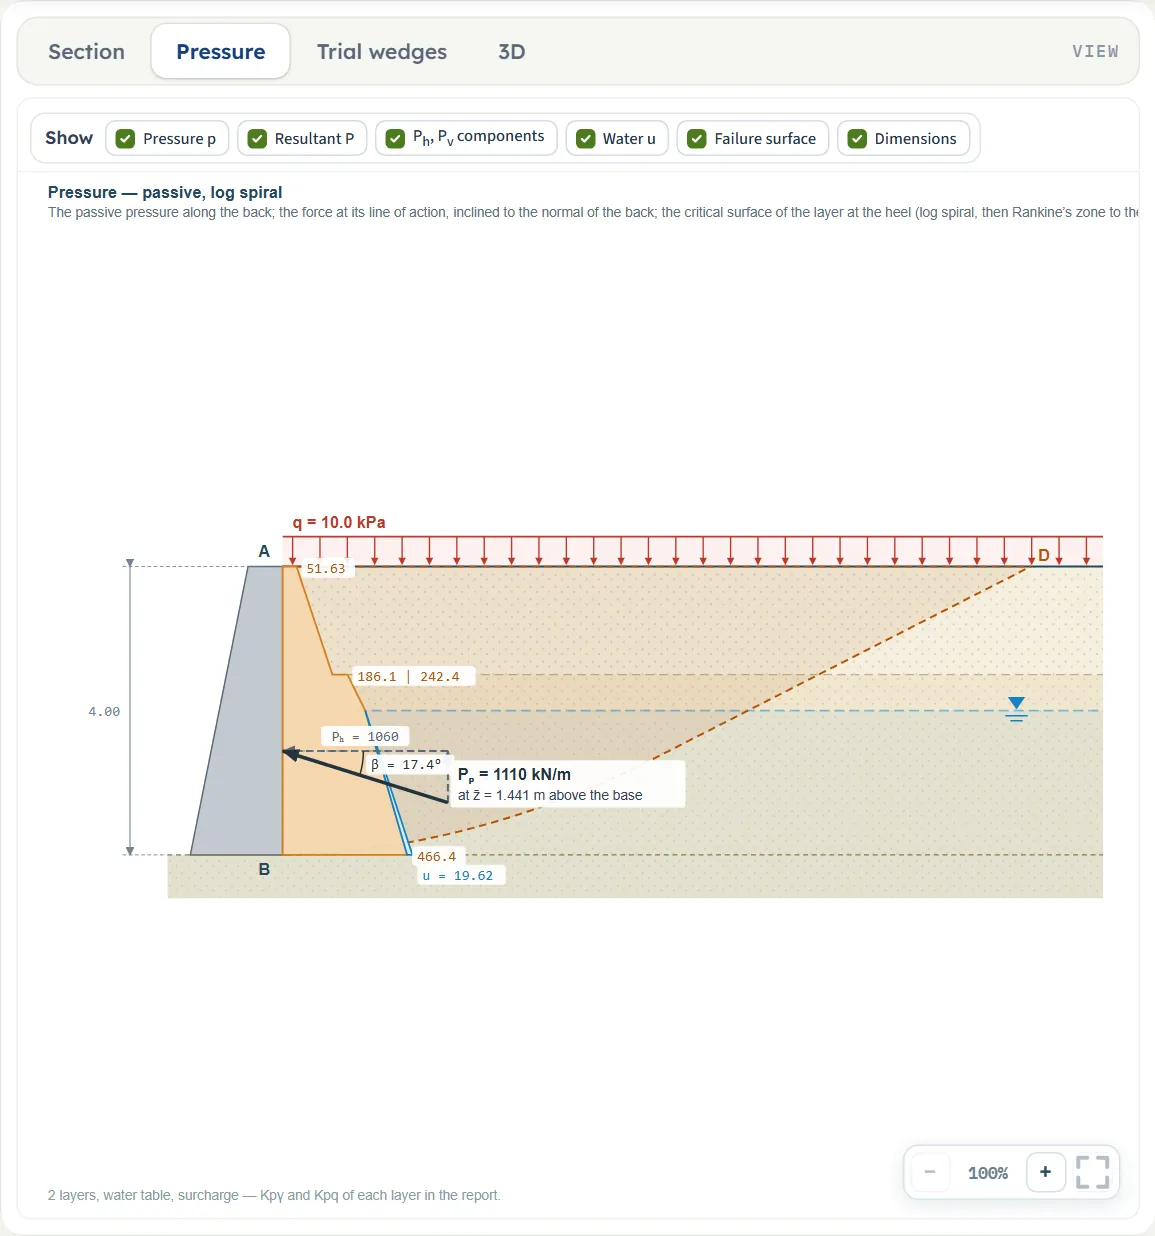
A 4 m wall with a vertical back and a level surface, a surcharge of 10 kPa, two layers and the water table 2 m below the top of the wall:
| Layer | H (m) | γ | γsat | φ′, δ′ |
|---|---|---|---|---|
| Layer 1 | 1.5 | 17 | 19 | 32°, 16° |
| Layer 2 (to the heel) | — | 19 | 21 | 36°, 18° |
Press Analyze. The module gives for the layers Kpγ = 5.2732 and Kpq = 5.1628 (Layer 1), 7.0264 and 6.8282 (Layer 2). The pressure on the back is built from these: at the top of Layer 1, σ′v = q = 10 kPa and σ′p = 5.1628 × 10 = 51.63 kPa; at its base σ′v = 10 + 17 × 1.5 = 35.5 kPa and σ′p = 5.1628 × 10 + 5.2732 × 25.5 = 186.1 kPa; at the top of Layer 2, 6.8282 × 35.5 = 242.4 kPa; at the base, 466.4 kPa, with the water pressure 19.62 kPa there. The force of each layer is the area of its pressure diagram along the back: P1 = 178.3 kN/m for Layer 1 and P2 = 913.4 kN/m for Layer 2. Their normal parts are 178.3 cos 16° = 171.4 and 913.4 cos 18° = 868.7 kN/m, and the water adds 19.62, so N = 171.4 + 868.7 + 19.62 = 1059.7 kN/m. Their parts along the back are 178.3 sin 16° = 49.14 and 913.4 sin 18° = 282.3, so T = 49.14 + 282.3 = 331.4 kN/m, up the back. Then
The module gives Pp,h = 1060 kN/m and Pp,v = 331.4 kN/m, and the water 19.62 kN/m (= ½ × 9.81 × 2²).
How each input changes the answer
Each row changes one thing in the example (H = 3 m, γ = 15.7 kN/m³, φ′ = 30°, δ′ = 15°, level surface, vertical back) and runs the module again; for the first rows δ′ follows φ′/2. The numbers are the ones the module gives, so you can reproduce any row. In the rows from θ down, the module is in its general form and the coefficient is Kpγ.
| Change | Kp or Kpγ | Pp (kN/m) | Pp,h · Pp,v |
|---|---|---|---|
| The example: φ′ = 30°, δ′ = 15° | 4.615 | 326.0 | 314.9 · 84.38 |
| φ′ = 25°, δ′ = 12.5° | 3.388 | 239.3 | 233.7 · 51.80 |
| φ′ = 35°, δ′ = 17.5° | 6.522 | 460.8 | 439.4 · 138.6 |
| φ′ = 40°, δ′ = 20° | 9.672 | 683.3 | 642.1 · 233.7 |
| δ′ = 0° | 3.000 | 212.0 | 212.0 · 0 |
| δ′ = 10° | 4.020 | 284.0 | 279.7 · 49.32 |
| δ′ = 20° | 5.260 | 371.6 | 349.2 · 127.1 |
| δ′ = 30° (equal to φ′) | 6.677 | 471.8 | 408.6 · 235.9 |
| H = 6 m | 4.615 | 1,304 | 1,260 · 337.5 |
| γ = 18 kN/m³ | 4.615 | 373.8 | 361.1 · 96.75 |
| θ = +10° (back leans into the soil) | 3.728 | 263.4 | 262.4 · 22.96 |
| θ = −10° (back leans away) | 6.004 | 424.2 | 384.4 · 179.3 |
| α = +10° (rising) | 6.402 | 452.3 | 436.9 · 117.1 |
| α = −10° (falling) | 3.135 | 221.5 | 213.9 · 57.33 |
| q = 10 kPa | 4.615 | 462.0 | 446.2 · 119.6 |
| Water table at 1 m | 4.615 | 284.9 | 276.5 · 68.83 |
What the rows show:
- φ′ is the strongest soil input. Kp rises from 3.388 at 25° to 9.672 at 40°, with δ′ = φ′/2 throughout.
- Wall friction raises the force a lot. From δ′ = 0 to δ′ = φ′ the force rises from 212.0 to 471.8 kN/m. At δ′ = 0 the result is Rankine’s, Kp = 3.000.
- The force follows H² and γ. Doubling the wall height multiplies the force by four ( 1,304 kN/m, with the same Kp); γ = 18 against 15.7 scales it by 18/15.7.
- The back and the surface move Kpγ the way you would expect. A back leaning into the soil or a falling surface lowers it; a back leaning away or a rising surface raises it.
- A surcharge adds to the force and lifts its line of action; with water the water pressure adds Pw and the effective weight below the table falls.
Messages: when the module stops, and notes
The module checks the numbers it needs. When one of them cannot be used it stops and nothing is calculated.
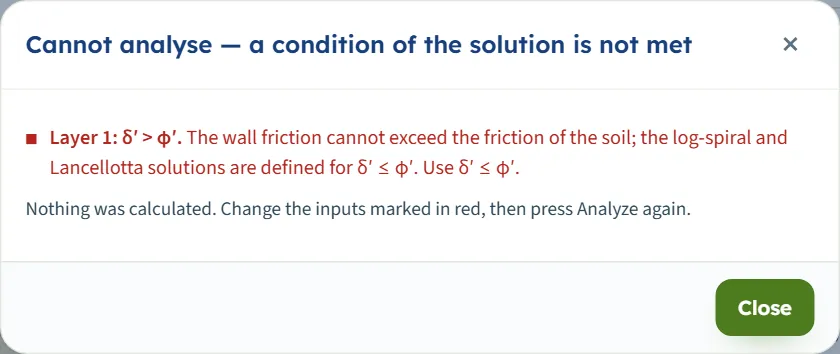
- A condition of the solution (the first table below): the bar at the foot of the Model tab turns brown and reads Cannot be analysed followed by the message, the field is marked in red, and the drawing shows a red box, “Not analysed — the drawing shows the geometry only. Why:”. Pressing Analyze opens “Cannot analyse — a condition of the solution is not met” with the message and “Nothing was calculated. Change the inputs marked in red, then press Analyze again.”
- A value outside its range (an empty or out-of-limits box): the bar stays blue and reads Not analysed, the row of the box is marked, and the message is written in italics in the drawing. Pressing Analyze opens “Cannot analyse — 1 input error” (or n input errors) with the message and a Close button.

Conditions of the solution
| Kind | When | Message and what to do |
|---|---|---|
| Stop | δ′ is above φ′ of a layer | “Layer 1: δ′ > φ′.” The wall friction cannot exceed the friction of the soil. Use δ′ ≤ φ′. |
| Stop | |α| is not below φ′ | “Layer 1: the surface is as steep as φ′.” Below the surface there is no passive Rankine state, on which the wedge is built. Keep the size of α below φ′. With φ′ = 30°, α = 25° is accepted and α = 30° stops. |
| Stop | A falling surface with φ′ + |α| above 50° | “Layer 1: a falling surface with φ′ + |α| > 50°.” For a surface falling this steeply the wedge overstates the force, so the module does not use it. Use a flatter surface or a smaller φ′. α = −25° with φ′ = 30° stops; −20° gives an answer. |
| Stop | The layers above the last reach the base | “The layers above the last one already reach the base.” The last layer would not meet the wall. Reduce the thicknesses or the number of layers. |
| Stop | Water present and γsat not above 9.81 kN/m³ | “Layer 1: the saturated unit weight … is not above that of water.” Below the water table the effective weight would be zero or negative. Enter the saturated unit weight of the soil. |
Values outside their range
A box outside its limits stops the analysis with a message that names it, for example “Height of the wall (vertical) (H) must be at least 0.1 m.”, “Effective friction angle (granular, c′ = 0) (φ′1) must be at least 10°.”, “Inclination of the wall back from the vertical (+ toward the backfill) (θ) must be at most 30°.” An empty box reads “… is missing.” The limits are in the field tables above.
Notes
Some results carry a note: the bar shows Notes (1) instead of Warnings (0), and pressing it opens “Notes and assumptions”. The notes are also listed in the report.
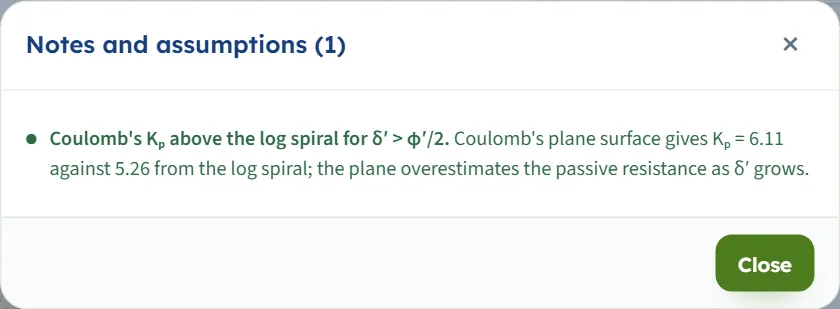
- Coulomb’s Kp above the log spiral for δ′ > φ′/2 (one soil, vertical back, level surface). For δ′ = 20° and φ′ = 30° the plane gives Kp = 6.11 against 5.26 from the log spiral, and the passive force is taken from the log spiral.
- A back leaning away from the soil with large wall friction (θ < 0 and δ′ above φ′/2). For θ < 0 and δ′ = φ′ the log spiral gives up to about 14 % more than published charts; keep δ′ moderate there. The note appears when θ < 0 and a layer has δ′ above φ′/2 (and the log spiral, not Coulomb’s plane, governs).
Good practice and common mistakes
- Pick δ′ deliberately. It changes the passive force a great deal (from 212.0 kN/m at 0° to 471.8 kN/m at 30° for the example). Run the analysis with δ′ at φ′/2 and at 2φ′/3, and use the lower force if you are unsure.
- Match the force to the movement your wall allows. The passive force is the resistance at failure; the movement needed to mobilise it is part of your design judgement, and the force you rely on may be a fraction of it.
- Check what the force is used for. Combine the passive force with the other forces on the wall in the wall calculation, with the factors your design method requires.
- Take the vertical component with care. Pp,v acts upward on the wall; whether you may count on it is a design decision.
- Check the soil near the surface. The soil in front of a wall is often disturbed, softened or removed later; the first layers carry little of the force but they are the first to go.
- Use layers for real changes. Add a layer when the soil changes, not for small variations; the thicknesses add up from the top of the wall.
- Remember the soil is granular. The module takes c′ = 0 and φ′ from 10° to 45°.
- Enter the thicknesses as measured vertically at the back, not along an inclined back.
- Save your model. The module keeps the last model in the browser, but the file from Save to file… is the record that goes with the project.
Frequently asked questions
How is the passive force on a wall calculated with a log-spiral surface?
The module takes trial wedges bounded by a log spiral from the heel of the wall and a zone in Rankine’s passive state up to the surface; moments about the centre of the spiral give the force of each, and the smallest is the passive force. For one soil, a vertical back and a level surface it is Pp = ½ γ H² Kp. For the module’s example (H = 3 m, γ = 15.7 kN/m³, φ′ = 30°, δ′ = 15°), Kp = 4.615 and Pp = 326.0 kN/m.
Why not use Coulomb’s plane for passive pressure?
A plane failure surface is a fair approximation for active pressure, but for passive pressure on a rough wall it overstates the resistance, and the more so the larger the wall friction. In the example Coulomb gives Kp = 4.977 against 4.615 from the log spiral. The module shows both and takes the log spiral.
What wall friction should I use?
Enter δ′ for the wall face and the soil, from 0° up to φ′ of the layer. The Theory tab gives φ′/2 to 2φ′/3 for dense soil and about φ′ for loose soil. The force is sensitive to it: for φ′ = 30° the example gives 212.0 kN/m at δ′ = 0°, 326.0 at 15° and 471.8 at 30°.
What happens when δ′ is zero?
The spiral flattens to a plane and the result is Rankine’s, Kp = tan²(45° + φ′/2). For φ′ = 30° that is 3.000, and the force is 212.0 kN/m for the example wall.
Can I use it with several layers, water and a surcharge?
Yes. Up to six granular layers with level boundaries, a level water table with hydrostatic pressure, and a uniform surcharge. The module works on the pressure along the back from the coefficients Kpγ and Kpq of each layer and adds the water pressure. It also takes an inclined back (−30° to 30°) and a rising or falling surface.
Why does Analyze say “the surface is as steep as φ′”?
When the surface slope reaches the friction angle, the soil below it has no passive Rankine state, on which the log-spiral wedge is built. Keep the size of α below φ′. A falling surface is also limited to φ′ + |α| ≤ 50°.
Is the force horizontal?
No. It is inclined at δ′ to the normal of the back, turned upward, because the wall pushes the soil up and its friction holds it down. The module gives the horizontal component Pp,h = Pp cos δ′ and the vertical one Pp,v = Pp sin δ′ (314.9 and 84.38 kN/m for the example).
Where does the force act on the wall?
For one soil, a vertical back and a level surface without water or surcharge, at H/3 above the base. In the general form the module gives the height of the line of action above the base: 1.441 m for the layered example of the worked examples (4 m wall, two layers, water at 2 m, surcharge 10 kPa).
Which units does it use, and what are the units of the answer?
SI · kN, SI · tf or US, switchable in the header at any time, even after Analyze. The force is in kN/m, tf/m or kip/ft, the pressure in kPa, t/m² or ksf, and the unit weight in kN/m³, t/m³ or pcf. The example gives 326.0 kN/m, 33.25 tf/m or 22.34 kip/ft.
Does the module remember my inputs?
Yes. Every change is kept in this browser, so the page opens again with the model you last worked on, analysed or not. Reset to defaults brings back the example; Save to file… and Quick Save… keep versions you name.
Can I drag the wall or the water table on the drawing?
No. The drawing follows the Model tab and has no handles. You can zoom with the + and − buttons or the mouse wheel, pan a zoomed drawing by dragging it, and fit it with the third button; each view keeps its own zoom, and the 3D view does not rotate.
What does the report contain?
A cover with your project details and a summary, then six parts: introduction and scope, input data, the calculation step by step, results, summary and references, with the Section, Pressure, Trial wedges and 3D drawings. It is saved as a PDF or a Word file.