

What the module calculates
Sheet pile in clay designs a cantilever or anchored sheet-pile wall whose soil is undrained clay, from the top of the wall down below the toe. It draws the net pressure diagram, finds by limit equilibrium the depth of embedment the wall needs, gives the maximum bending moment, and checks the steel sheet pile you give it to EN 1993-1-1 or AISC 360-22. With rows of ground anchors the same wall is an anchored wall, and the module then also gives the anchor reactions and the position of their bond zones.
The clay is analysed in total stress with its undrained shear strength cu and φ = 0, so Ka = Kp = 1. With σv the vertical stress, γ the unit weight and q a surcharge, the active and passive pressures of a layer are:
Above the dredge line only the retained clay acts on the wall, and its active pressure is taken as zero where σv − 2cu would be negative: that is the tension crack, which the module fills with water to its top unless you choose a dry crack. Below the dredge line the clay acts on both faces of the wall, and the net pressure on the wall is the difference of the two faces:
where r is the retained side and e the excavation side. Below the dredge line this is a constant: the overburden difference less 4cu. Before the embedment is looked for, the module checks that this net pressure turns toward the retained soil, which is the condition for any depth to balance the wall; see Messages.
What you can describe
- Clay layers: up to four, from the top of the wall down, each with its unit weights, its cu and a horizontal subgrade reaction kh. The last layer runs on below the toe.
- A retained height L above the dredge line, with the embedment calculated by the module or given for you to verify.
- Water: a water table on the retained side and the same level or a different level in the excavation.
- Ground anchors: none (a cantilever wall) or one to four rows, each with its depth, spacing, inclination, lengths and tendon area.
- Surcharges: up to six loads, each uniform, a strip or a point load.
- The earthquake: a pseudo-static check of the wall as designed.
- The bottom heave of the base of the excavation.
- The safety route of the embedment, the tension-crack and active-pressure options, the steel grade and section modulus, and the design code.
It draws the section, a 3D view, the net pressure, the shear force and the bending moment, writes out the working step by step, and prepares a PDF or Word report.
Which module for which wall
- The soil is clay from top to bottom: this module. Sand is not entered here; a wall in sand uses Sheet pile in sand, and sand and clay together use Anchored sheet pile on layered soil, with drained or undrained layers, up to four anchor rows and the short- and long-term scenarios.
- The pressure coefficients of a sand are explained in the Lateral earth pressure manuals; a load beside the wall other than the three kinds the module takes is worked out in the Surcharge loads manuals.
Before you start: what you need
Have these ready from your design and your ground investigation:
| What | Where from, and notes |
|---|---|
| The retained height L | Your design. Top of the wall to the dredge line, at least 0.5 m. The Theory tab gives up to about 6 m as the usual range of a cantilever wall. |
| The clay layers | Boring logs, vane or triaxial tests. Per layer, top down: thickness (not the last), moist and saturated unit weight, cu (at least 1 kPa), kh. |
| The water levels | Groundwater readings. Depth below the top of the wall behind the wall and, if different, in the excavation; or none. |
| Anchors, loads | Your design. Per anchor row: depth, spacing, inclination, free and bond length, tendon area; the surcharges behind the wall. |
| The sheet pile | The maker’s table. Yield strength (from the grade), section modulus per metre of wall, second moment of area for the displacement. |
Quick start in eight steps
- Open the module and choose the units
Open Sheet pile in clay from the Sheet-Pile Walls family. Pick SI · kN, SI · tf or US in the header; you can change it at any time.
- Enter the clay layers
In Soil layers fill the New layer form and press + Add layer, once per layer, from the top down. The last layer has no thickness: it runs on below the toe.
- Set the water and the wall
In Groundwater choose None or Present; in Wall and embedment type L and choose Calculated by the program.
- Add anchors and loads if there are any
In Ground anchor press + Add anchor for each row (none keeps the wall a cantilever); in Surcharge press + Add load for each load.
- Choose the safety, the steel and the code
In Design factors set the embedment route and the crack options; in Sheet pile the steel grade and the section modulus; in Design code EN 1993-1-1 or AISC 360-22.
- Press Analyze
Press Analyze in the bar at the foot of the Model tab. The bar reads Analysed and the model locks. The module stays on the Model tab: open Results.
- Read the answer
The Results tab gives the pressure, shear and moment diagrams, the values step by step and, last, the cards: Dtheory , Ddesign , Mmax , Wreq , the utilisation of the pile, the heave factor and the top displacement.
- Take the working and the report
The Calculations tab writes out the steps with your numbers; the Report tab saves a PDF or a Word file.
The screen: section and 3D
The layout is the one every GeoTerva module shares, described in the workspace guide. The drawing has two views, chosen with the buttons above it:
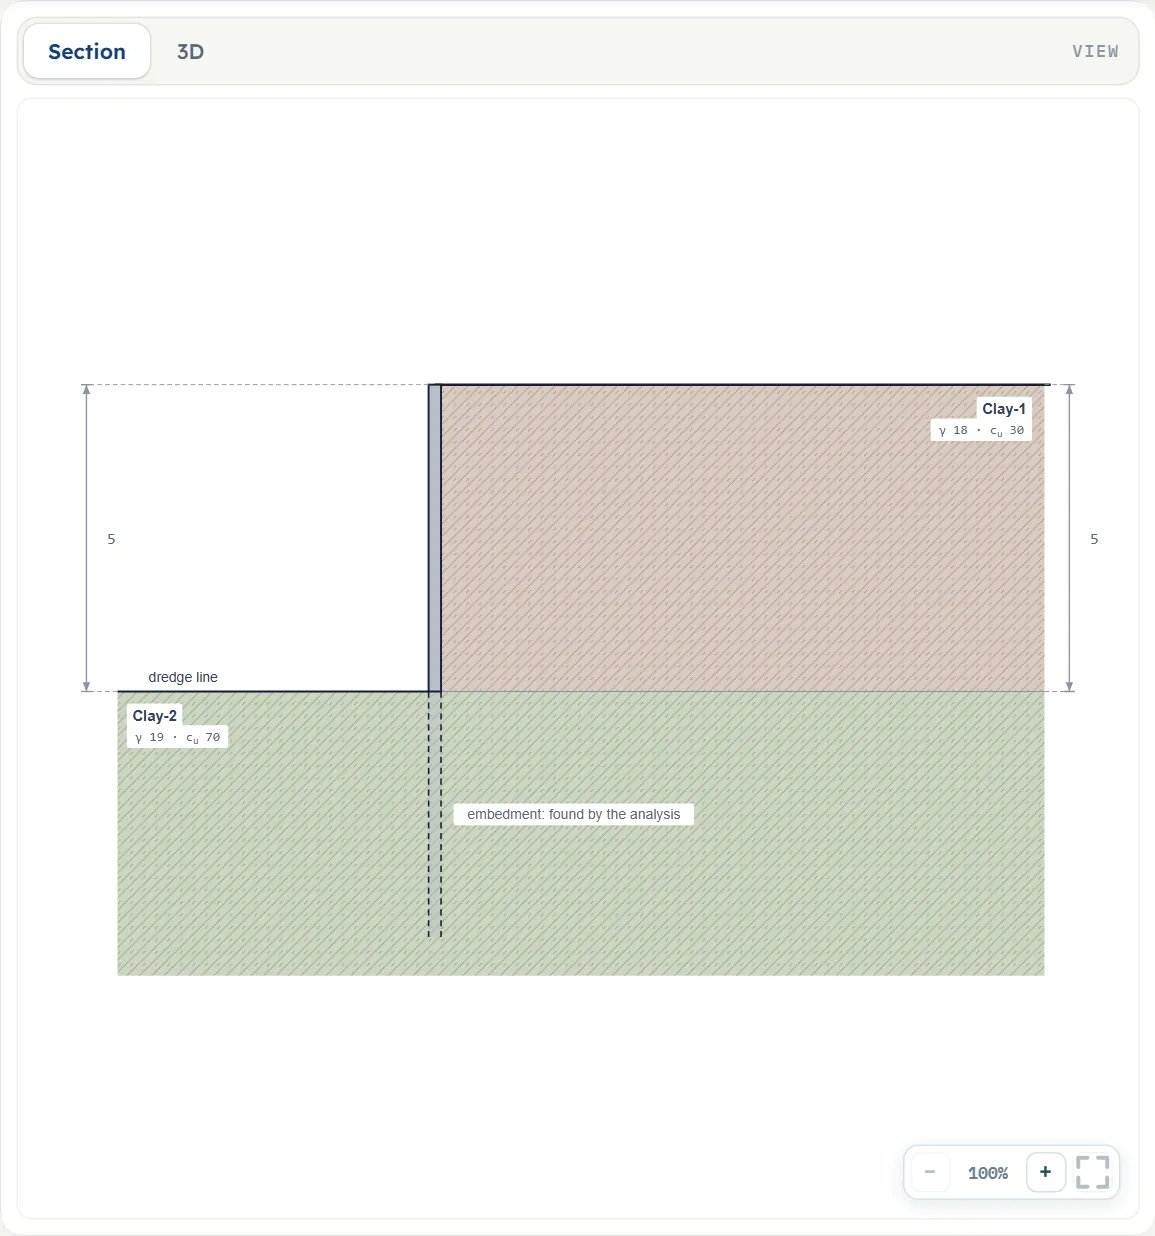
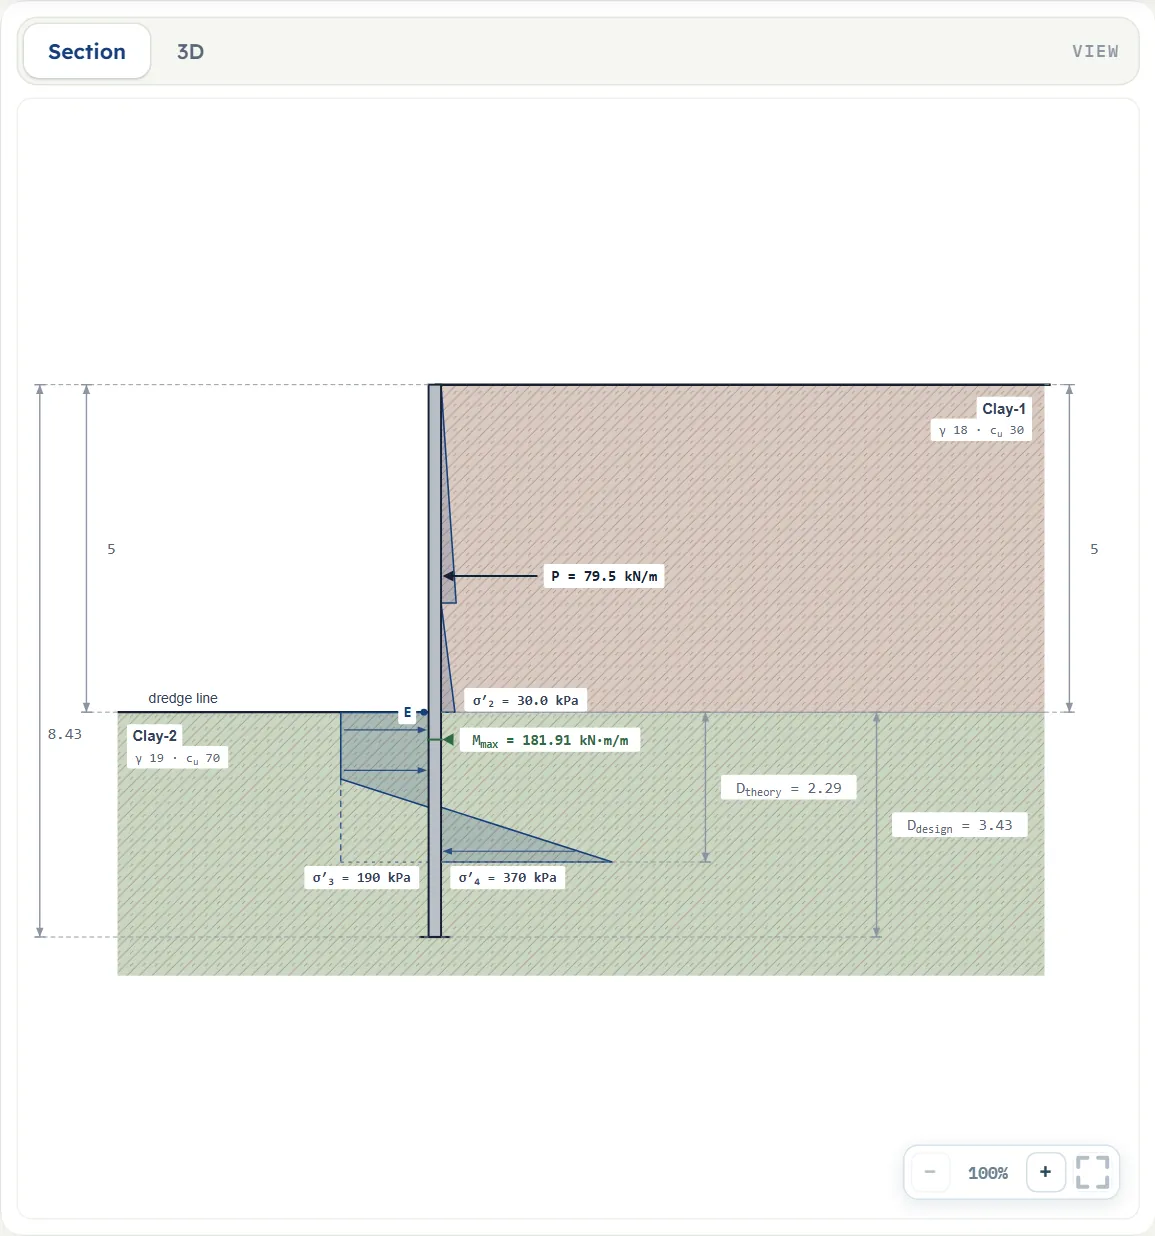
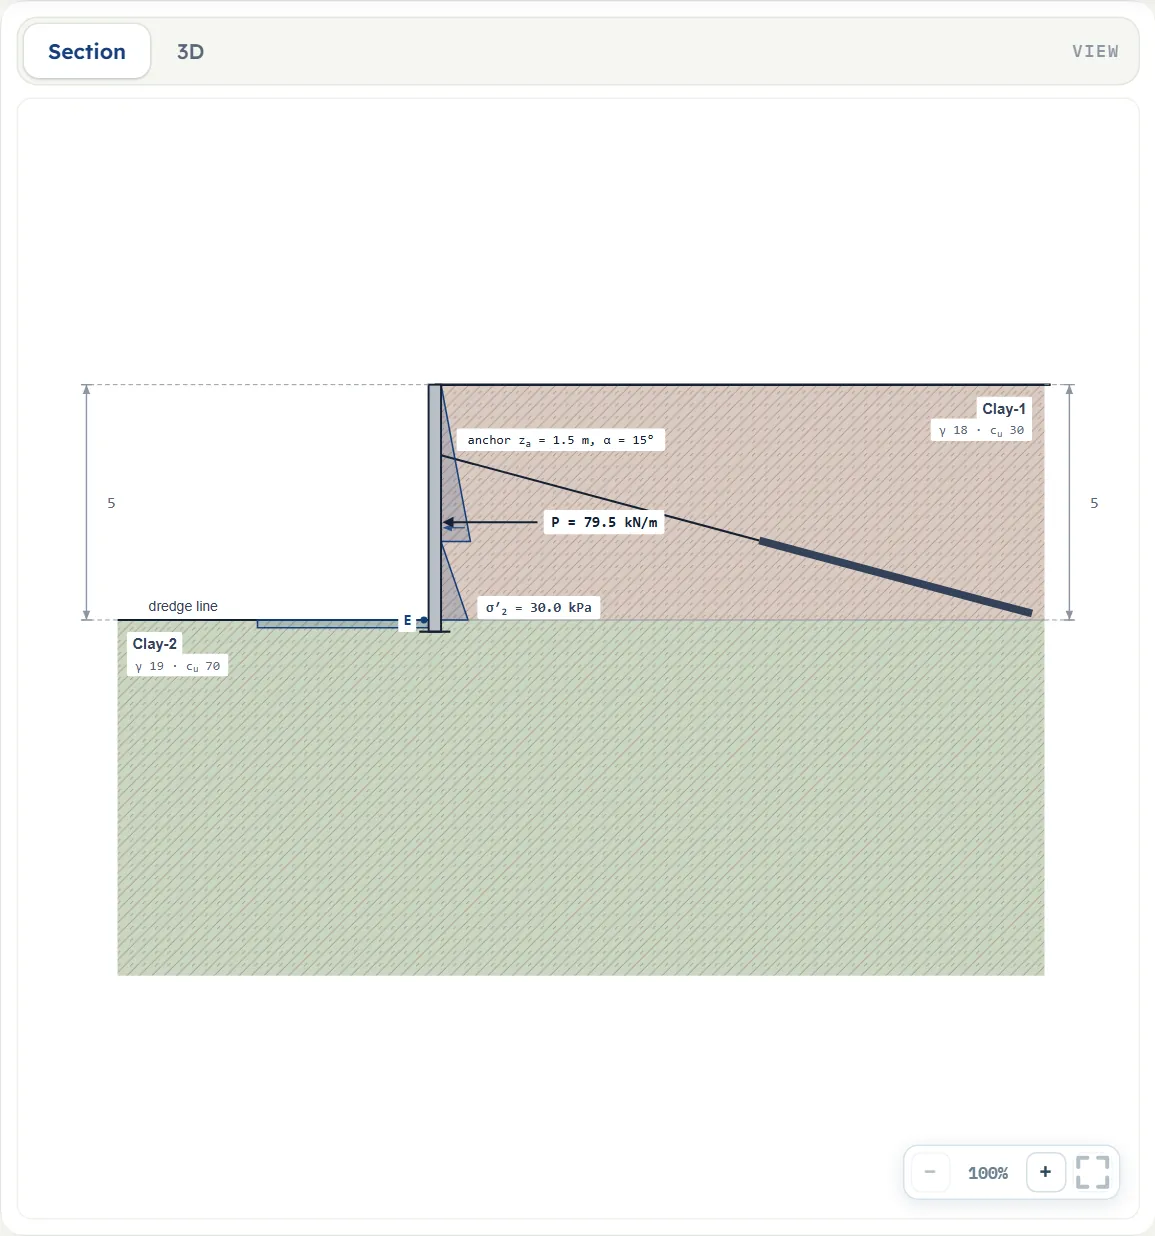
- Section is the wall with the retained and the lower clay layers, the dredge line, the water levels and the dimensions. It follows your inputs. Before Analyze it draws the active pressure above the dredge line and a sketch of the embedment (“embedment: found by the analysis”); after it, the net pressure diagram with P and its resultant, the stresses σ2, σ3 and σ4, the point E, Dtheory , Ddesign and Mmax , which is green where the sheet pile given carries it and red where it does not. With anchors the section also shows each row with its depth and inclination.
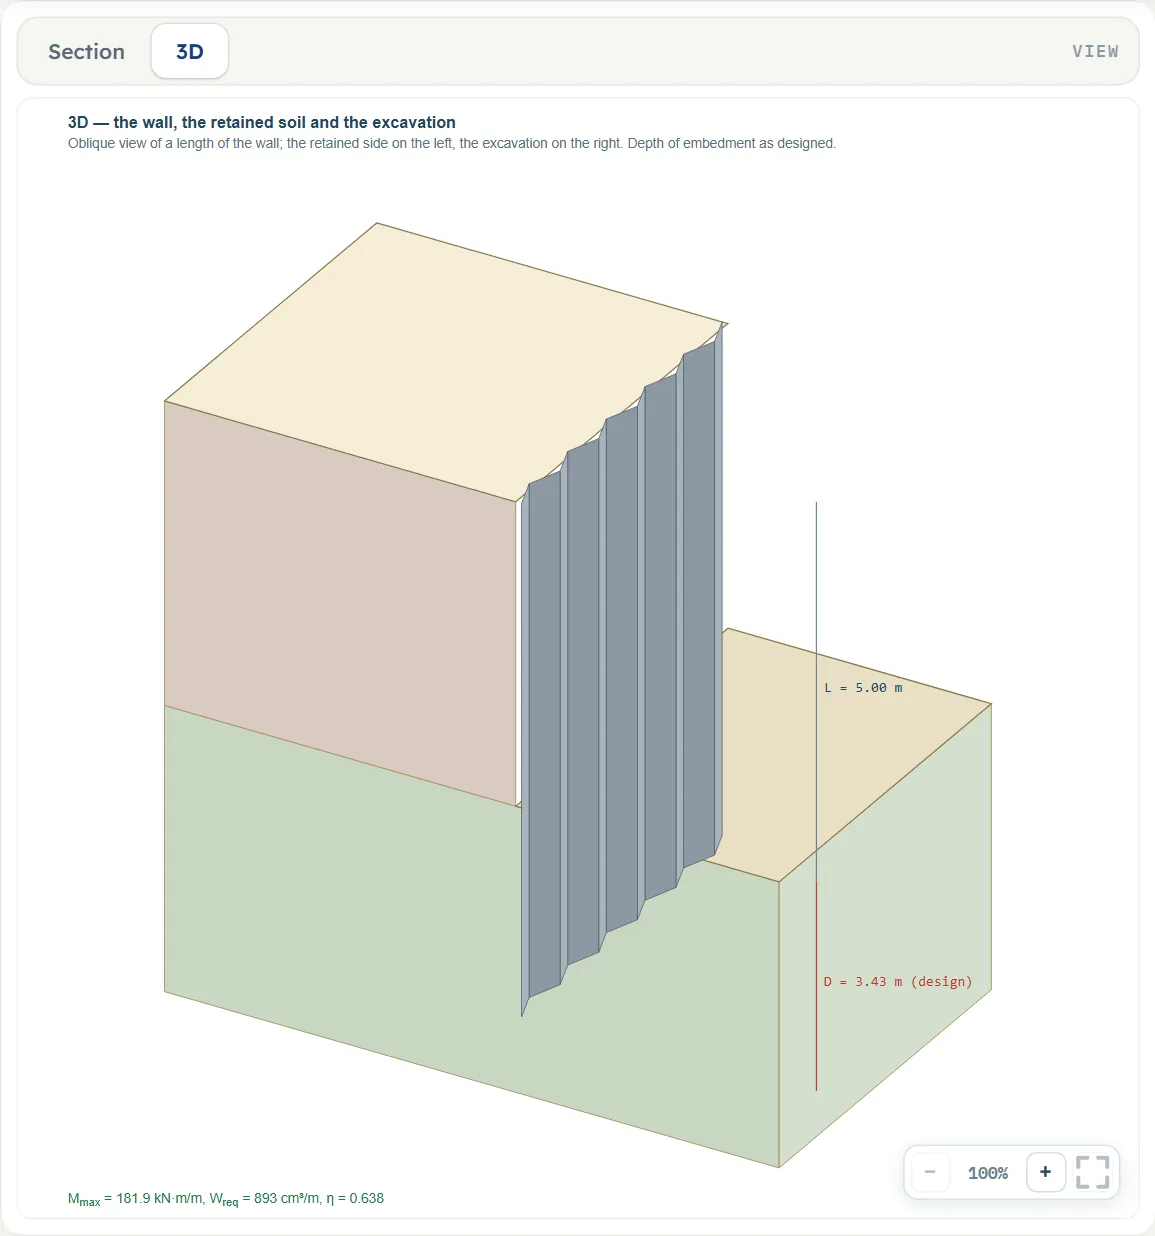
- 3D is an oblique view of a length of the wall, the corrugated sheet piling driven to the design depth, the retained layers and the excavation, with L and D marked and, after Analyze, a line with Mmax , Wreq and the utilisation.
Dragging, and what is locked
Nothing is dragged after Analyze. Before Analyze a few handles on the Section drawing move inputs, in steps of 5 cm; the Model tab follows:
- The boundary between two layers moves up and down and changes the thickness of the layer above it (the layer below it keeps at least 10 cm).
- With Given — verify it the toe line moves up and down and changes D. Pulling it in the calculated mode switches the embedment to Given.
- With a water table, the water level on the retained side moves, and the level in the excavation too when you chose a different level.
- A strip load (by its body, or by its near or far edge) and a point load move along the ground. Anchors are not dragged.
The wall height L has no handle; type it in Wall and embedment. Pressing a layer, a load or an anchor on the drawing opens it in its form (the form then reads Editing · Layer 2, for example, with Done and Delete layer, and says that changes apply as they are entered).
There are no Show chips on the drawing. Each view has −, a percentage and + at the lower right and a button that fits the whole drawing in the pane.
Entering the model, section by section
The Model tab has eleven sections: Model data, Soil layers, Groundwater, Wall and embedment, Base heave, Ground anchor, Surcharge, Earthquake, Design factors, Sheet pile and Design code. Each opens when you click its title; Next and Back at the foot walk you through them, and Analyze waits in the bar below. In the tables a unit shown two or three times, such as m · ft, gives the units of SI · kN, SI · tf and US in turn, and equal ones are merged. Defaults are shown in SI. After a switch of the unit system the boxes show the converted values, unrounded.
Model data
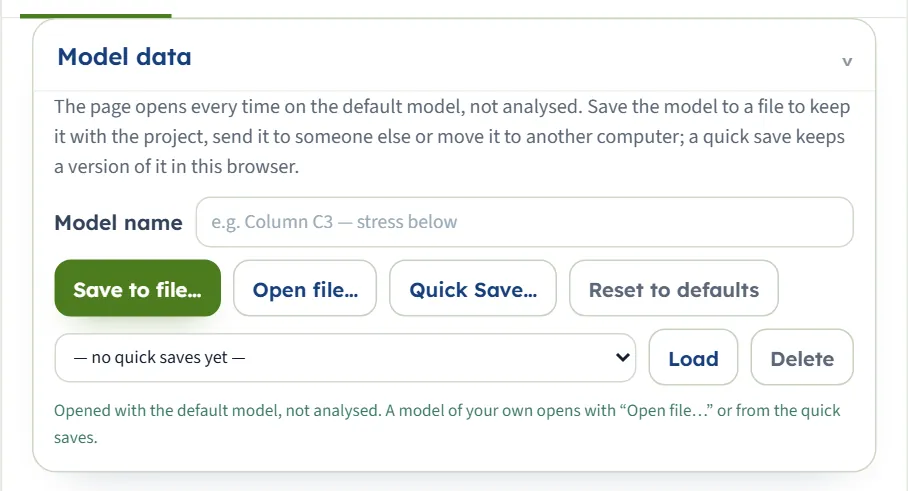
The first section holds the model name, Save to file…, Open file…, Quick Save… with its list and Load and Delete, and Reset to defaults. It works as described in the workspace guide. Its note says that the page opens every time on the default model, not analysed.
Soil layers
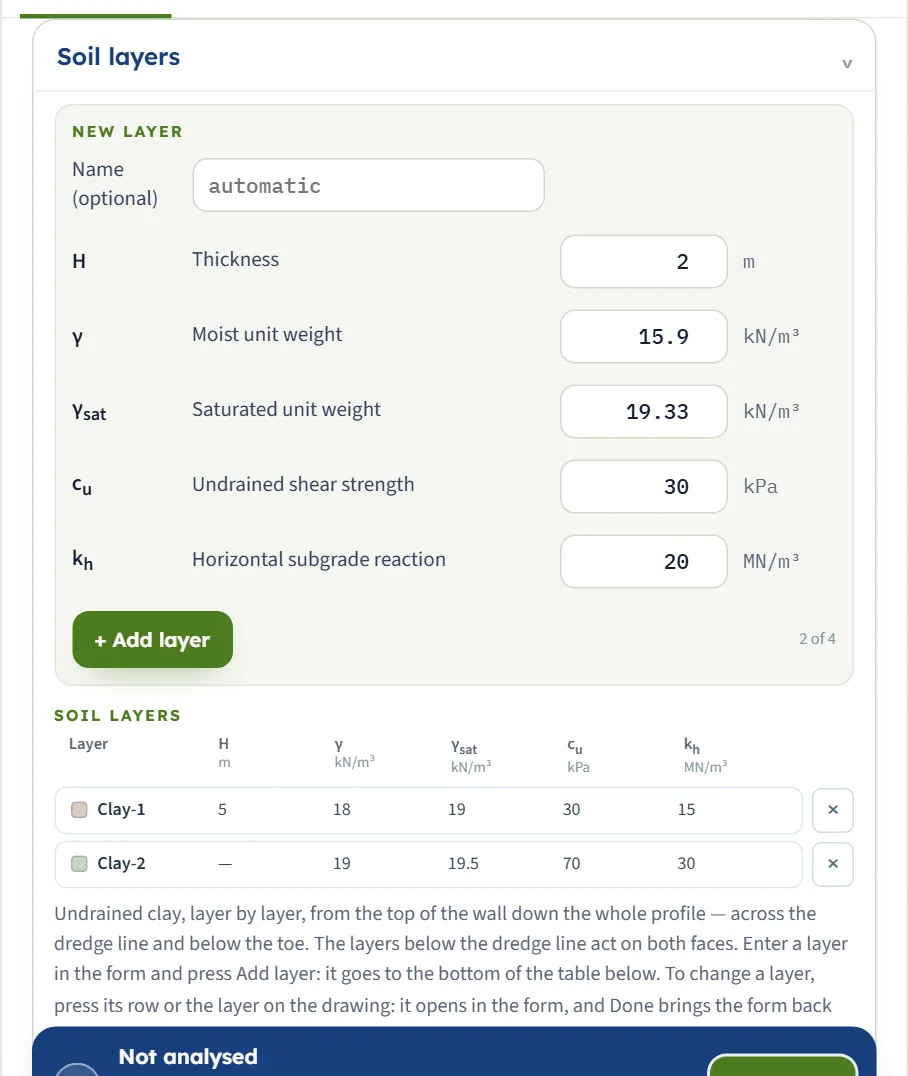
The section is a form over a table. The New layer form takes the name and the values of one layer; + Add layer puts it at the bottom of the table, and a counter beside the button shows how many of the four layers there are. The Soil layers table lists every layer with a swatch of its colour on the drawing. Press a row, or the layer on the drawing, to change it in the form; press × to take it out. Every layer is undrained clay, from the top of the wall down the whole profile, across the dredge line and below the toe. The layers below the dredge line act on both faces. The profile opens with the two layers of the example in the table; the New layer form opens with the values of a further layer, which differ.
| Field | Default | What to enter |
|---|---|---|
| Name — | automatic | Optional; empty gives Clay-1, Clay-2 … |
| Thickness H m · ft | 5 (Clay-1); 2 (form) | At least 0.1 m. The last layer has none: its row shows a dash (“it runs on below the toe”). |
| Moist unit weight γ kN/m³ · t/m³ · pcf | 18, 19 (rows); 15.9 (form) | At least 1. Used above the water table, or everywhere without one. |
| Saturated unit weight γsat kN/m³ · t/m³ · pcf | 19, 19.5 (rows); 19.33 (form) | At least 1, and above 9.81 kN/m³ where there is a water table: below it γsat − γw is used. |
| Undrained shear strength cu kPa · kg/cm² · psf | 30, 70 (rows); 30 (form) | At least 1 kPa. The layer is taken with φ = 0, so Ka = Kp = 1. |
| Horizontal subgrade reaction kh MN/m³ · t/m³ · pci | 15, 30 (rows); 20 (form) | At least 0.1 MN/m³. The spring stiffness of the displacement only. |
Groundwater
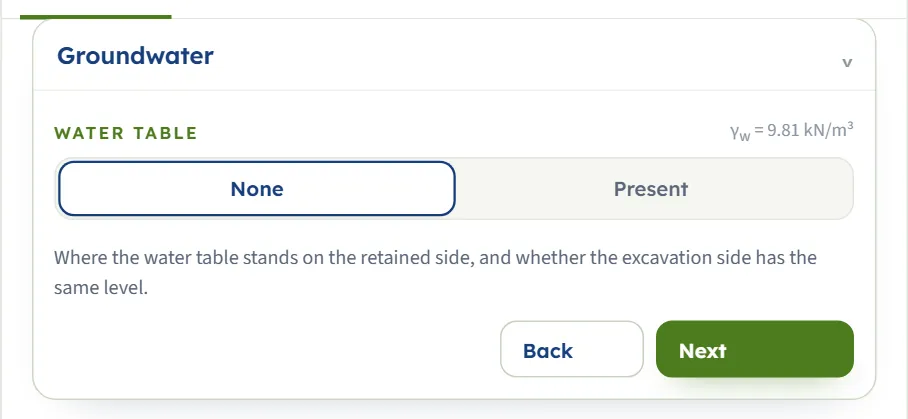
Water table has the buttons None and Present; the unit weight of water, γw = 9.81 kN/m³, is shown. With Present, Level in the excavation appears with Same as retained side and Different level, and a box for the water table depth Dw below the top of the wall on the retained side (2 m by default) and, for a different level, Dw,exc in the excavation (6 m by default; both at least 0 m). With the same level the pore pressures of the two faces cancel from the net pressure; with different levels their difference is added as a net hydrostatic pressure, without seepage. With None the unit weight is the moist one everywhere and the only water is that of the tension crack.
Wall and embedment
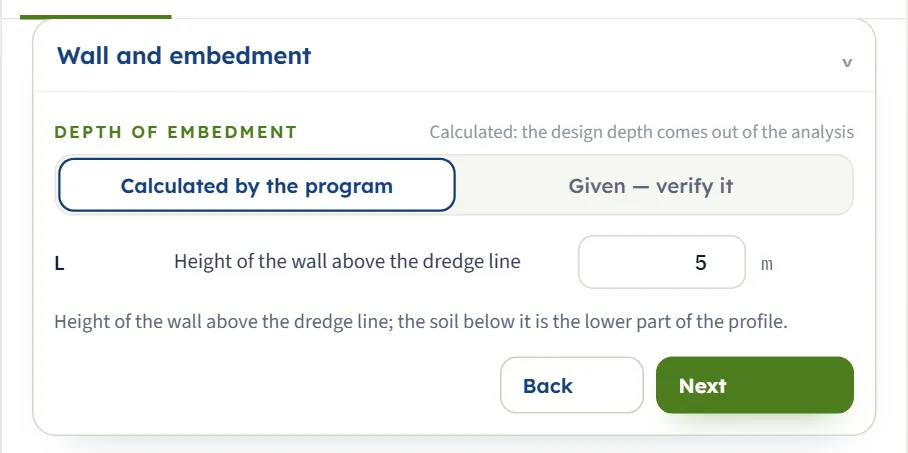
Depth of embedment has Calculated by the program, where the design depth comes out of the analysis, and Given — verify it, where you type the depth D of the toe below the dredge line (default 5 m, at least 0.1 m) and the module verifies it. L, the height of the wall above the dredge line, is 5 m by default and at least 0.5 m.
Base heave
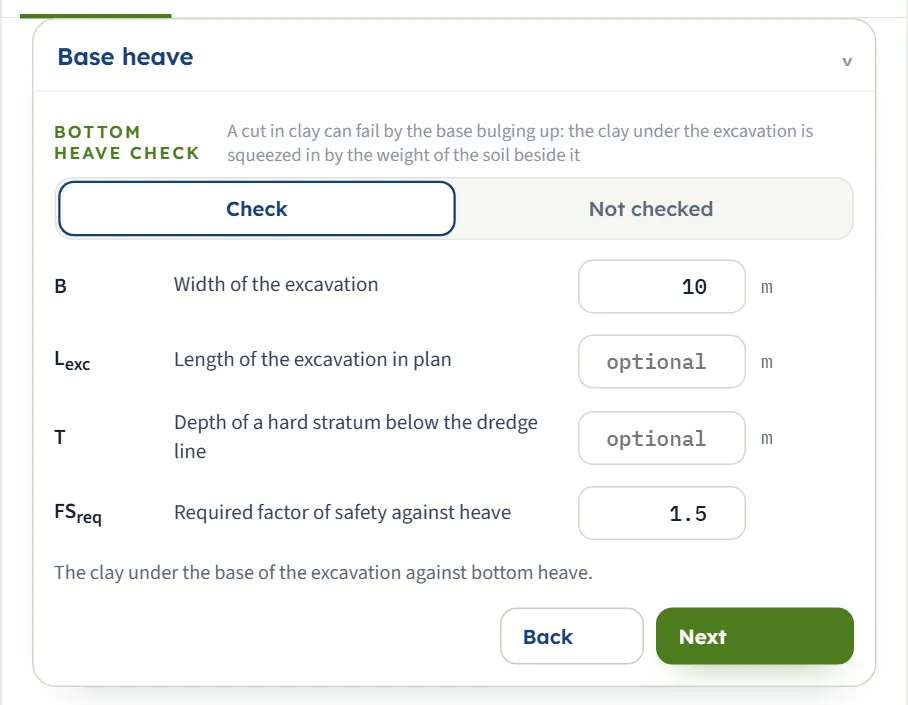
Bottom heave check has Check (the default) and Not checked. With Check you give the width of the excavation B (10 m, at least 0.5 m), optionally its length in plan Lexc and the depth T of a hard stratum below the dredge line, and the required factor of safety FSreq (1.5; from 1 to 3). The module compares the shear resistance of the clay under the base with the weight of the soil beside the cut; see Analyze and read the results.
Ground anchor
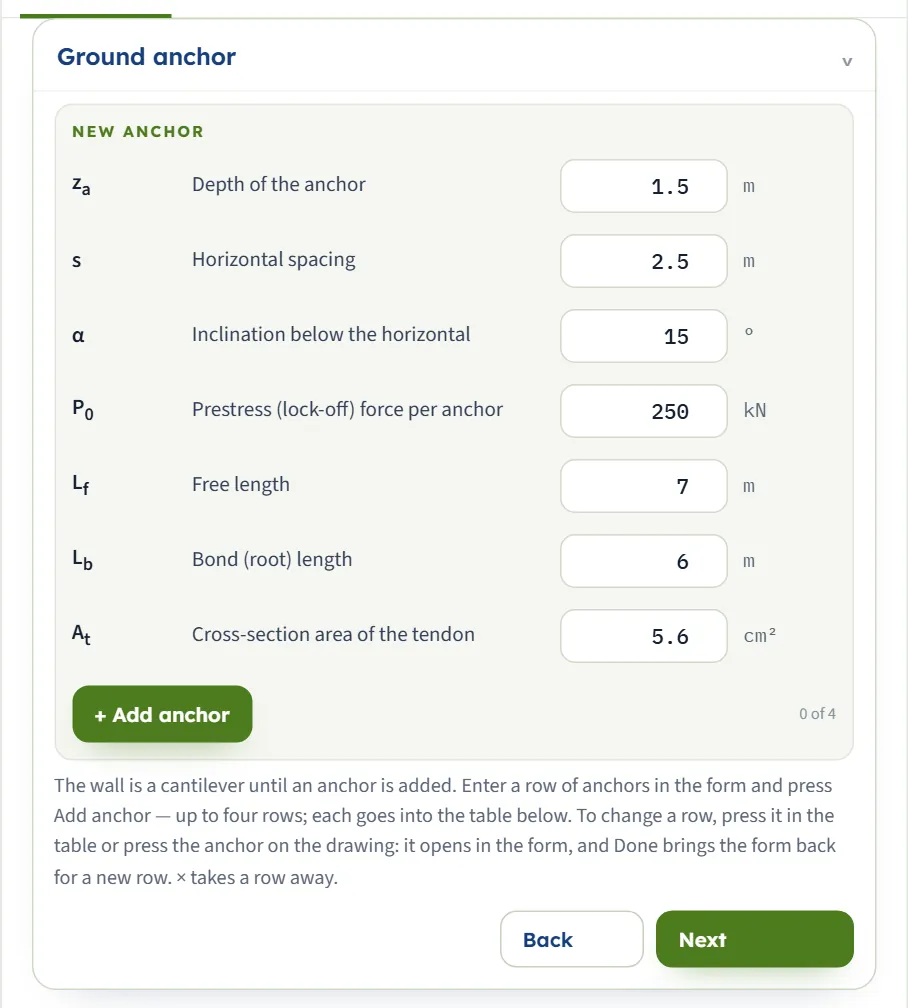
The wall is a cantilever until an anchor is added. The New anchor form takes one row; + Add anchor puts it in the table below, up to four rows, with a counter. Each row has its depth za below the top of the wall (above the dredge line, at least 0.25 m from the next row), its horizontal spacing s along the wall, its inclination α below the horizontal (0° to 60°), the prestress P0, the free length Lf, the bond length Lb (at least 0.5 m) and the tendon area At. Defaults of the form: 1.5 m, 2.5 m, 15°, 250 kN, 7 m, 6 m and 5.6 cm². Tendon: Strand (default) or Bar sets the minimum free length checked, 4.5 m or 3 m; it appears once a row exists. With anchors the wall is solved by the free earth support method: see Cantilever or anchored.
Surcharge
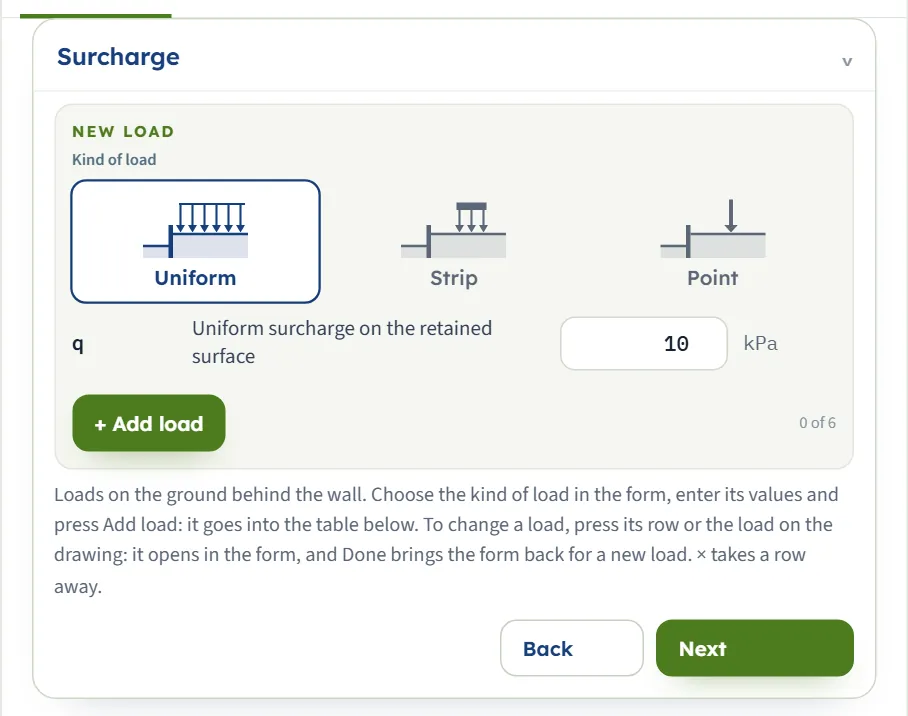
Up to six loads on the ground behind the wall. In the New load form choose the Kind of load: Uniform (a surcharge q on the whole retained surface, 10 kPa), Strip (a strip load qs, 20 kPa, between a near edge x1 = 1 m and a far edge x2 = 3 m from the wall) or Point (a load Q of 50 kN at x = 2 m); then + Add load. With the earthquake on, each load also has a combination factor ψ2 (1, from 0 to 1). A uniform load adds to the vertical stress at every depth; strip and point loads add lateral pressure on the wall. The lateral pressure of a strip or point load is worked out in the Surcharge loads manuals.
Earthquake
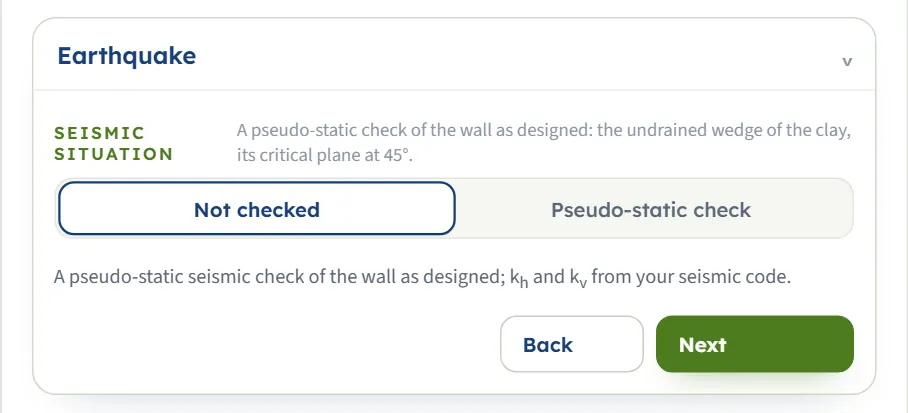
Seismic situation has Not checked and Pseudo-static check. The check is of the wall as designed: the undrained wedge of the clay with its critical plane at 45°, both senses of the vertical coefficient, and your kh (0.15, from 0 to 0.6) and kv (0.075, from 0 to 0.4) from your seismic code.
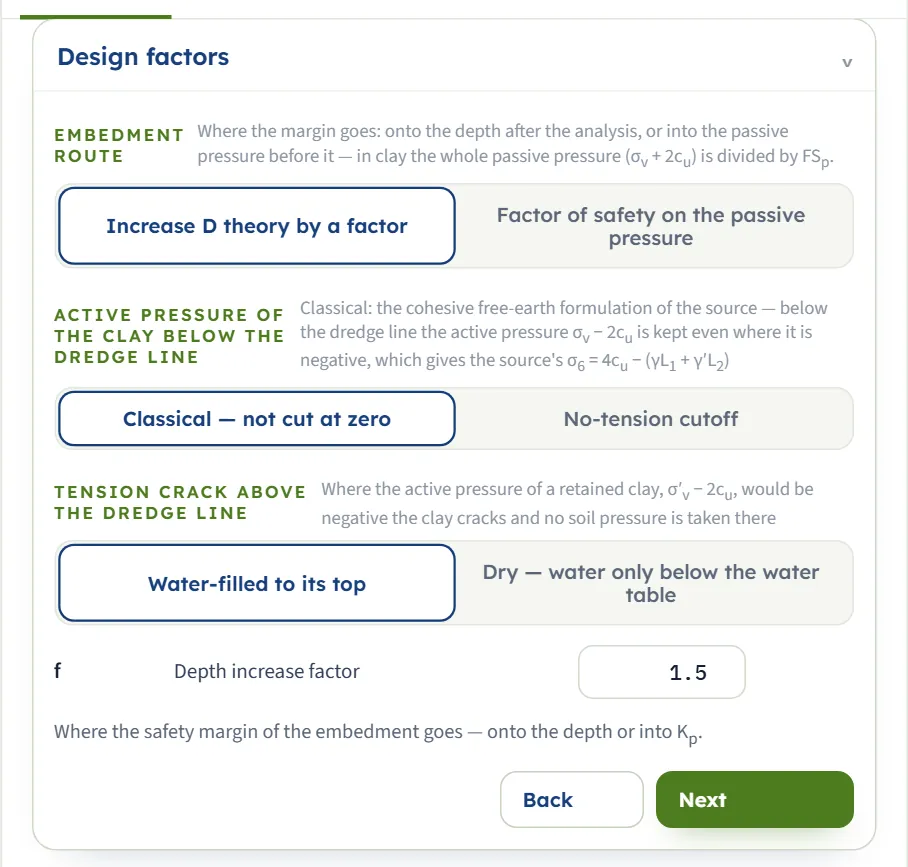
Design factors
Three choices and a number; they are explained in How the module treats the clay. Embedment route: Increase D theory by a factor (the factor f, 1.5 by default, from 1 to 1.6) or Factor of safety on the passive pressure (the factor FSp, 1.5, from 1 to 3). Active pressure of the clay below the dredge line: Classical — not cut at zero or No-tension cutoff. Tension crack above the dredge line: Water-filled to its top or Dry — water only below the water table.
Sheet pile
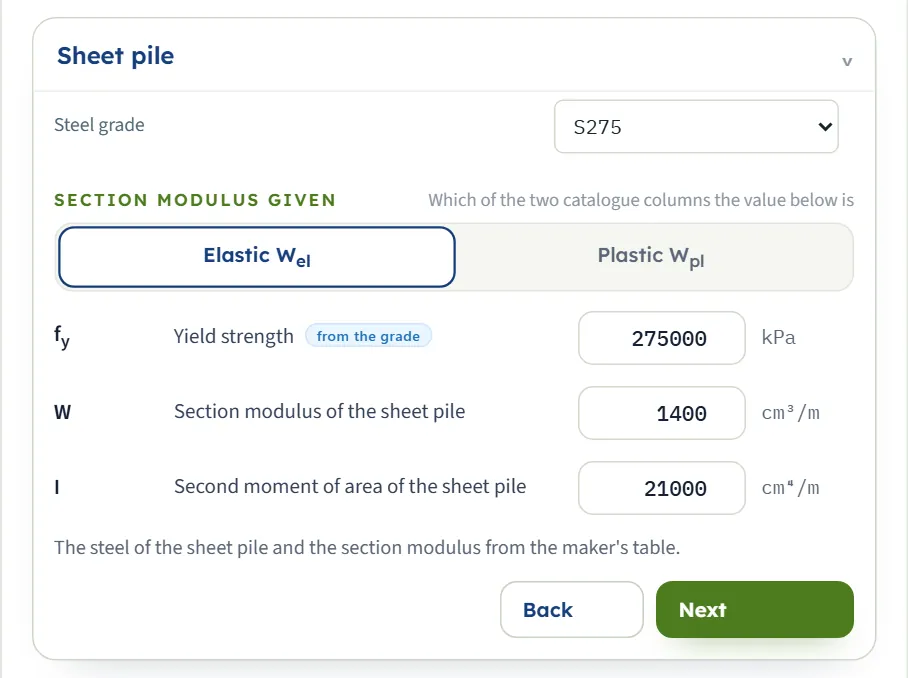
The Steel grade is S235, S275 (default) or S355, or Typed; the yield strength fy follows the grade (275 000 kPa for S275, chip “from the grade”) until you type a value of your own, and must be at least 100 000 kPa. Section modulus given says which catalogue column the value of W is: Elastic Wel (default) or Plastic Wpl. W (1 400 cm³/m) and I (21 000 cm⁴/m) are optional. Without W the module gives the modulus the wall needs and verifies no section; without I it gives no displacement.
Design code
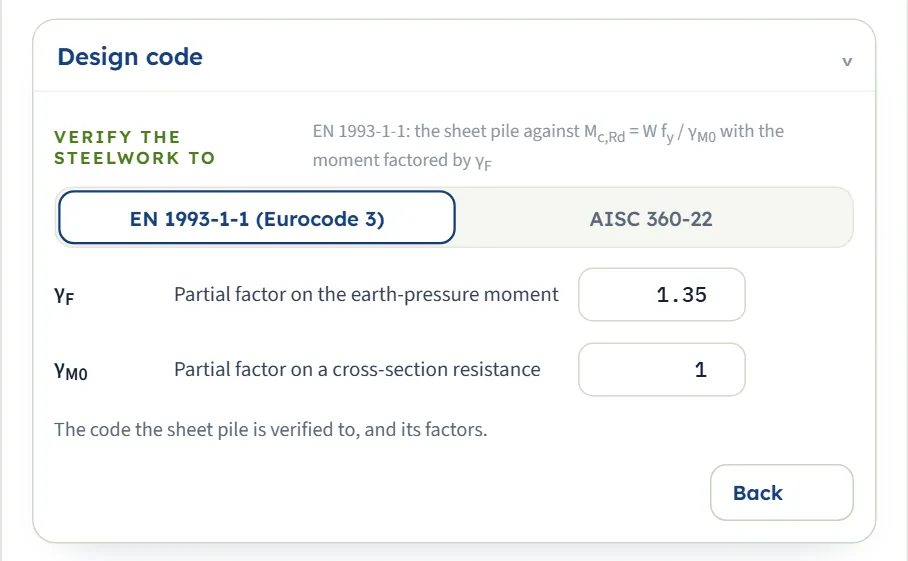
Verify the steelwork to: EN 1993-1-1 (Eurocode 3) with the partial factor γF on the earth-pressure moment (1.35, from 1 to 1.6) and γM0 on the resistance (1, from 1 to 1.3), or AISC 360-22, where LRFD takes the load factor γH on the earth pressure (1.6, from 1 to 2) and ASD none.
How the module treats the clay: the crack, the net pressure and the anchors
The tension crack above the dredge line
In a retained clay the active pressure σv − 2cu is negative near the top, down to the depth zc where it is zero. The module takes the clay as unable to pull on the wall: no soil pressure acts down to zc, and the crack is a gap. In the example zc = 2 × 30 / 18 = 3.33 m. Water-filled to its top, the default, loads the wall over the crack with the water pressure γw (z − zt), zt being the top of the crack: 9.81 × 3.33 = 32.70 kPa at zc, which is 54.50 kN/m of the 79.50 kN/m resultant. Dry — water only below the water table leaves that water out. The drainage of the site must then keep the crack dry, and the module says so as a warning. The difference is large because the crack water is the larger part of the load: with a dry crack the example gives Dtheory = 0.6780 m and Mmax = 15.53 kN·m/m instead of 2.288 m and 181.9 kN·m/m.
The net pressure of 4cu below the dredge line
Below the dredge line the clay of the retained side pushes with σv − 2cu and the clay of the excavation side resists with σv + 2cu, so the net pressure is the difference of the overburdens of the two faces less 4cu. In the example, just below the dredge line: 90 − 140 − 0 − 140 = −190 kPa, which is σ3; the minus sign means toward the retained soil, so the clay below the dredge line holds the wall. At the toe the pressure on the other face is σ4 = 4cu + (the difference of the overburdens) = 370 kPa. Because the undrained cohesion acts on both faces, the unit weight of the clay below the dredge line does not change the answer in a profile of one layer there: Clay-2 at 21 instead of 19 kN/m³ gives the same Dtheory = 2.288 m.
Classical — not cut at zero, the default, keeps the active pressure σv − 2cu of the clay below the dredge line even where it is negative, as the classical cohesive free-earth formulation does; this is what gives the constant σ3. No-tension cutoff does not take the active pressure of the clay below zero on either face below the dredge line. The result depends on the choice. In the example the cutoff gives Dtheory = 2.691 m, Ddesign = 4.036 m and Mmax = 187.3 kN·m/m, against 2.288 m, 3.433 m and 181.9 kN·m/m. The Calculations tab states the figures of the other choice “for comparison”.
Can the wall be balanced? The check before the embedment
Before it looks for the depth, the module checks that a depth exists. The net pressure just below the dredge line, 4cu less the difference of the overburdens, must turn toward the retained soil. If it does not, no embedment can balance the diagram and the module stops with “No depth of embedment balances the diagram” and the advice to raise cu or lower the retained height. In the example, Clay-2 with cu = 10 kPa leaves 90 − 40 = +50 kPa below the dredge line, toward the excavation, and stops; with cu = 30 kPa the net pressure is −30 kPa and the embedment is long, Dtheory = 7.303 m.
The depth of embedment and its safety
The theoretical depth is the one at which the diagram is in equilibrium with no margin. The margin goes in by one of two routes. With Increase D theory by a factor the design depth is f × Dtheory : 1.5 × 2.2884 = 3.433 m, a pile of 5 + 3.433 = 8.433 m. With Factor of safety on the passive pressure the whole passive pressure (σv + 2cu) is divided by FSp before the depth is found; the card then reads Required embedment depth (passive pressure / FSp). With FSp = 1.5 the example gives 2.775 m and with 2 it gives 3.174 m. The maximum moment is that of the theoretical diagram; stretching the toe by f does not change it.
With Given — verify it the module checks your depth against the required one. At D = 3.5 m (the required depth is 3.433 m) the card Design embedment depth — given reads PASS, with the required depth and the factor of safety the given depth mobilises on the passive pressure, 2.470. At 3 m it reads FAIL (1.772) with a warning, and with a depth shorter than Dtheory the module stops (see Messages).
Cantilever or anchored
With no anchor the wall is a cantilever: it is fixed only by the clay below the dredge line, and the diagram is closed with the toe reversal σ4 over the block L5. With one or more anchor rows the wall is held near its top. For one row the module uses the free earth support method: the embedment comes from the moments about the anchor and the anchor force from horizontal equilibrium; the diagram is cut off at the free toe with no reversal. With two to four rows the structure is idealised with hinges at the anchors below the uppermost and simple spans between them, with the embedment by free earth support about the lowest anchor. With anchors the first card reads Theoretical embedment depth — the equilibrium depth of the adopted limit-equilibrium model, not a minimum constructible penetration. The anchor reaction per metre of wall is F; the force in each anchor is TLEM = F s / cos α, and its vertical part is TLEM sin α.
One anchor row at 1.5 m (15°, 2.5 m apart) on the example gives Dtheory = 0.1659 m, Ddesign = 0.2489 m (a pile of 5.25 m), Mmax = 28.05 kN·m/m, F = 47.97 kN/m and TLEM = 124.2 kN. A hand check: F = P − σ3 D = 79.50 − 190 × 0.1659 = 47.97 kN/m, and 47.97 × 2.5 / cos 15° = 124.2 kN. The module notes that the equilibrium depth of a strong clay can be very short “not a minimum constructible penetration”; choose the penetration from driveability, heave, overall stability and practice. The Theory tab gives up to about 6 m as the usual range of a cantilever wall.
Analyze and read the results
Press Analyze. The bar changes to Analysed — the sheet-pile wall calculated. The module stays on the Model tab (the bar, with Warnings or Notes, Edit inputs and Analyze, belongs to that tab): open the Results tab. The Section view now shows the net pressure.
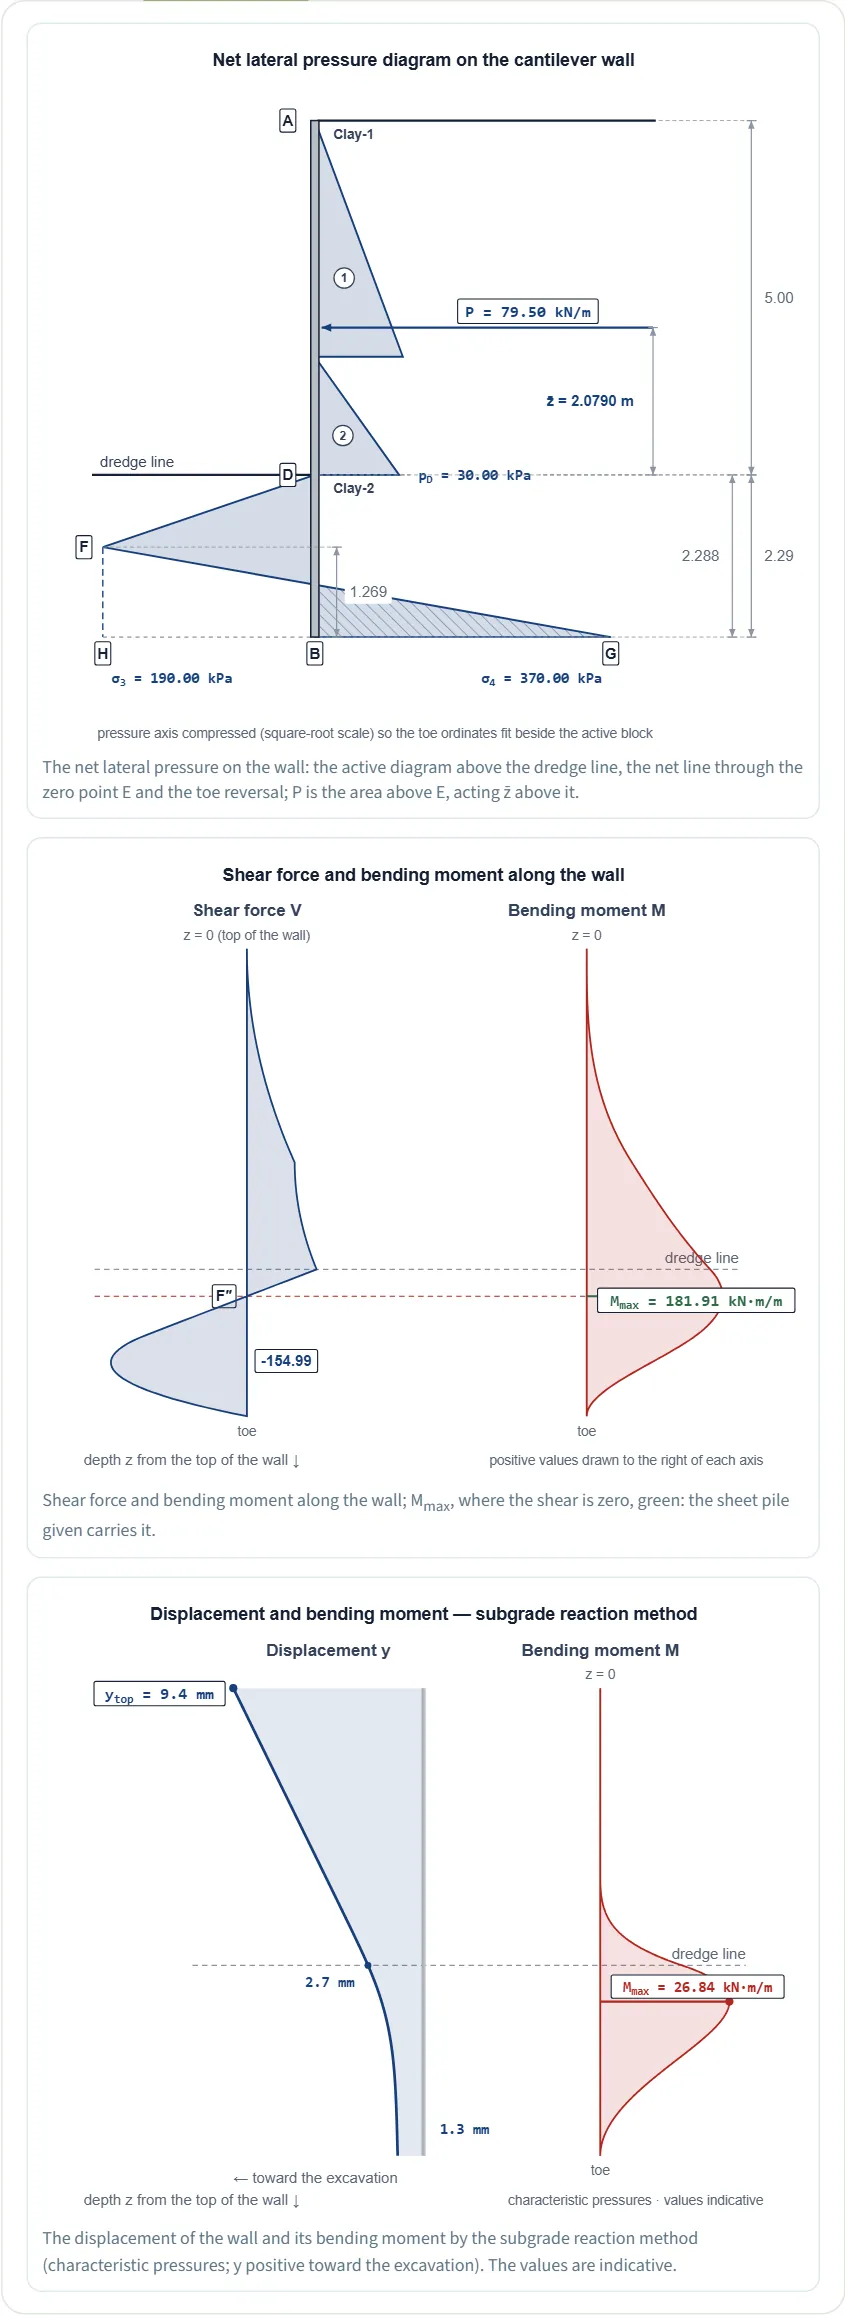
The tab has three drawings, then the tables, and the cards last, under Sheet-pile wall:
- Net lateral pressure diagram on the cantilever wall: the active diagram above the dredge line in pieces (1, 2 …), P and its height z̄ above E, the net line through E, σ3 and σ4 and the block L5. The pressure axis is compressed so that the toe ordinates fit beside the active block.
- Shear force and bending moment along the wall: Mmax where the shear is zero, green where the sheet pile given carries it.
- Displacement and bending moment — subgrade reaction method: the displacement of the wall on springs, indicative.
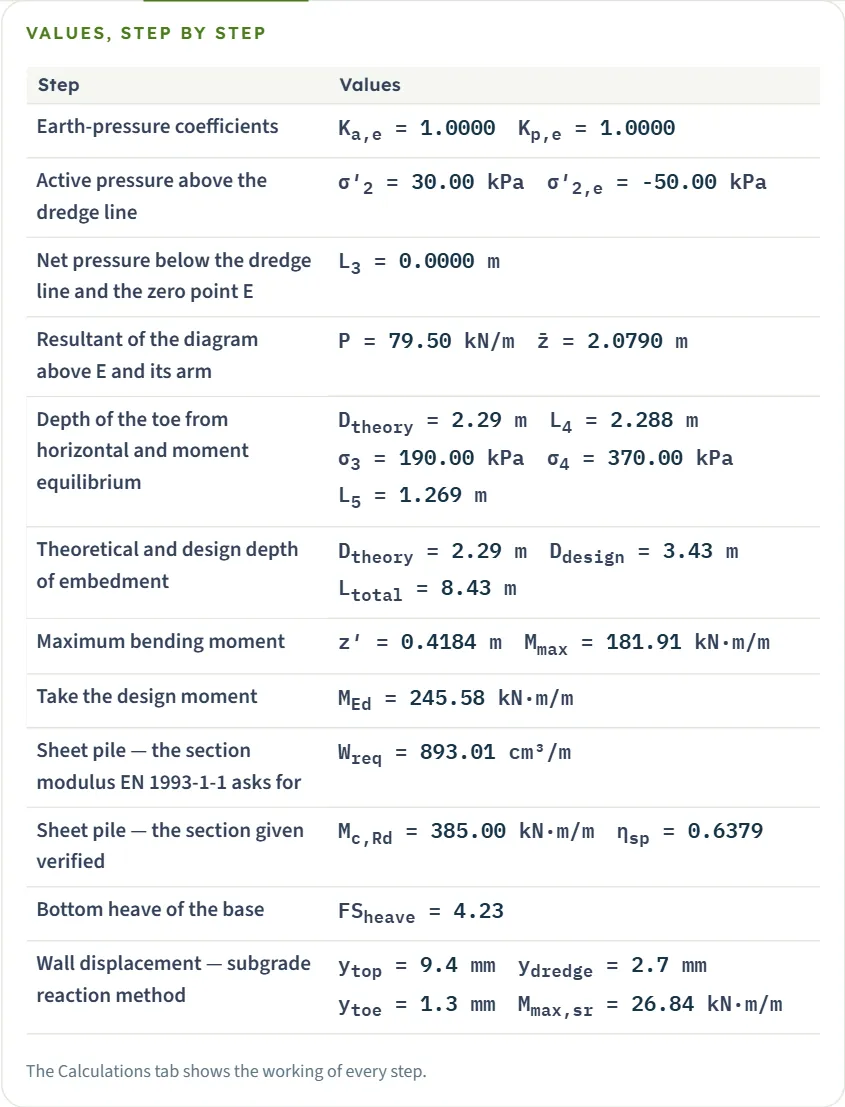
Values, step by step lists the step values; five more tables give the working in numbers: the effective overburden, pore pressures and net pressure at the depths where a line of the diagram changes; the pieces of the pressure diagram above E; the trial depths of embedment with the residual about the toe (it changes sign at the root); the layers down to the toe with their springs, which also lists φ′, cu, K0, Ka and Kp of each layer; and the displacement, moment and pressures along the wall. With anchors the trial-depth table gives the moment about the anchor, and a table of the anchors is added.
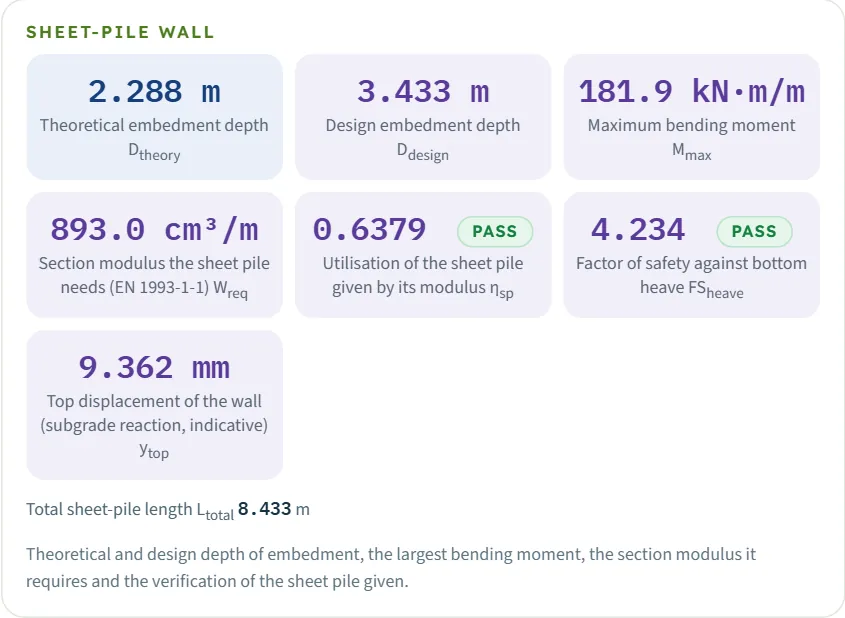
| Card | What it is | The example |
|---|---|---|
| Theoretical embedment depth Dtheory | The depth at which the diagram is in equilibrium, no margin. | 2.288 m |
| Design embedment depth Ddesign | After the safety route; the total pile length is shown beneath the cards. | 3.433 m (8.433 m long) |
| Maximum bending moment Mmax | At the zero of the shear, below E. | 181.9 kN·m/m |
| Section modulus the sheet pile needs Wreq | The number a sheet-pile table is looked up with (EN 1993-1-1 or AISC 360-22 as chosen). | 893.0 cm³/m |
| Utilisation of the sheet pile ηsp | Design moment over the resistance of the section given; PASS up to 1, FAIL above. Only when W is given. | 0.6379 PASS |
| Factor of safety against bottom heave FSheave | Only when the heave check is on; PASS at or above FSreq . | 4.234 PASS |
| Top displacement of the wall ytop | Subgrade reaction, indicative; only when I is given. | 9.362 mm |
The sheet pile
The moment is factored once. With EN 1993-1-1, MEd = γF Mmax = 1.35 × 181.91 = 245.58 kN·m/m, Wreq = MEd γM0 / fy, and the section given is held to Mc,Rd = W fy / γM0 (with the elastic modulus, first yield). With AISC 360-22 the example needs 1,176 cm³/m by LRFD (Mn with φb = 0.90 and the moment factored by γH = 1.6) and 1,105 cm³/m by ASD (Ωb = 1.67), with the utilisation 0.8400 and 0.7891. The depth of embedment keeps the margin of its own route and is not factored again. S355 instead of S275 lowers Wreq to 691.8 cm³/m, S235 raises it to 1,045 cm³/m. The grade fills fy; type fy with Typed for any other steel.
Bottom heave
The base can fail by bulging up. The module compares the resistance of the clay under the base, 5.14cu(1 + 0.2B″/Lexc ) with the cohesion of Clay-2 below the dredge line, plus the side shear cside H/B′ along the retained height, with the weight of the retained soil σv(H) plus the surcharge: uniform loads in full, a strip load by its part within B′ spread over B′, a point load within B′ spread over a square B′ × B′, and a load beyond B′ left out. Water standing on the base is deducted from σv(H). B′ is B/√2, or the depth T of a hard stratum when that is smaller, B″ = √2 B′, and without Lexc the excavation is taken as long. The embedment of the sheet pile is not credited. For the example: (5.14 × 70 + 30 × 5 / 7.07) / 90 = 4.23. Other runs: a 15 m wide excavation with Clay-2 at 40 kPa gives 2.442; a hard stratum 1 m below the dredge line, 5.664; a length of 20 m, 4.633; a 20 kPa surcharge, 3.464. The module notes that the formula is the source’s, extended to layers: the clay under the base carries the bearing term, the cohesion averaged over the retained height the side shear.
Anchored wall
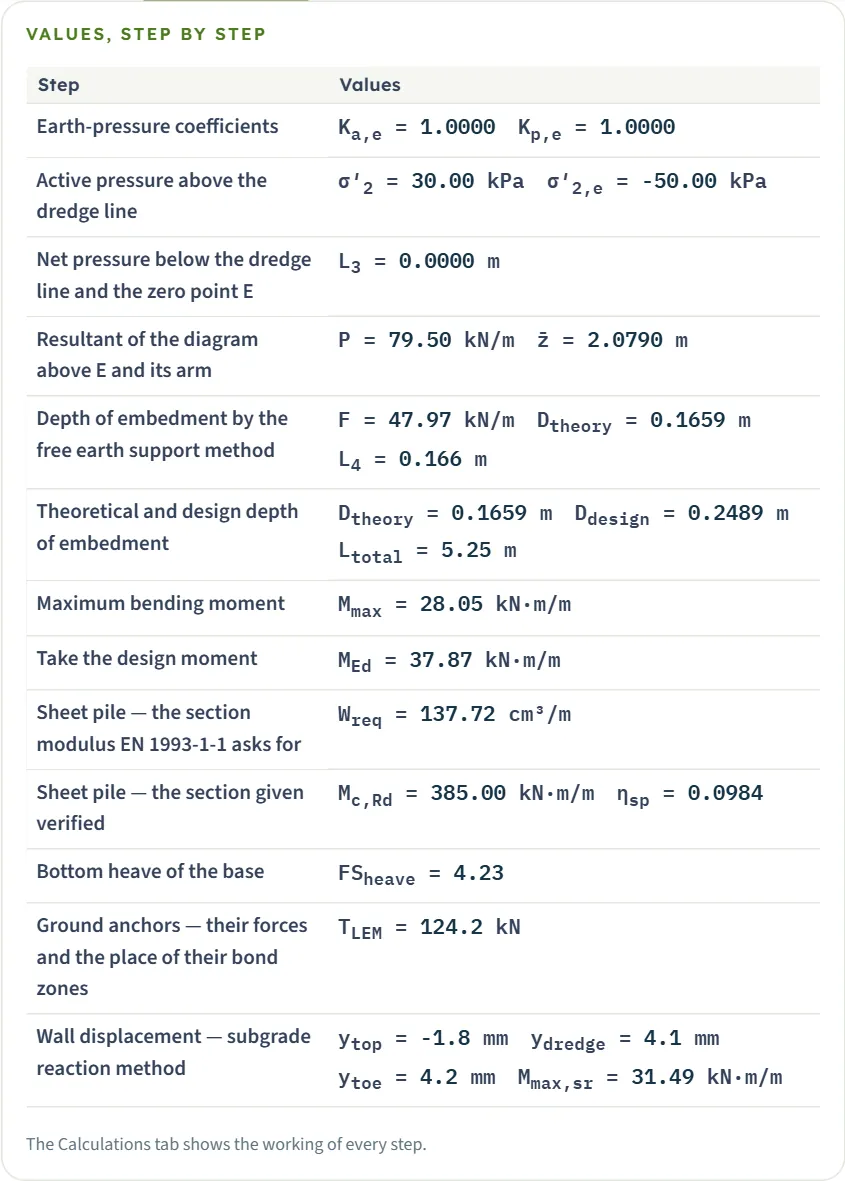
With anchors the embedment step reads Depth of embedment by the free earth support method, and a table The anchors, their reactions and their bond zones gives for each row za, s, α, F, TLEM , TLEM sin α, P0, the position xb of the start of the bond zone behind the wall, the distance xreq it must have behind the active wedge and a Check (PASS in the example: 6.761 m against 3.188 m). The top displacement can be negative: y is positive toward the excavation. A note gives the vertical component of the anchor forces: in the example “12.85 kN/m per metre of wall in all”; the sheet pile is verified in bending only.
The earthquake
With the pseudo-static check on, a card Embedment required in the seismic situation DE is added with its own verdict. With kh = 0.15 and kv = 0.075 the example gives DE = 2.503 m, PASS against Ddesign = 3.433 m, and Mmax,E = 184.99 kN·m/m; the two senses of kv are tabulated. The static results above are unchanged. With kh = 0.45 and kv = 0.2 the required depth is 3.58 m, above the design depth, and the module warns (see Messages).
Using the numbers
- The forces are per metre of wall (kN/m, tf/m or kip/ft), the moments in kN·m/m, tf·m/m or kip·ft/ft, and W and I per metre of wall. The anchor force TLEM is per anchor.
- Depths are measured below the dredge line; the total length of the sheet piles is L + Ddesign .
- Values are rounded where they are drawn. After a unit switch the drawings keep their labels in m, kN and kPa; the cards, the tables and the report are re-stated.
- The default example in SI · tf gives Mmax = 18.55 tf·m/m (181.91 kN·m/m is 18.55 tf·m/m) and in US Dtheory = 7.508 ft, Mmax = 40.89 kip·ft/ft (181.91 kN·m/m is 40.89 kip·ft/ft), Wreq = 16.61 in³/ft and ytop = 0.3686 in. The heave working carries its intermediate values forward at the precision printed in the chosen units (for example 1.46 ksf), so US reads 4.229 and SI · tf 4.233 against 4.234 in SI · kN.
The Calculations tab, the report and the Theory tab
The Calculations tab opens with Given and what is sought and then writes out twelve numbered steps with your numbers, ending with the notes and the answer. With anchors the embedment step is the free earth support one.
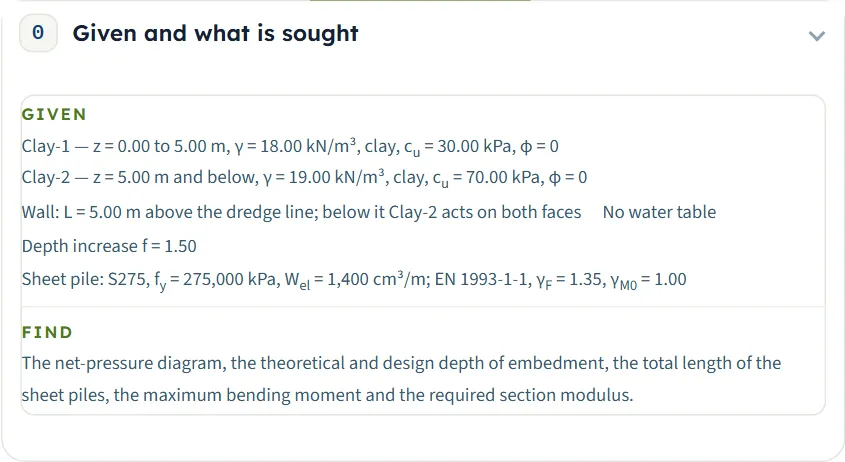
- Earth-pressure coefficients — the undrained pressures, Ka = Kp = 1, and 2cu of each layer.
- Active pressure above the dredge line — σv at the boundaries, the tension crack depth and its water, σ′2 at the dredge line and, for comparison, the depth and moment with a dry crack.
- Net pressure below the dredge line and the zero point E — p written out, the table of overburdens, pore pressures and net pressure at each depth where it changes; E at the dredge line when the net pressure is already negative there. For comparison, the figures with the no-tension cutoff.
- Resultant of the diagram above E and its arm — the pieces, P and z̄.
- Depth of the toe from horizontal and moment equilibrium — σ3, σ4, L5 and the trial depths with their residual (with anchors: Depth of embedment by the free earth support method).
- Theoretical and design depth of embedment, and the total pile length.
- Maximum bending moment — the depth of zero shear and the moment, with the diagram.
- Take the design moment.
- The section modulus EN 1993-1-1 (or AISC 360-22) asks for.
- The section given verified.
- Bottom heave of the base.
- Wall displacement — subgrade reaction method, with the moment of that model, which is indicative.
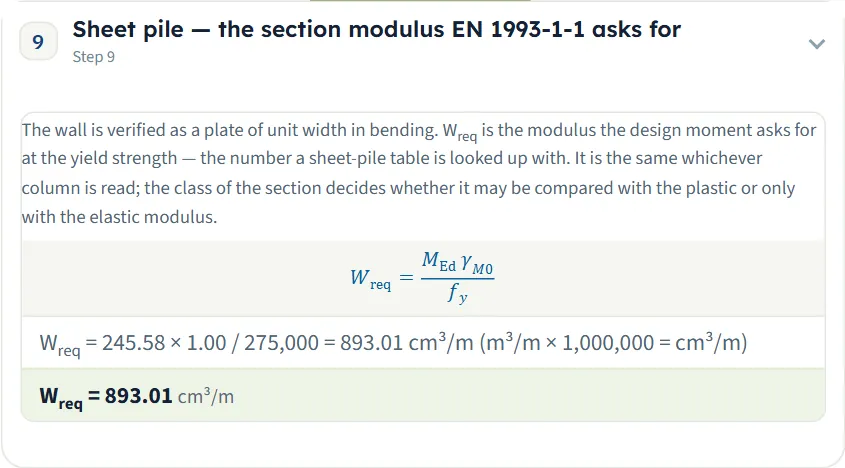
The tab ends with Notes and assumptions and the Answer. A drawing of the net pressure and one of the shear and moment sit inside the steps; the working of step 9 for the example, Wreq = 245.58 × 1.00 / 275 000 = 893.01 cm³/m, is:
The report
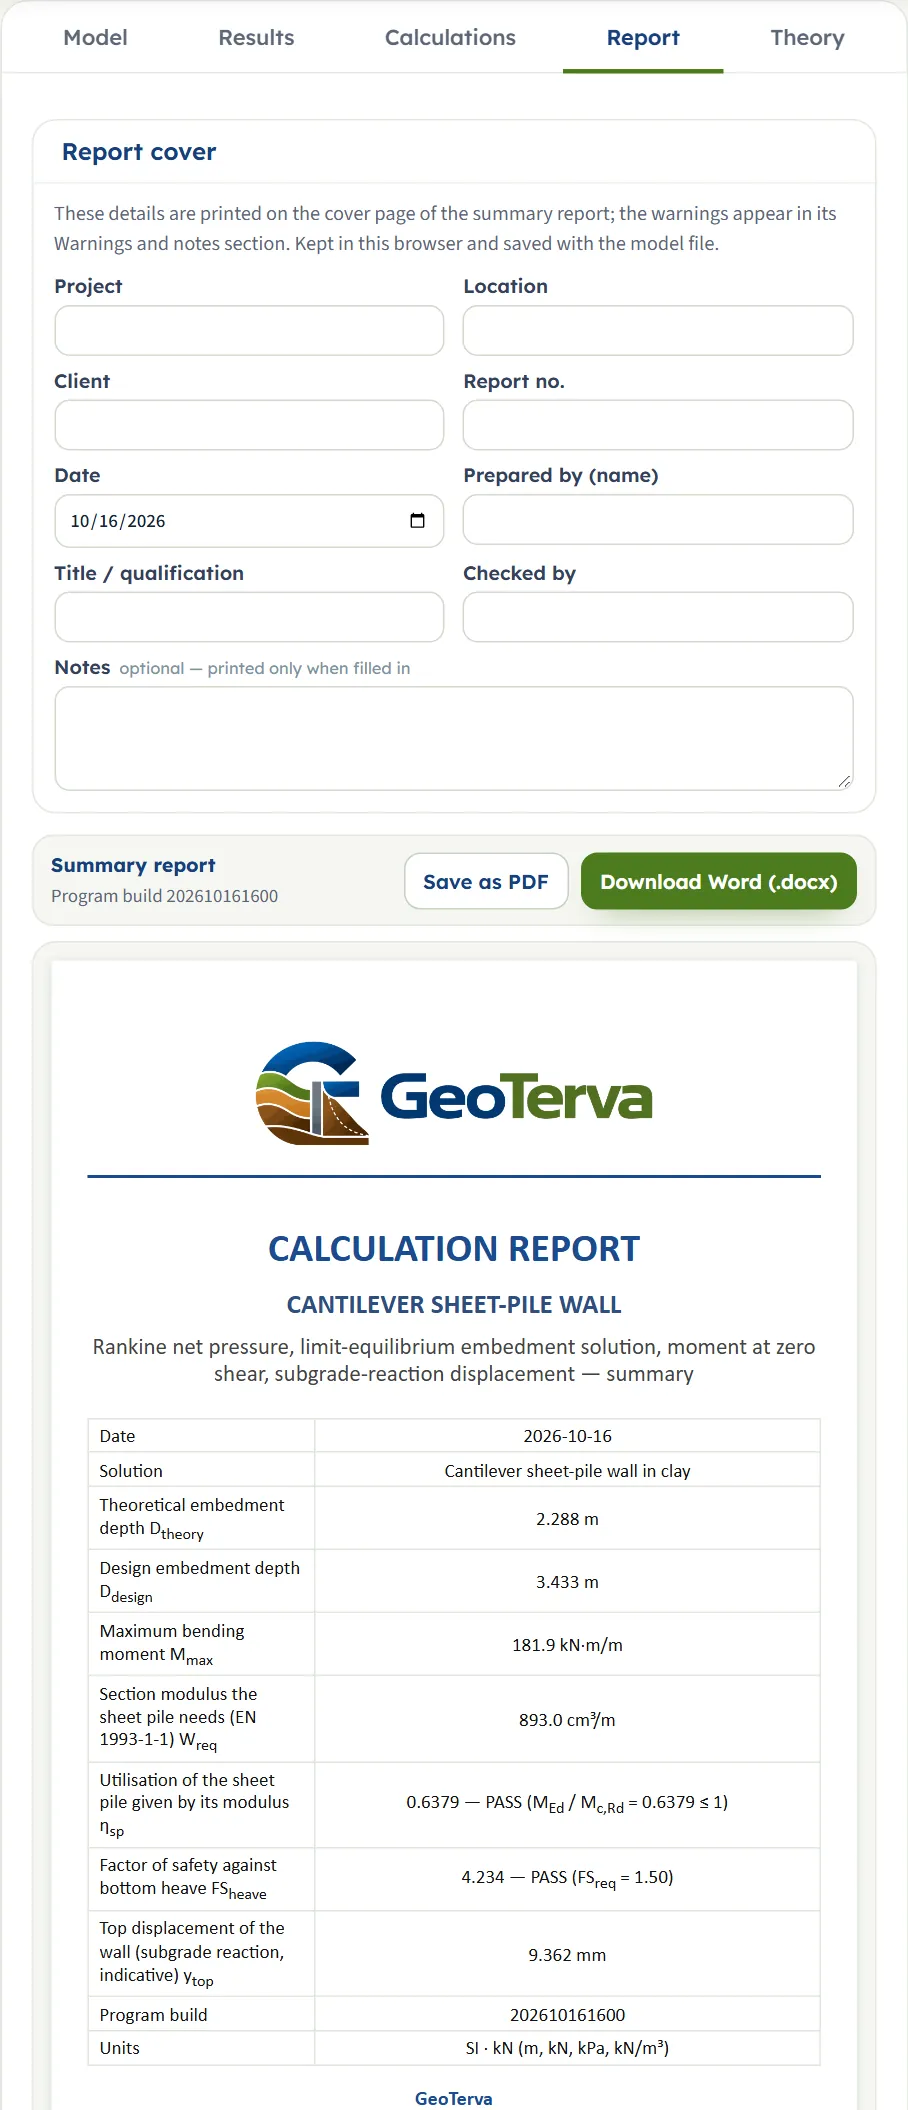
In the Report tab fill in the cover (project, location, client, report number, date, prepared by, title or qualification, checked by, and optional notes). The details are kept in this browser and saved with the model file. Save as PDF and Download Word (.docx) produce the summary report; the preview below the buttons is the report itself.
The report has seven parts: 1 Introduction and scope, 2 Input data, 3 Calculation (3.1 to 3.12, one for each step), 4 Results, 5 Assumptions and notes, 6 Summary and 7 References. The cover gives the answer and states the units.
The Theory tab
The Theory tab has seventeen sections: Sheet-pile walls and this module; How a cantilever wall moves; Active pressure of the retained clay; The net pressure in the clay; Equilibrium and the depth of embedment in clay; The depth of embedment; Water at different levels on the two faces; Verifying the sheet pile to EN 1993-1-1; Verifying the sheet pile to AISC 360-22; The anchored wall; The seismic situation; The displacement of the wall; The base of the excavation: bottom heave; A worked example, by hand and by the module; The opening wall, verified to EN 1993-1-1; What the module assumes; and References. Each opens when you click its title.
Worked example: the module’s own example
The module opens on this example, so you can follow the numbers on your own screen.
| Section | Input | Value |
|---|---|---|
| Soil layers | Clay-1 | 5 m; γ = 18 kN/m³ (saturated 19); cu = 30 kPa; kh = 15 MN/m³ |
| Soil layers | Clay-2 | below; γ = 19 kN/m³ (saturated 19.5); cu = 70 kPa; kh = 30 MN/m³ |
| Groundwater, Wall | Water, height | None; L = 5 m; embedment calculated |
| Base heave | B, FS | B = 10 m, FSreq = 1.5 |
| Design factors | Route, options | f = 1.5; classical; crack water-filled |
| Sheet pile, Design code | Steel, code | S275 (fy = 275 000 kPa), W = 1 400 cm³/m; EN 1993-1-1, γF = 1.35, γM0 = 1 |
Step 1: the pressure above the dredge line
σv = 18 × 5 = 90 kPa at the dredge line and σa = 90 − 2 × 30 = 30.00 kPa. The crack reaches zc = 60 / 18 = 3.333 m, where its water pressure is 9.81 × 3.333 = 32.70 kPa. The diagram has two pieces: the crack water, ½ × 32.70 × 3.333 = 54.50 kN/m with its centroid 5 − 2.222 = 2.778 m above the dredge line, and the clay, ½ × 30.00 × 1.667 = 25.00 kN/m at 5 − 4.444 = 0.5556 m.
The net pressure just below the dredge line is already negative, so the zero point E is at the dredge line (L3 = 0).
Step 2: the net pressure and the toe
σ3 = 140 + 140 − 90 = 190.00 kPa toward the retained soil; at the toe σ4 = 140 + 90 + 140 = 370.00 kPa. For a trial depth D horizontal equilibrium gives L5 = 2 (190 D − P) / (190 + 370), and moment equilibrium about the toe is a residual that changes sign at the right depth:
At D = 2.288 m: L5 = 2 × (190 × 2.288 − 79.50) / 560 = 1.269 m and 79.50 × 4.367 − 95 × 5.235 + 1.610 × 560 / 6 = 347.2 − 497.3 + 150.3 = 0. So Dtheory = 2.288 m, Ddesign = 1.5 × 2.288 = 3.433 m, and the pile is 5 + 3.433 = 8.433 m long. These are the first cards of the Results tab; the module’s trial table shows the residual 78.15, 41.80, 0 and −47.25 kN·m/m at 1.831, 2.060, 2.288 and 2.517 m.
Step 3: the moment and the sheet pile
The shear is zero z′ = P / σ3 = 79.50 / 190 = 0.4184 m below E, where Mmax = 79.50 × (0.4184 + 2.079) − 190 × 0.4184² / 2 = 181.91 kN·m/m. Then MEd = 1.35 × 181.91 = 245.58 kN·m/m, Wreq = 245.58 / 275 000 = 893.0 cm³/m, Mc,Rd = 1 400 × 10⁻⁶ × 275 000 = 385.00 kN·m/m and ηsp = 245.58 / 385.00 = 0.6379: PASS.
Step 4: the base
B′ = 10 / √2 = 7.07 m; FSheave = (5.14 × 70 + 30 × 5 / 7.07) / 90 = 381.0 / 90 = 4.23, above the required 1.5: PASS. The module gives 4.234.
Every figure above is one the module gives (2.288 m, 3.433 m, 181.9 kN·m/m, 893.0 cm³/m, 0.6379, 4.234).
The same wall with the other options
- Dry crack: P = 25.00 kN/m at 0.5556 m, Dtheory = 0.6780 m, Mmax = 15.53 kN·m/m (by hand: 0.678 m and 15.53 kN·m/m), a warning, and 0.05447 for the utilisation.
- One anchor row: F = 79.50 − 190 × 0.1659 = 47.97 kN/m; 0.1659 m, 28.05 kN·m/m (see Cantilever or anchored).
- Surcharge 20 kPa, uniform: σa at the dredge line becomes 50.00 kPa, zc = 2.222 m, σ3 = 170 kPa, Dtheory = 2.413 m, Mmax = 175.3 kN·m/m, and the heave factor falls to 3.464 (hand: 381.0 / 110 = 3.46).
- Clay-1 20 kPa: Dtheory = 2.315 m (hand: 2.3145 m; the module rounds to 2.315), Mmax = 172.6 kN·m/m.
Other unit systems
In SI · tf the example gives Mmax = 18.55 tf·m/m (181.91 / 9.807) and in US Dtheory = 7.508 ft (2.288 m × 3.2808), Mmax = 40.89 kip·ft/ft (181.91 × 0.2248) and Wreq = 16.61 in³/ft (893.0 cm³/m / 53.76): the same wall in other units. The utilisation 0.6379 is the same in all three. The heave factor differs in the last digit (US 4.229, SI · tf 4.233, SI · kN 4.234) because its working carries intermediate values forward at the precision printed in the chosen units.
How each input changes the answer
Each row changes one thing in the example (two clay layers, Clay-1 5 m thick, γ = 18 and 19 kN/m³, γsat = 19 and 19.5, cu = 30 and 70 kPa, L = 5 m, no water and no load, f = 1.5, water-filled crack, classical formulation, S275, W = 1 400 cm³/m, EN 1993-1-1) and runs the module again. The numbers are the ones the module gives. Mmax is in kN·m/m. In the passive-route rows there is no theoretical depth (a dash) and the design depth is the required depth Dreq .
The soil and the wall
| Change | Dtheory Ddesign m | Mmax ηsp |
|---|---|---|
| The example (reference) | 2.288 3.433 | 181.9 0.6379 |
| cu of Clay-1 = 20 kPa (a shallower crack) | 2.315 3.472 | 172.6 0.6053 |
| cu of Clay-1 = 50 kPa (the crack reaches the dredge line) | 2.811 4.216 | 243.9 0.8554 |
| cu of Clay-2 = 50 kPa | 3.083 4.624 | 194.0 0.6803 |
| cu of Clay-2 = 100 kPa | 1.787 2.680 | 175.5 0.6153 |
| cu of Clay-2 = 120 kPa | 1.597 2.395 | 173.4 0.6080 |
| L = 4 m | 2.639 3.959 | 132.5 0.4648 |
| L = 6 m | 2.790 4.185 | 267.2 0.9371 |
| γ of Clay-1 = 20 kN/m³ | 2.332 3.498 | 178.8 0.6269 |
| γ of Clay-2 = 21 kN/m³ | 2.288 3.433 | 181.9 0.6379 |
| Clay-1 3 m thick, Clay-2 retained below it | 2.822 4.232 | 244.4 0.8569 |
| cu of Clay-2 = 30 kPa | 7.303 10.95 | 270.6 0.9489 |
The weaker or the stronger Clay-2 moves Dtheory the most among the rows tabulated, because σ3 = 4cu − (the overburden) is the pressure that holds the wall: 50 kPa gives 3.083 m and 100 kPa 1.787 m, while Mmax changes little (194.0 and 175.5 kN·m/m), as the retained pressure is the same. The strength and weight of the retained clay change the load: Clay-1 at 50 kPa gives a large moment, Mmax = 243.9 kN·m/m, because its crack reaches the dredge line and the crack water (9.81 × 5 = 49.05 kPa) becomes the load. The unit weight of Clay-2 drops out of the answer when Clay-2 alone lies below the dredge line, as in the row with 21 kN/m³.
Water, the crack and the loads
| Change | Dtheory Ddesign m | Mmax ηsp |
|---|---|---|
| Uniform surcharge 20 kPa | 2.413 3.619 | 175.3 0.6148 |
| Strip load 20 kPa from 1 m to 3 m | 2.775 4.163 | 260.4 0.9131 |
| Point load 50 kN at 2 m | 2.469 3.704 | 210.2 0.7372 |
| Water table 2 m, same level on both faces (γsat 19 and 19.5) | 2.134 3.202 | 170.7 0.5984 |
| Water 2 m behind the wall, 5 m in the excavation | 2.764 4.146 | 238.8 0.8373 |
| Dry crack | 0.6780 1.017 | 15.53 0.05447 |
| No-tension cutoff | 2.691 4.036 | 187.3 0.6568 |
| No-tension cutoff, dry crack | 0.8395 1.259 | 16.10 0.05647 |
The margin, the anchor and the steel
| Change | Dtheory Ddesign m | Mmax ηsp |
|---|---|---|
| f = 1.3 | 2.288 2.975 | 181.9 0.6379 |
| f = 1.0 | 2.288 2.288 | 181.9 0.6379 |
| Passive route, FSp = 1.5 | — 2.775 | 187.5 0.6575 |
| Passive route, FSp = 2 | — 3.174 | 192.1 0.6736 |
| One anchor row at 1.5 m | 0.1659 0.2489 | 28.05 0.09837 |
| Given D = 3 m | 2.288 3.000 | 190.1 0.6666 |
| Given D = 5 m | 2.288 5.000 | 209.7 0.7353 |
| W = 800 cm³/m | 2.288 3.433 | 181.9 1.116 |
| AISC 360-22, LRFD | 2.288 3.433 | 181.9 0.8400 |
| AISC 360-22, ASD | 2.288 3.433 | 181.9 0.7891 |
S355 instead of S275 does not change the pressure or the depth: Wreq falls to 691.8 cm³/m and ηsp to 0.4941. The given-depth rows show how the verdict follows the depth: 3 m is short of the 3.433 m the design needs (FAIL and a warning), 5 m passes. The W = 800 cm³/m row fails (η above 1) with a warning, and a dry crack or an anchor reduces the demand on the pile enormously.
Messages: when the module stops, and what it says
The module checks the numbers it needs before it calculates. When one cannot be used it stops and nothing is calculated; otherwise it calculates and lists warnings and notes.
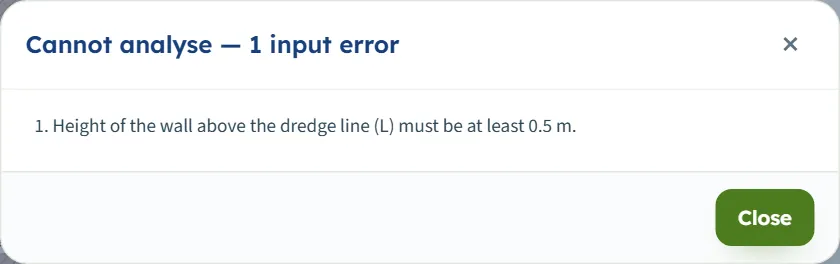
- A value outside its range stops the analysis with a window titled Cannot analyse — 1 input error (or 2 input errors …) that lists each message; the box of the value is marked in red in the Model tab. The limits are shown in the units of the unit system chosen.
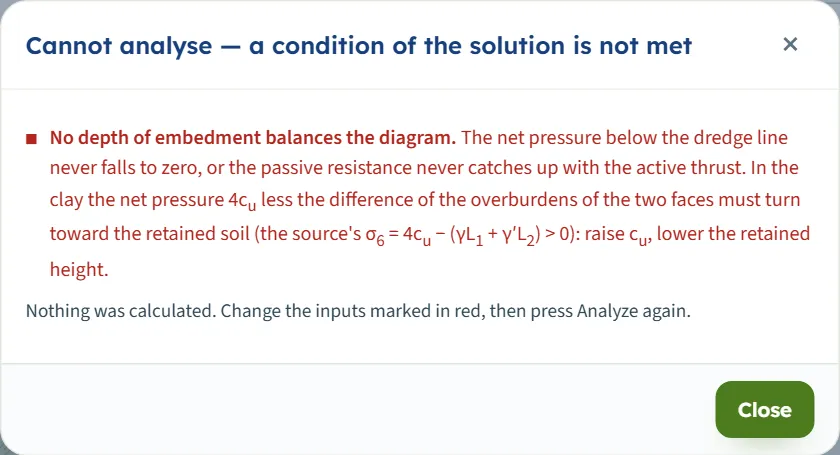
- A condition of the solution that is not met stops it in a window titled Cannot analyse — a condition of the solution is not met, which ends “Nothing was calculated. Change the inputs marked in red, then press Analyze again.”
- Warnings (△) and notes (○) are listed on the Warnings (n) or Notes (n) button of the bar; the button reads Warnings when there is at least one warning. The window is titled Warnings (1) or Notes and assumptions (7).
Stops: a value out of range
| When | The message | What to do |
|---|---|---|
| L below 0.5 m, or empty | “Height of the wall above the dredge line (L) must be at least 0.5 m.” / “… is missing.” | Enter the height. |
| A thickness below 0.1 m | “Thickness (H1) must be at least 0.1 m.” | Enter a thickness. |
| cu below 1 kPa, or empty | “Undrained shear strength (cu,1) must be at least 1 kPa.” / “… is missing.” | Enter cu of the layer. |
| A unit weight below 1 | “Moist unit weight (γ1) must be at least 1 kN/m³.” | Enter the unit weight. |
| A negative water depth | “Water table depth (retained side) (Dw) must be at least 0 m.” | Enter zero or more. |
| f outside 1 to 1.6 | “Depth increase factor (f) must be at least 1.” / “… at most 1.6.” | Enter f in range. |
| FSp below 1 | “Factor of safety on the passive pressure (FSp) must be at least 1.” | Enter 1 or more. |
| fy below 100 000 kPa | “Yield strength (fy) must be at least 100000 kPa.” | Choose a grade or type fy. |
| W below 1 cm³/m | “Section modulus of the sheet pile (W) must be at least 1 cm³/m.” | Enter W or leave it empty. |
| D given below 0.1 m | “Depth of embedment below the dredge line (D) must be at least 0.1 m.” | Enter the depth. |
| B below 0.5 m | “Width of the excavation (B) must be at least 0.5 m.” | Enter the width. |
| α above 60°, Lb below 0.5 m | “Inclination below the horizontal (α) must be at most 60°.” / “Bond (root) length (Lb) must be at least 0.5 m.” | Enter a value in range. |
| kh above 0.6 | “Horizontal seismic coefficient (kh) must be at most 0.6.” | Enter kh from your code. |
| A different level chosen, none typed | “Water level in the excavation (Dw,exc) is missing.” | Enter it or choose Same as retained side. |
When more than one value is wrong the window lists them together: L = 0.2 m and cu = 0 of Clay-1 give “2 input errors”. In the table the layer or row number is part of the symbol: H1, cu,1 and γ1 belong to layer 1.
Stops: a condition of the solution
| When | The message | What to do |
|---|---|---|
| γsat at or below 9.81 with a water table | “Clay-1: saturated unit weight must exceed γw. Below the water table the overburden uses γ′ = γsat − γw. Enter the saturated unit weight.” | Enter γsat above 9.81 kN/m³. |
| An anchor at or below the dredge line | “The anchor must stand above the dredge line. za is its depth below the top of the wall: 0 ≤ za < L. …” | Enter za < L. |
| Two rows less than 0.25 m apart | “Anchor row 2: two rows of anchors stand at nearly the same depth. The rows need at least 0.25 m between them to be separate supports. …” | Separate the rows. |
| A strip with the far edge not beyond the near edge | “Load 1 (strip load): the strip must have its far edge beyond its near edge. x1 is the distance of the near edge from the wall and x2 that of the far edge: 0 ≤ x1 < x2. …” | Enter x1 < x2. |
| No depth balances the wall | “No depth of embedment balances the diagram. The net pressure below the dredge line never falls to zero, or the passive resistance never catches up with the active thrust. In the clay the net pressure 4cu less the difference of the overburdens of the two faces must turn toward the retained soil (the source’s σ6 = 4cu − (γL1 + γ′L2) > 0): raise cu, lower the retained height.” With a different water level “or the unbalanced head”, and with the passive route “reduce FSp”. | Raise cu below the dredge line or lower L. Clay-2 at 10 kPa, or an anchor at 3 m in the example, gives it. |
| A given depth too short | “NO EQUILIBRIUM AT THE GIVEN EMBEDMENT — even full passive resistance is insufficient. At the given depth D = 2.00 m the wall is not in equilibrium even with the full passive coefficient: the diagram with Kp needs Dtheory = 2.29 m. No factor of safety can be given for it. Drive the sheet pile deeper than 2.29 m — the design route asks 3.43 m — or choose “Calculated by the program” …” | Give a depth above Dtheory , or let the module calculate it. |
Warnings
A warning does not stop the analysis; the results are calculated and the bar reads Warnings (n).
| When | The warning | What to do |
|---|---|---|
| The pile given does not carry the moment | “The sheet pile given does not carry the design moment: MEd / Mc,Rd = 1.12. Mc,Rd = 220.00 kN·m/m per metre of wall, against 245.58 kN·m/m. The wall asks for 893.01 cm³/m. Take a heavier sheet pile or a higher grade.” (with W = 800 cm³/m; the card reads FAIL) | A heavier pile or a higher grade. |
| The given depth is short of the design depth | “The given depth of embedment D = 3.00 m is shorter than the depth the design requires, 3.43 m. At the given depth the passive resistance mobilises a factor of safety of only 1.77 on the passive pressure. Drive the sheet pile deeper, or choose “Calculated by the program” …” The displacement is then marked indicative only. | Deepen the wall. |
| A dry crack | “The tension crack is taken dry: the drainage of the site must keep it dry. No water acts in the crack. Keep the dry crack only where the drainage of the site keeps it dry; otherwise take it water-filled, the default.” | Water-filled unless the site is drained. |
| The seismic depth is longer | “The design embedment is too short for the seismic situation: DE = 3.58 m > Ddesign = 3.43 m. … Drive the sheet pile to at least DE below the dredge line, or review kh and kv.” (with kh = 0.45, kv = 0.2) | Deepen the wall or review kh and kv. |
| The water table is below the dredge line | “The water table (Dw = 6.00 m) lies below the dredge line (L = 5.00 m), inside or below the embedment. … The embedment is taken as submerged on both faces over its whole depth … as if the table stood at the dredge line: conservative … If the table is certainly below the toe, set the water table to None.” | None, if the table is below the toe. |
| The bond zone is too close to the wall | “The bond zone of anchor row 1 is too close to the wall (free length under 4.5 m). … Lengthen the free length or steepen the anchor so that its bond zone starts at least 4.22 m behind the wall, with a free length of at least 4.5 m.” (with Lf = 3 m, Lb = 2 m; the check reads FAIL) | A longer free length. |
| The toe block does not fit | “The toe block L5 = 0.000 m does not lie between 0 and L4 … The net-pressure diagram cannot be closed. … the depth printed here is not a valid design.” With a second warning that the subgrade reaction model finds no equilibrium. It appears for a water table at the top of the wall, Dw = 0. | Check the water level and the soil. |
Notes
The Notes (7) of the example, and their conditions:
- The tension crack is taken filled with water to its top; choose the dry crack only where the drainage of the site keeps it dry.
- When the equilibrium depth is very short: “Dtheory is the equilibrium depth of the adopted limit-equilibrium model, not a minimum constructible penetration …” (a strong clay, an anchored wall, a dry crack).
- The sheet pile is checked on the modulus given, as the modulus of the whole wall; a wall of U-piles may have its modulus reduced where the interlocks can slip, a wall of Z-piles carries the full value.
- The overall stability of the wall and the ground, a deep slip surface below the toe, is verified separately with a slope-stability analysis of the excavation.
- The classical formulation, the factored moment, the extension of the heave formula to layers and the subgrade reaction displacement (a model parameter kh; indicative, no displacement limit is checked) are stated as assumptions; with an anchor the note on the vertical component of the anchor forces; with the earthquake the pseudo-static assumptions; with different water levels the independent hydrostatic pore pressures.
- Without W: “No section modulus was given for the sheet pile: the modulus it needs is found, and no section is verified.” Without I: “No second moment of area was given for the sheet pile: the displacement of the wall is not computed.”
Good practice and common mistakes
- Enter every layer as the clay it is, with cu. The module takes the profile as undrained from top to bottom; for a sand backfill use Sheet pile in sand, and for sand and clay together Anchored sheet pile on layered soil.
- Decide the crack before the number. A water-filled crack is the larger load on the wall in the example (54.50 of 79.50 kN/m); run the dry crack only if the site is drained, and compare.
- Compare the classical and cutoff options for a strong clay below the dredge line; the result depends on the choice.
- The theoretical depth is not a length to build. Choose the penetration from driveability, heave, overall stability, the long term and practice; the module says so itself for very short depths.
- Check the base. Keep the heave check on for a cut in clay and give the excavation width; a hard stratum below the cut raises the factor.
- Check the long term separately. The module works in total stress; the drained condition of the same clay is a separate design case.
- Give the section modulus to have the pile verified, and the second moment of area to have the displacement; type fy for a steel that is not one of the three grades.
- Read the displacement as indicative. It rests on kh, a model parameter, and on characteristic pressures.
- Do not forget the overall stability. A slip surface below the toe is not part of the design of the wall.
- Save before you leave. The page opens on the default model; use Save to file… or Quick Save….
Frequently asked questions
How does the module find the depth of embedment in clay?
It builds the net pressure diagram — the active pressure of the retained clay above the dredge line, and below it the difference of the two faces, the overburden difference less 4cu — closes it with the toe reversal, and solves horizontal and moment equilibrium for the depth at which the wall balances. The design depth is the theoretical depth times f, or the depth found with the passive pressure divided by FSp. For the example: 2.288 m theoretical and 3.433 m design.
What is the tension crack and why does it carry water?
Where σv − 2cu is negative the retained clay cannot pull on the wall, so no soil pressure is taken there and a crack opens. By default the crack is water-filled to its top and its water pressure loads the wall; choose the dry crack only where the site is drained. In the example the crack is 3.33 m deep and its water is 54.50 of the 79.50 kN/m.
Why does the module say that no depth of embedment balances the diagram?
The net pressure just below the dredge line, 4cu less the difference of the overburdens of the two faces, must turn toward the retained soil. If the clay below the dredge line is too weak for the retained height it does not, and no embedment can balance the wall: raise cu or lower L. Clay-2 at 10 kPa under the example’s 5 m of retained clay stops the analysis.
What do the classical and the no-tension cutoff options change?
Below the dredge line the classical formulation keeps the active pressure σv − 2cu of the retained clay even where it is negative; the cutoff does not take the active pressure of the clay below zero on either face below the dredge line. In the example the cutoff gives 2.691 m of Dtheory against 2.288 m. The Calculations tab gives the figures of the other option for comparison.
How do I make it an anchored wall?
In Ground anchor fill the New anchor form and press Add anchor; with one row the wall is solved by the free earth support method, with two to four rows by the hinge idealisation. The module gives F per metre of wall, TLEM per anchor and the position of the bond zone. One row at 1.5 m on the example gives Dtheory = 0.1659 m and TLEM = 124.2 kN.
Can I give the depth of embedment and have it checked?
Yes: in Wall and embedment choose Given — verify it and type D. The card then reads PASS or FAIL with the required depth and the factor of safety the given depth mobilises. A depth shorter than the theoretical one stops the analysis; with the example, 3 m is a FAIL with a warning and 3.5 m a PASS.
Which codes does it check the steel to?
EN 1993-1-1 with the factors γF and γM0 , or AISC 360-22 by LRFD (load factor γH, φb = 0.90) or ASD (Ωb = 1.67). The card gives the modulus the wall needs and, if you give W, the utilisation with PASS or FAIL.
What does the bottom heave check use?
The bearing resistance of the clay under the base, 5.14cu(1 + 0.2B″/Lexc ), plus the side shear of the retained height, against the weight of the retained soil and the surcharge (uniform loads in full, a strip load by its part within B′ spread over B′, a point load within B′ spread over a square B′ × B′); B′ is B/√2 or the depth of a hard stratum if smaller. The example gives 4.23, above the required 1.5.
Does the module remember my inputs?
No. The page opens every time on the default model, not analysed; only the unit system is kept. Use Save to file or Quick Save to keep a model, and Open file or Load to bring it back.
Can I drag things on the drawing?
Before Analyze: the boundary between layers, the toe line (with the embedment given), the water levels, and a strip load (by its body or either edge) or a point load along the ground; anchors are not dragged. After Analyze the model is locked until you press Edit inputs.
Which units does it use, and what are the units of the answer?
SI · kN, SI · tf or US, switchable in the header at any time, even after Analyze. The depths are in m or ft, the moment in kN·m/m, tf·m/m or kip·ft/ft and the section modulus in cm³/m or in³/ft. The default example gives Mmax = 181.9 kN·m/m, 18.55 tf·m/m or 40.89 kip·ft/ft.
What does the report contain?
A cover with your project details and the answer, then seven parts: introduction and scope, input data, the calculation step by step, results, assumptions and notes, summary and references, with the drawings. It is saved as a PDF or a Word file once the model is analysed.